Category: Painting and Weathering

N Scale Diorama: Grass

Part II: Building an N scale diorama with static grass to test my modeling skills.

Before committing to adding scenery to my N scale layout, I want to build an N scale diorama featuring a section of static grass.

Click to read part I about ballast.

Static Grass Applicator

On this second part we’ll focus on applying static grass with a Noch Gras-Master 3.0 applicator.

Noch Gras-Master 3.0 static grass applicator setup

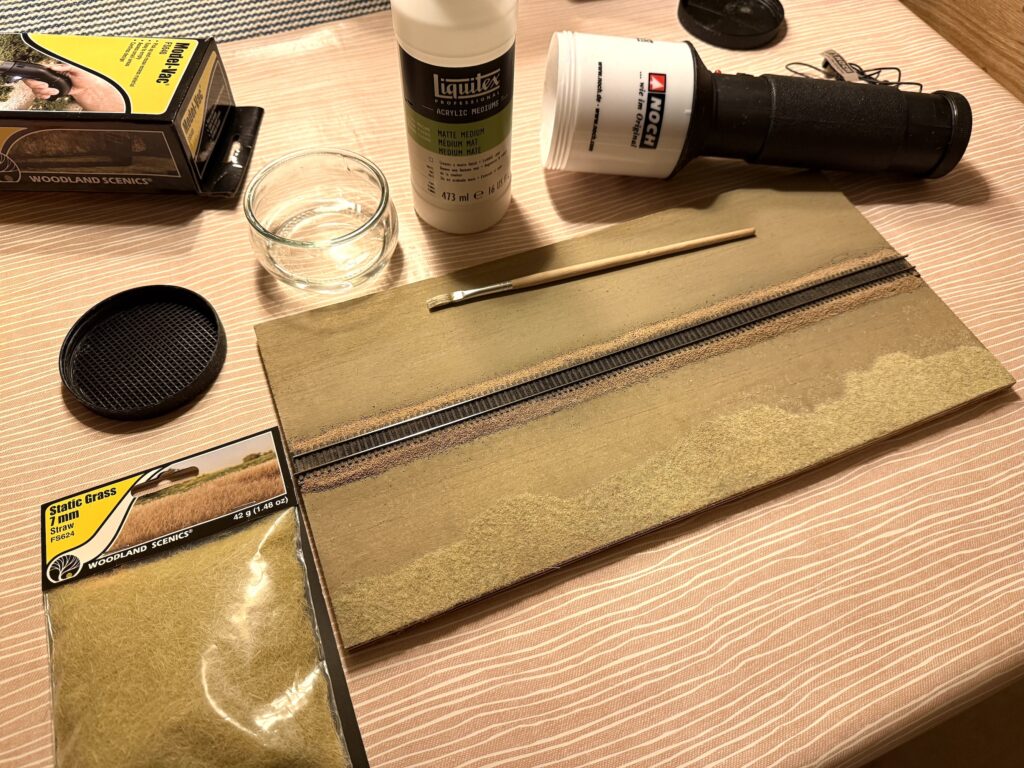
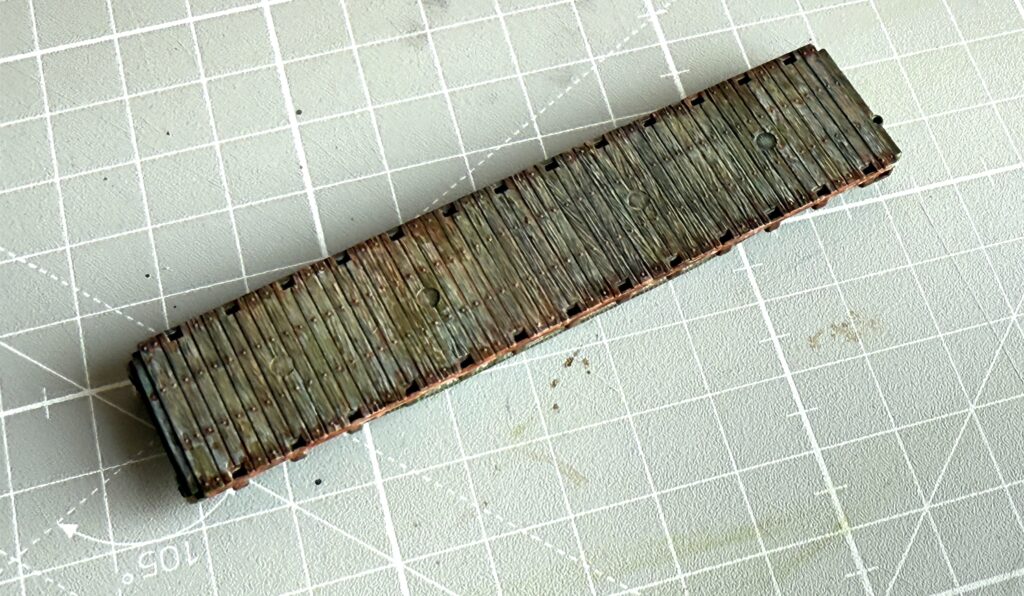
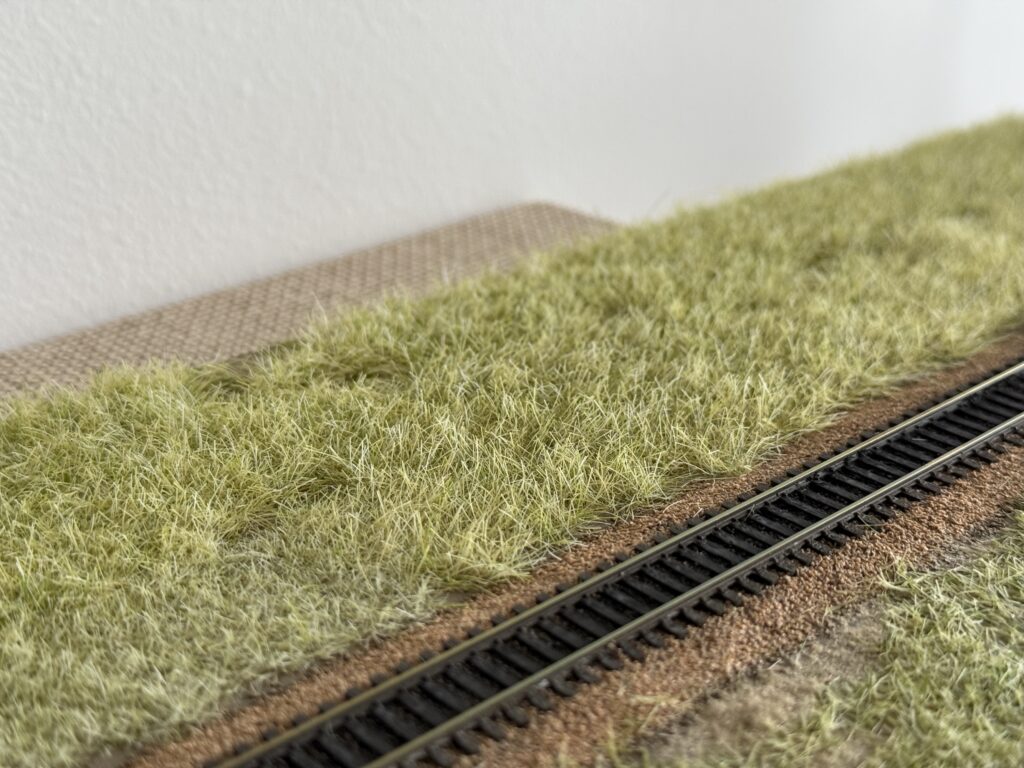
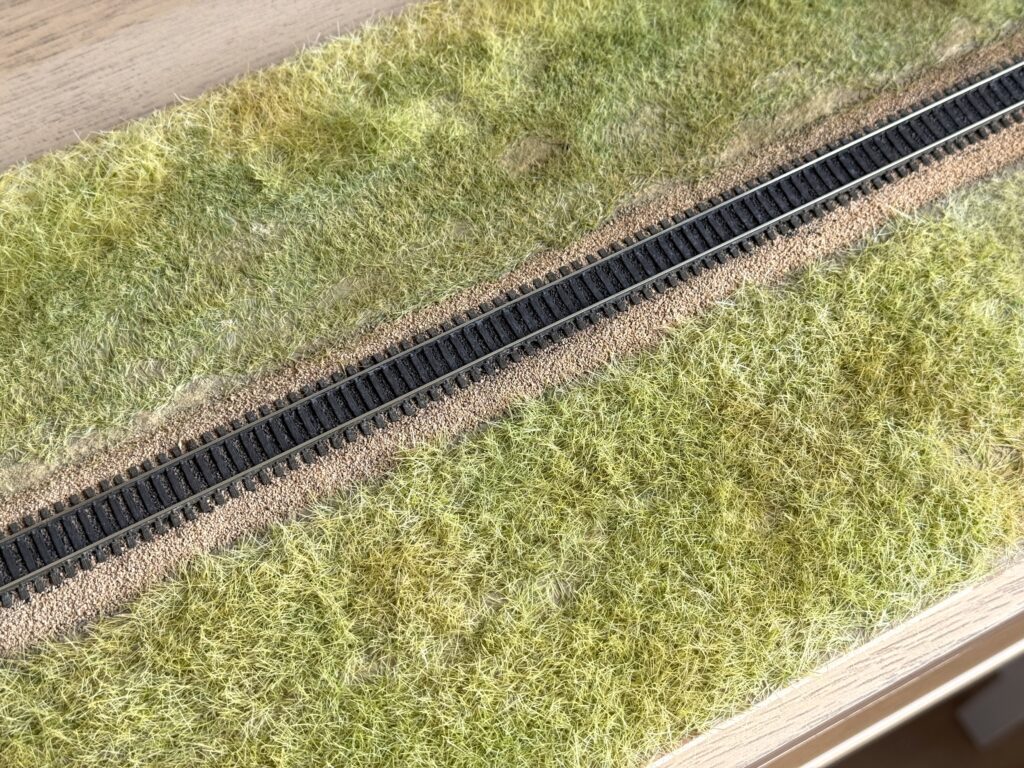
I applied a first layer of 2 mm Woodland Scenics Straw static grass mixed with some Noch 2 mm green static grass, using Liquitex Matte Medium to glue it in place. I brushed on a random patch of glue, then loaded the Gras-Master with static grass and applied it over the glued area.

After the glue had dried, I applied a second layer of matte medium in a random patchwork and added 7 mm Woodland Scenics Straw static grass.

N Scale Diorama: Static Grass applied
2mm + 7mm static grass
N Scale Diorama: Static Grass applied in two layers: 2mm and 7mm.

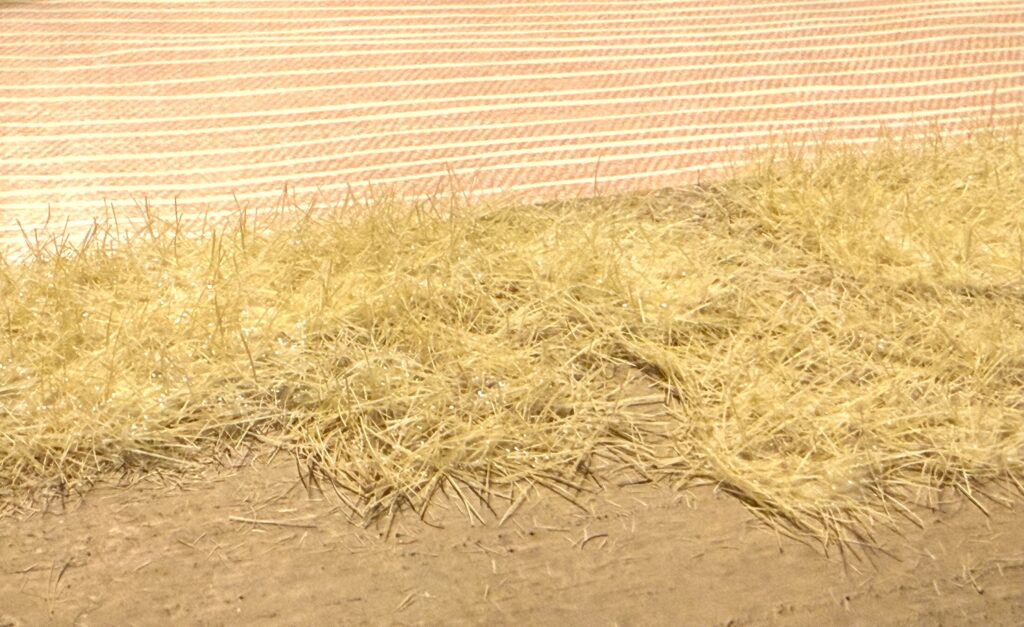
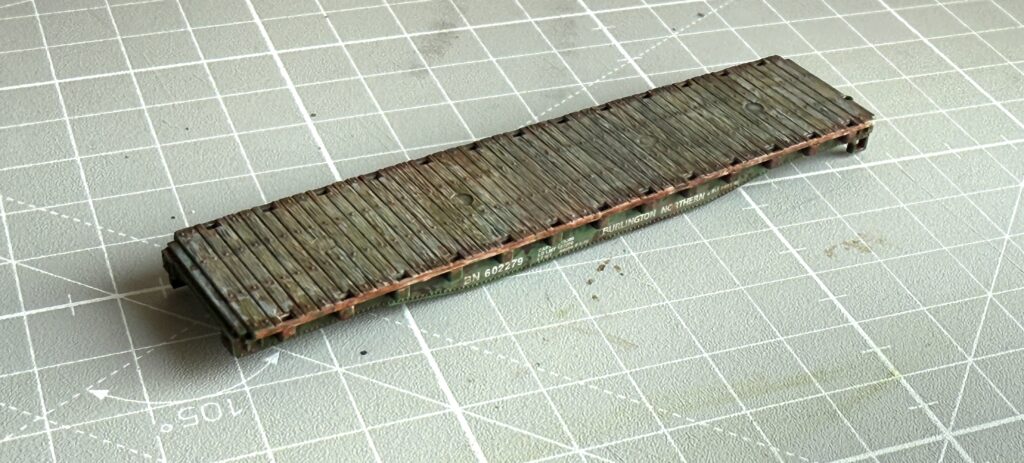
To create some variety, I mixed Light Green and Straw Woodland Scenics static grass. I applied both 7mm and 4mm layers.

Honestly, the result wasn’t as good as I’d hoped. I had better outcomes on previous layouts. The problem seems to be the sieve filters I used for the 7mm grass – the finest one isn’t ideal. I also switched to a 9V DC external power supply instead of using a battery.

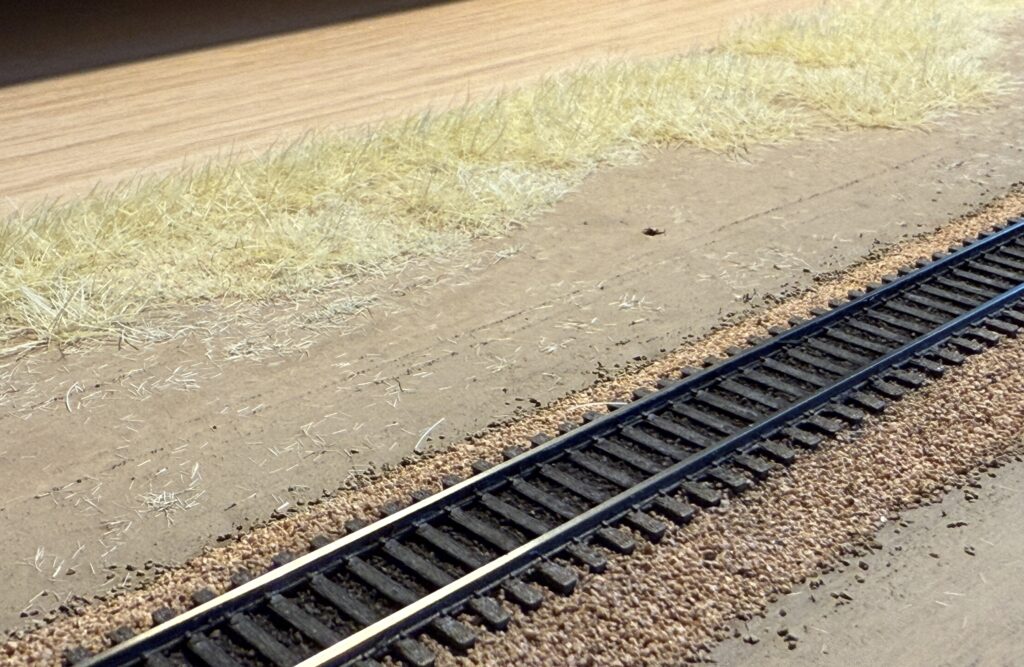
Alternative Sieves and External Power Supply

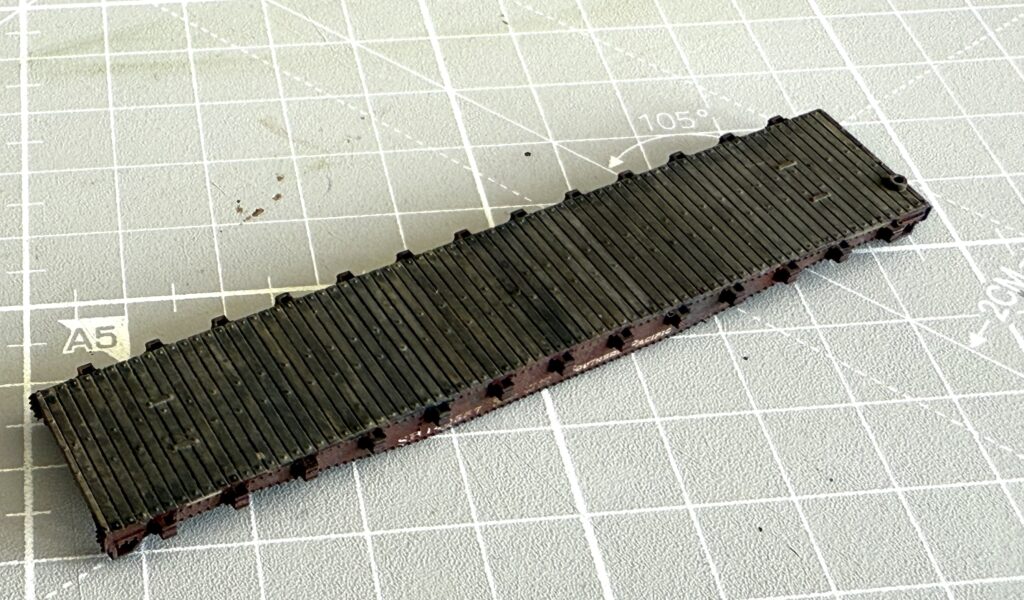
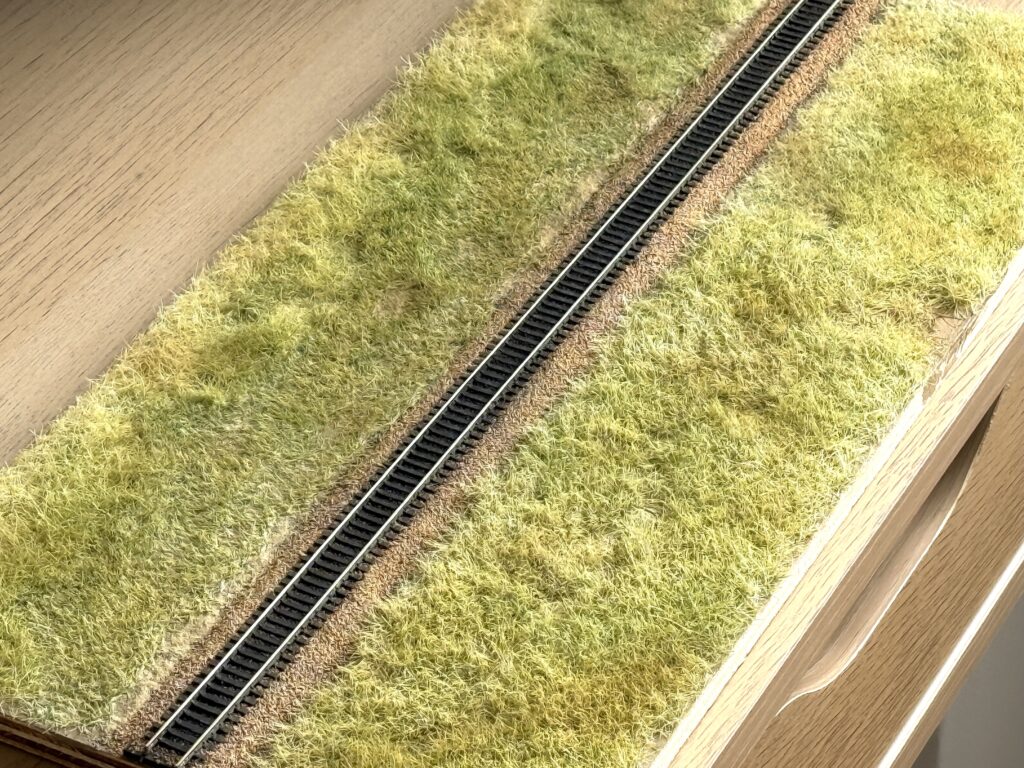
Here’s the result of applying a mix of Light Green, Medium Green, and Straw static grass in roughly random proportions. I applied separate layers of 7mm and 4mm grass in different spots. I also kept the ground clip close to the applicator and moved it along during application.

N Scale Diorama: Static Grass

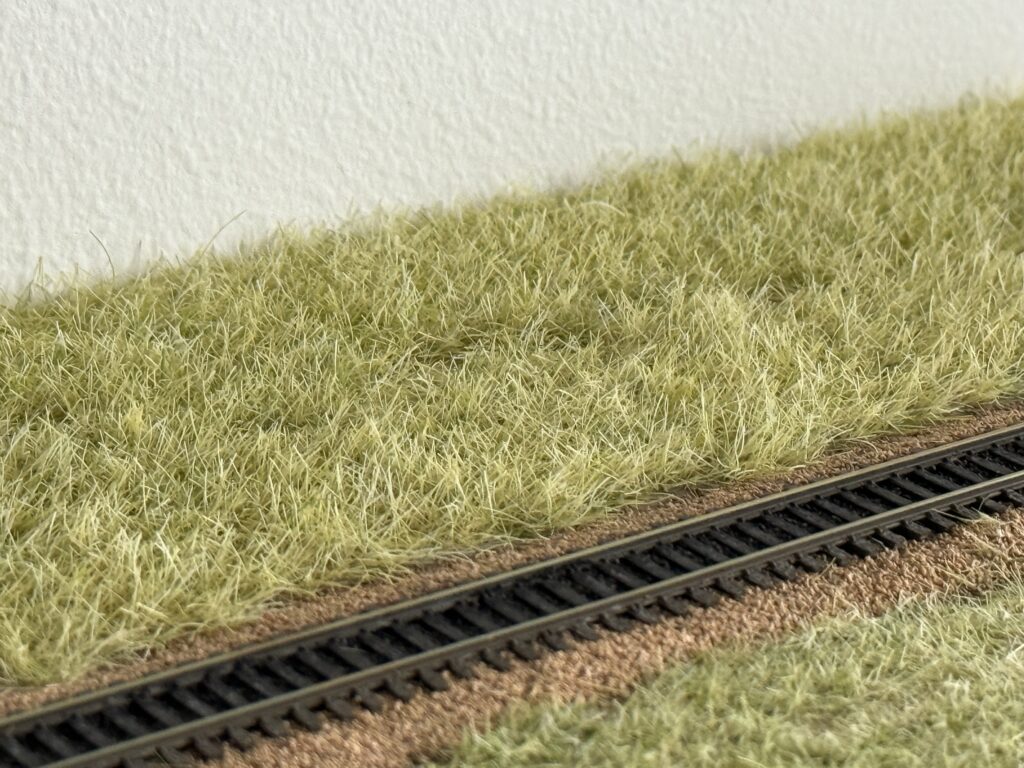
Overall I am quite satisfied, but I wanted to add more variety to the grass. A few touch ups were necessary.

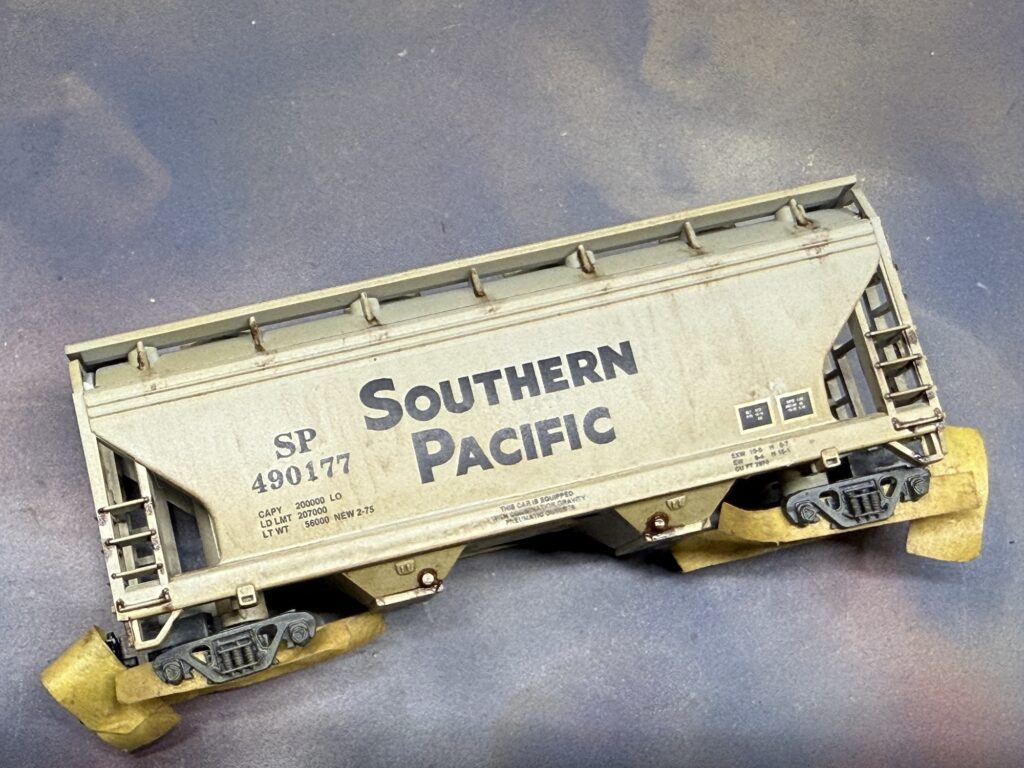
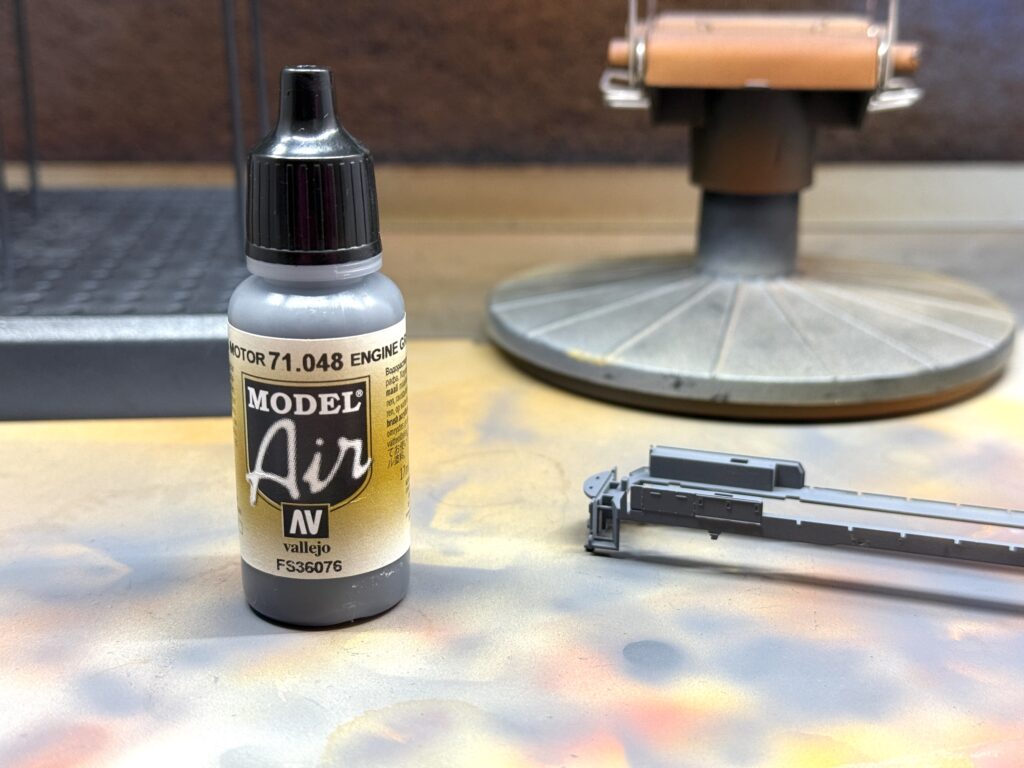
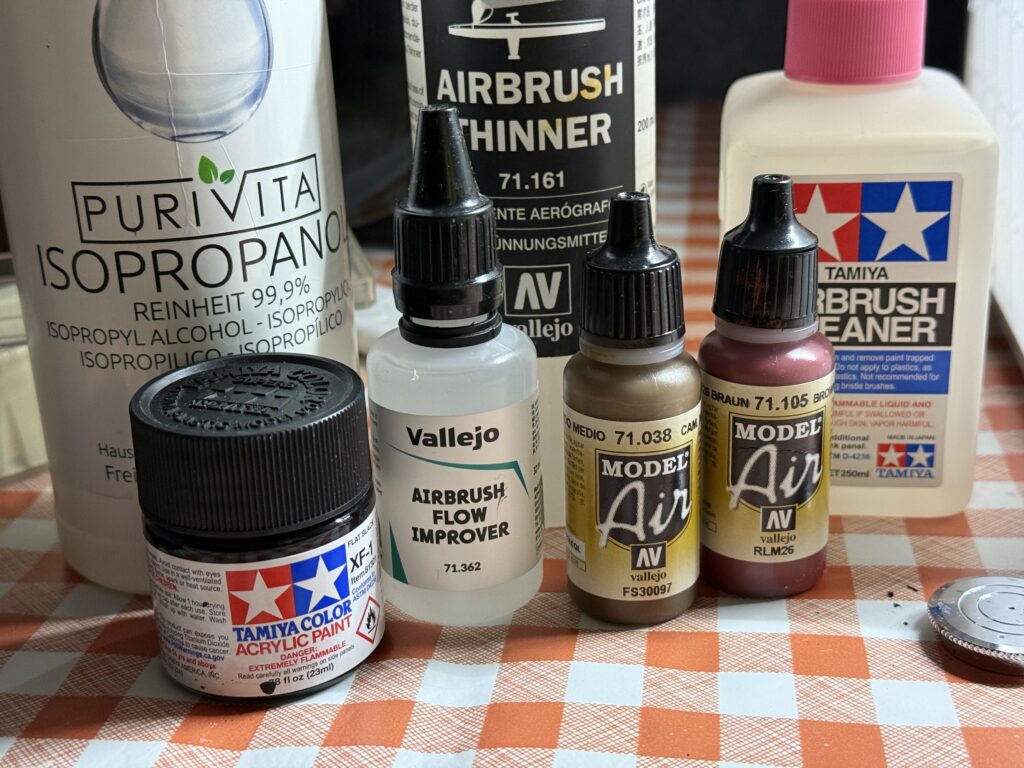
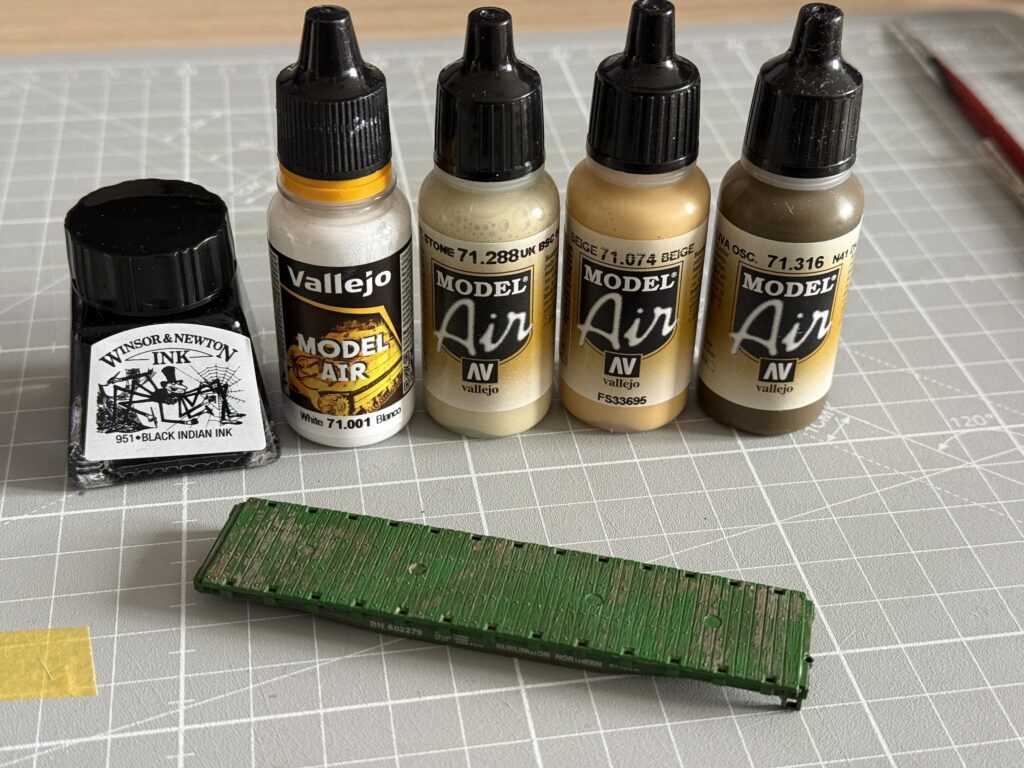
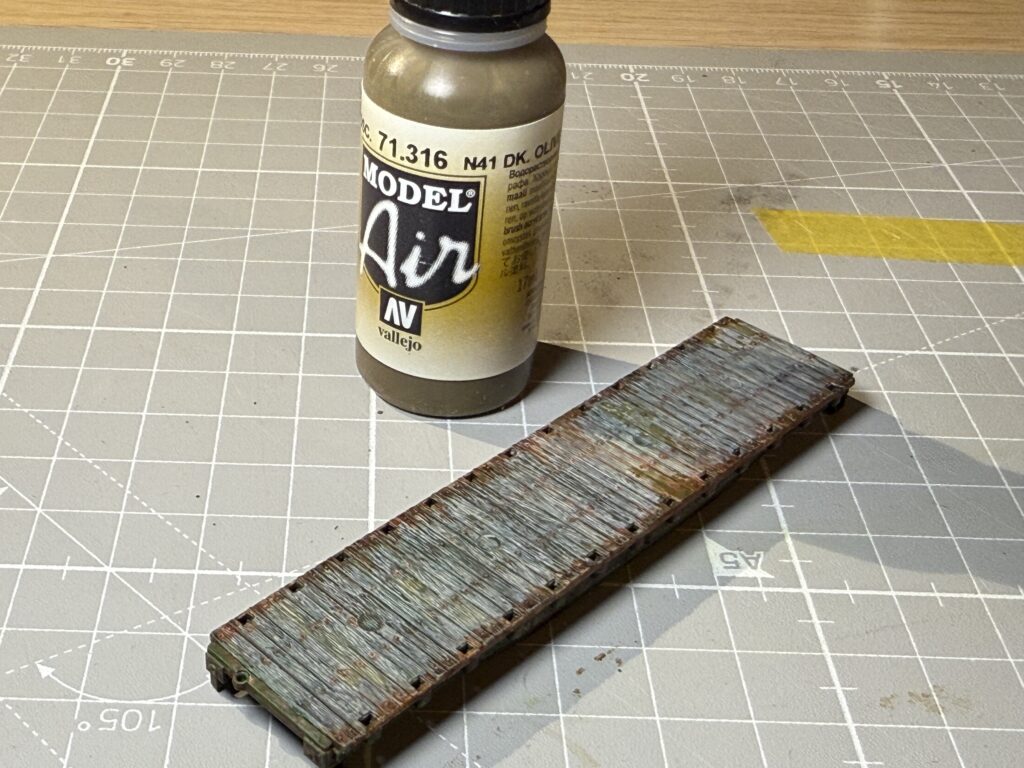
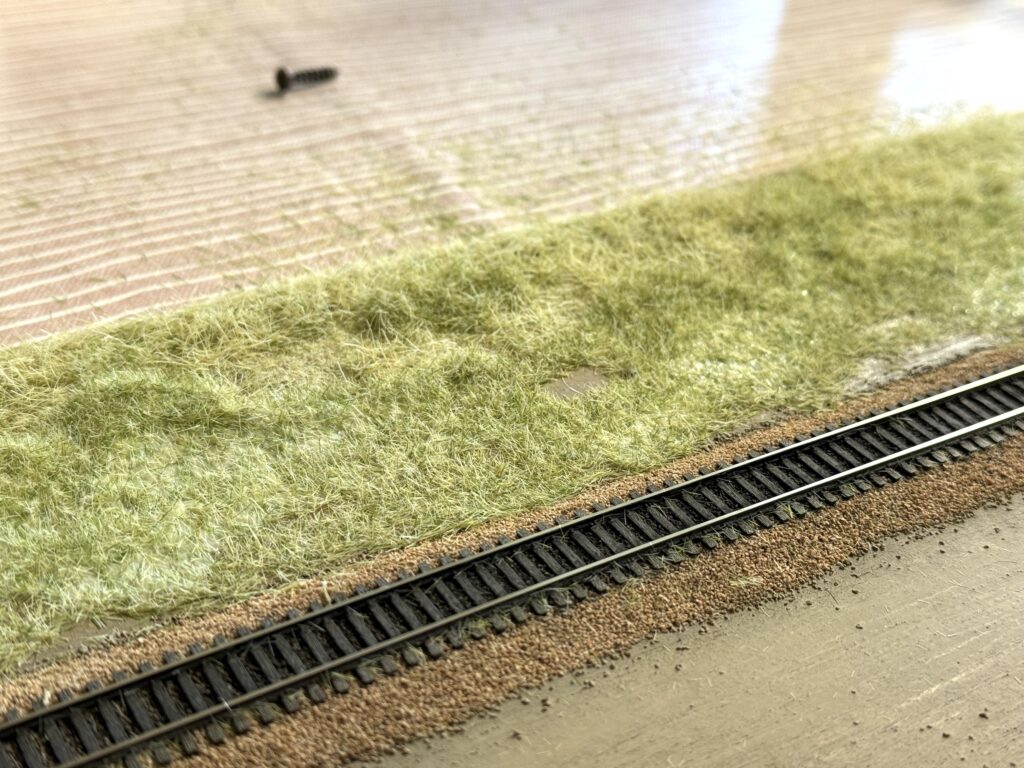
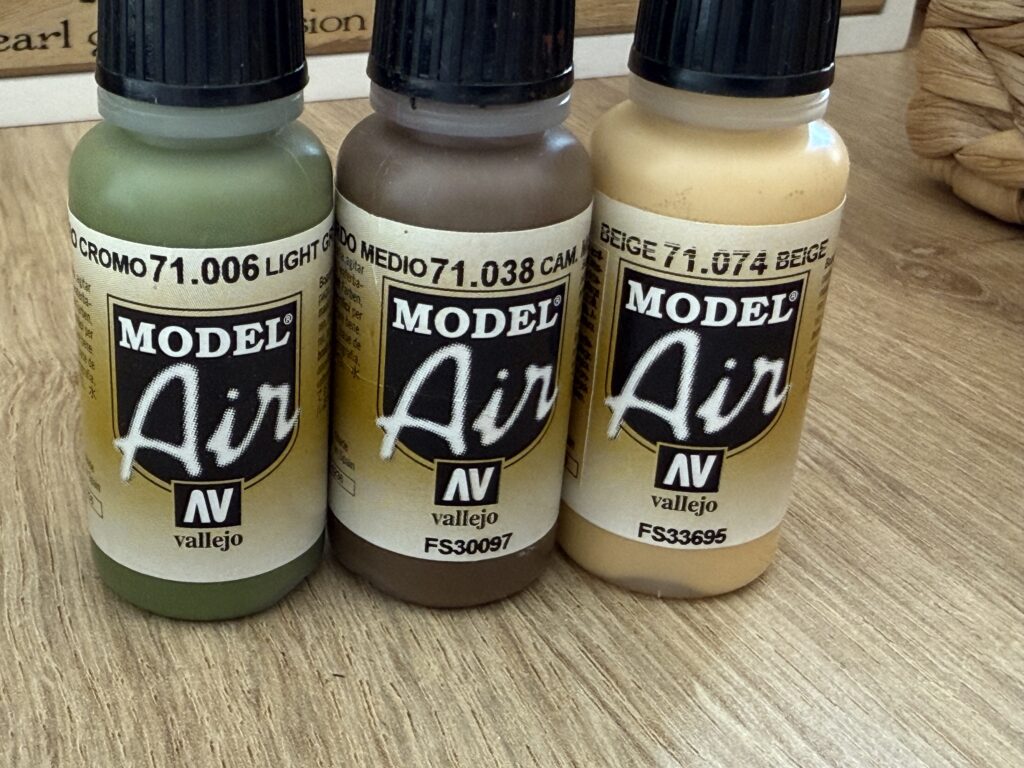
I used an airbrush to paint the grass with three different colors. Vallejo Light Green Chromate (71.006), Camouflage Medium Brown (71.038) and Beige (71.074).

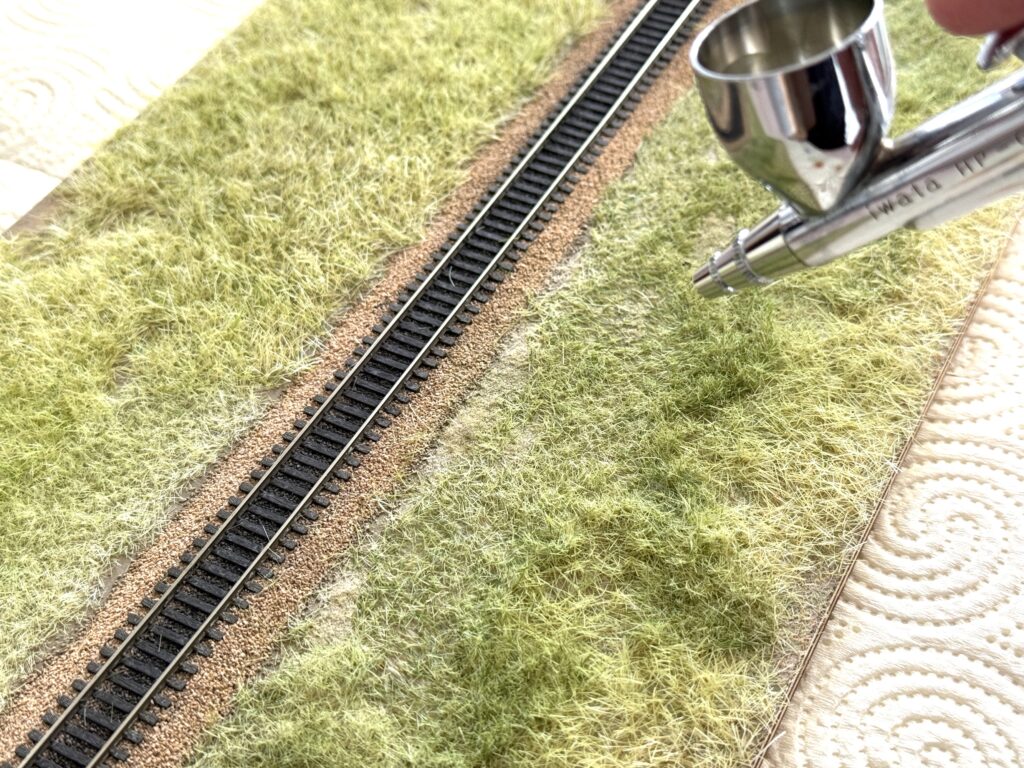
I started with the green, then added beige, followed by brown. I sprayed a light, diluted coat in a random pattern to highlight a few spots here and there.

N Scale Diorama: Grass / Conclusions

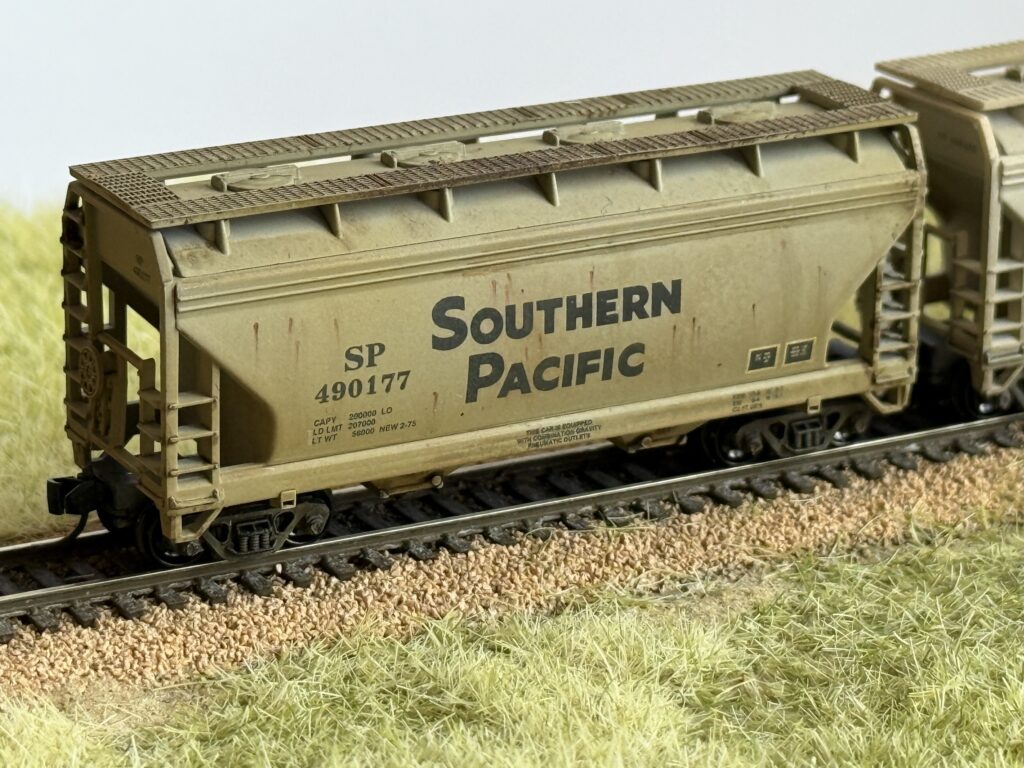
I like the result. The final airbrush touch-ups helped break up the uniform color and add more variation and more realism.

Once again, working on an N Scale diorama proved to be a smart choice for experimenting with static grass. Before committing to applying grass on the full SP Burbank Branch in N scale layout, I fine-tuned the technique on a disposable base.

Repainting and Weathering a Covered Hopper

Follow along the process of repainting and weathering a covered hopper in N scale.

I purchased an Atlas CSX ACF 2-bay covered hopper car on eBay at a good price. The car type suits my era and prototype, but the road name (CSX) is too modern for the 1970s. A covered hopper painted and lettered for the Southern Pacific will be a much better match, to use on my N scale layout.

Repainting a covered hopper: Atlas CSX ACF 2-bay covered hopper

I also replaced the trucks with Micro-Trains trucks with couplers.

Paint stripping

The first step is to strip the paint from the car. Before soaking it in 99% isopropyl alcohol for about 24 hours, I disassembled the trucks and removed the roof walkways for better results. I used a glass jar with a rubber-sealed lid.

Repainting a covered hopper: paint stripping

To streamline the repainting process, I soaked multiple car shells in alcohol to work on them simultaneously. As shown below, there are three ACF 2-bay covered hoppers to be repainted and lettered for SP, along with three 57′ mechanical reefers destined for Southern Pacific Fruit Express.

More cars soaked in alcohol for paint stripping.

Removing the paint

After soaking the car, I carefully removed all the paint using a cotton swab and more isopropyl alcohol.

Manual paint stripping
Manual paint stripping with cotton swab

Repainting and weathering a covered hopper: preparation

Paint stripping doesn’t need to be flawless, but it’s important to remove as much paint as possible, especially from the recessed areas of the shell. The ladders on the covered hoppers proved challenging, but with patience, I managed to get the job done.

Car shells ready to be primed with Vallejo White Primer

Once completely dry, I sprayed a coat of Vallejo acrylic White Primer using an airbrush. From my experience, Vallejo primers clog the airbrush, even with added thinner. However, adding too much thinner compromises the primer’s coverage on the plastic.

I had to clean the airbrush a couple of times while painting the six cars’ shells to get a smooth result. Next time I’ll try with a few drops of the Vallejo Flow Improver.

Shells primed and ready to be painted

Repainting and weathering a covered hopper with the proper color

After the primer has dried, I mixed 2 parts Vallejo Dark Grey Blue (71.054) and 8 part Vallejo White (71.001) acrylic paints and painted the car using an airbrush.

ACF 2-bay covered hopper painted a basic gray.

Gloss clear paint coat and waterslide decals

Applying waterslide decals starts with a coat of gloss clear paint.

ACF 2-bay covered hopper painted gloss clear.

This ensures the decals adhere smoothly to the surface, reducing the risk of air bubbles or silvering. To apply the decals, first cut them out carefully, staying close to the printed edges for a clean finish.

Soak the decals in warm water for 10–15 seconds, just enough to loosen them from the backing paper without over-soaking. Gently slide the decal onto the car, positioning it with a soft brush or tweezers. For tricky areas, use a decal-setting solution to help the decal conform to surface details like rivets or panel lines. I typically use Microscale Micro Set, while Microscale Micro Sol is invaluable for applying decals to irregular surfaces, creating a seamless painted-on appearance.

Applying Southern Pacific Microscale waterslide decals

Once positioned, lightly dab with a cotton swab to remove excess water and make sure the decal sits flush. Allow the decals to dry completely before applying a final coat of clear matte to seal and protect them.

Repainting a covered hopper: decals applied.

Once the decals dried, I sealed them with Tamiya XF-86 Flat Clear.

Flat cleat coat to seal the decals

Weathering

I used a combination of techniques to weather the covered hoppers. The first light layer of grey / tan has been applied with an airbrush.

I removed the wheels and masked the Micro-Trains couplers and the inner panels of the trucks to protect the wheel pin areas.

I used a fine brush and oil paints to add rust dots and streaks. Then I sealed the weathering with Tamiya XF-86 Flat Clear paint.

Weathered N Scale 2-Bay Covered Hopper

Repainting a locomotive

Step-by-step guide on repainting a locomotive. GP40-2 from CSX to Southern Pacific.

Repainting a locomotive can be a fun and rewarding project. I got a couple of N scale Atlas GP40-2 locomotives painted and lettered for CSX off eBay. They were reasonably priced, and I wanted to repaint and letter them in Southern Pacific Railroad’s “Bloody Nose” paint scheme, so I bought both to use them on my N scale layout.

Before proceeding with the repaint, I wanted to make sure I could replace the factory-installed Rapido couplers with Micro-Trains. It turned out to be an easy upgrade.

Disassembling

Before repainting a locomotive, it’s best to remove the old paint completely. I began by detaching the shell from the chassis and disassembling all its parts before soaking them in 99% isopropyl alcohol.

Disassembling the GP40-2 shell

I carefully removed all clear plastic components, such as the headlights and windows. Additionally, I disassembled the trucks, as I plan to repaint them SP Gray.

Removing all the clear plastic parts

Now, all the parts are fully disassembled and ready for paint stripping.

Painting a locomotive - All the disassembled shell parts are now ready for paint stripping before the repainting process begins.

Paint stripping

I submerged all the disassembled parts in 99% isopropyl alcohol, using a glass jar with a sealing lid to prevent evaporation

Submerging the shell parts in 99% isopropyl alcohol

After 24 hours, I used a soft toothbrush to carefully remove all the softened paint. I paid particular attention to the delicate handrails to avoid damaging them while ensuring the paint was completely removed.

GP40-2 shells completely stripped of paint and ready for the next steps in the repainting process

Repainting the locomotive parts

I then painted the nose and tail with SP Scarlet with an unopened bottle of Polly Scale paint that has lasted through the years – I purchased it in 2006! A a backup bottle of Vallejo Red RLM23 (71.003) was available, which can be used as a substitute for the discontinued Polly Scale color.

An old Polly Scale SP Scarlet bottle of paint.

I prefer SP Scarlet from Polly Scale over Vallejo Red, as it should match the red “wings” on the Microscale decals.

Painting nose and tail with SP Scarlet

After masking the nose and tail, I painted the rest of the locomotive in SP Lark Dark Gray. I had a couple of Polly Scale SP Lark Dark Gray bottles from mid 2000s, but neither aged well. So I opted for Vallejo Engine Gray (71.048), which is a very close match.

Repainting a locomotive: main color is SP Lark Dark Gray (with Vallejo Engine Gray)
Vallejo Engine Gray (71.048)

I also painted the disassembled trucks and fuel tanks. After letting everything dry, I removed the Tamiya 6mm masking tape.

Removing the masking tape

And here are the two GP40-2 locomotives, ready for a coat of clear gloss varnish before applying the lettering.

Repainting a locomotive: ready for a coat of clear gloss varnish

Detailing

Before finalizing the painting, I added a few details to the locomotives: cab sunshades and snow plows. I purchased them from Trainworx.

Locomotive details: cab sunshades and snow plows.

I used a hand drill with micro drill bits to carefully make holes in the cab for the sunshades.

Drilling tiny holes for the sunshades.

Then I installed the sunshades, securing them with a tiny drop of Tamiya Multipurpose Cement (Clear) glue.

Glueing the sunshades in place
Repainting a locomotive: metal sunshades details installed.

After the glue has dried, I painted the sunshades with the same Vallejo Engine Gray color.

Sunshades painted

I then added a Trainworx snow plow. Using a sharp hobby knife, I trimmed a small piece of plastic from the locomotive’s front to fit the plow.

Installing a Trainworx snow plow
Installing a Trainworx snow plow, trimming a pice of plastic on the front

Then, using a hand drill and a fine drill bit, I drilled two small holes.

Drilling small holes to mount the snow plow

I used Tamiya Multipurpose Cement (Clear) glue to secure the snow plow in place.

Repainting a locomotive: suing Tamiya Multipurpose Cement (Clear) glue to secure the snow plow in place
Snow plow installed

Lettering

Using Microscale decals, I completed the GP40-2 lettering after repainting the locomotives. I chose to model units 7240 and 7609.

Microscale SP diesels decals
Repainting a locomotive: road number decals applied to the cab side.
Southern Pacific side decals
SP nose logo

The red wings on the nose are always a bit tricky to apply, but I managed to get through it.

SP Red Wings decals
Repainting a locomotive: lettering

Weathering

I then applied a weathering coat by washing the grills and adjacent areas with black India ink, followed by airbrushing a couple of layers of Polly Scale Depot Buff (70/30 thinner-to-paint mix).

The Depot Buff (light tan color) replicates a layer of accumulated dust.

Repainting a locomotive: weathering
Airbrushing a layer of light tan color to reproduce dust.

Here is the final result. Southern Pacific GP40-2 7609 and Southern Pacific GP40-2 7240, both equipped with a Zimo MX615 DCC decoder.

Repainted locomotives Southern Pacific GP40-2 7609 and Southern Pacific GP40-2 7240

Painting freight cars

Step-by-step on painting freight cars in batches with airbrush and acrylic colors

Painting freight cars: I recently purchased a few inexpensive, older Roundhouse boxcars and Athearn mechanical reefers on eBay to repaint and letter for the Southern Pacific Railroad and Southern Pacific Fruit Express.

Painting N scale freight cars, spray booth

For this project, I used the discontinued Polly Scale Boxcar Red – yes, I still have a bottle from 2007 – along with Vallejo acrylic paints. Unfortunately, the Polly Scale paint had aged poorly and clogged the airbrush, regardless of how much I thinned it.

Boxcar Red color with Vallejo acrylic paint

To achieve a convincing “Boxcar Red” color, I mixed equal parts of Vallejo Camouflage Medium Brown (71.038) and Vallejo Brown RLM26 (71.105).

Painting an N scale undecorated boxcar with Vallejo colors

Painting freight cars in batches

I prefer to paint in batches to make the most of my effort.

This time, I prepared three 2-bay covered hoppers, four boxcars, three 57′ mechanical reefers (to be painted and lettered for SPFE – Southern Pacific Fruit Express), and one old, inexpensive caboose.

57′ Mechanical Reefers

Soaking the boxcar shell in 99% isopropyl alcohol for at least three days significantly simplifies the paint removal process. As shown above, the paint practically lifts off the shell!

I washed the car with warm water and a drop of soap to remove fingerprints or oils, wearing plastic gloves. I used a soft toothbrush.

Washing the car shell with warm water and soap.

Once completely dry, I sprayed a coat of Vallejo acrylic White Primer using an airbrush. I used a few drops of the Vallejo Flow Improver.

Shell painted with Vallejo White Primer

After painting the roof white (Vallejo White 71.001), I masked it off and sprayed the reefer with Vallejo Orange (71.083).

Painting N scale freight cars: SPFE 57' mechanical reefer

Then I carefully and slowly removed the masking tape

Removing the masking tape

Here is future SPFE 459273.

Painting N scale freight cars: 57' SPFE Reefer ready for gloss varnish coat.

Two other 57′ SPFE Reefers will be painted with black ends. I properly masked the car and sprayed some Tamiya XF-1 black thinned 3:2 with Vallejo Airbrush Thinner.

Painting N scale freight cars: Airbrush colors and auxiliaries

This time I experimented with a few drops of Vallejo Airbrush Flow Improver.

57' SPFE Reefer with black painted ends
Two 57' SPFE Reefers with black painted ends

Reefers are now ready for a coat of gloss varnish. This layer provides a smooth surface for easier decal application, helping the waterslide decals adhere properly without silvering.

57' SPFE Reefer coated with gloss clear paint.

Lettering (applying waterslide decals)

To apply the decals, I first cut them out carefully, staying close to the printed edges for a clean finish.

Painting N scale freight cars: PFE Reefers decals sheet

I soaked the decals in warm water for 10–15 seconds, just enough to loosen them from the backing paper without over-soaking. I gently slid the decal onto the car, positioning it with a soft brush or tweezers.

For tricky areas, I used Microscale Micro Set decal-setting solution to help the decal conform to surface details like rivets or panel lines. For the most difficult irregular surfaces I used Microscale Micro Sol, to soften the decals for a few seconds before applying them.

57' SPFE Reefer ready to be lettered with 60-250 Microscale decals sheet

Once positioned, I lightly dabbed with a cotton swab or soft cloth to remove excess water and ensure the decal sits flush.

57' SPFE Reefer lettering
Cars lettering: SP Hydra Cushion 50' boxcars

I allowed the decals to dry completely before applying a final coat of clear matte to seal and protect them.

Decals sealed with a coat of flat clear paint.

After the flat clear coat dried, I proceeded with installing Micro Trains Line 1015 body-mount couplers. I drilled a hole in the metal chassis e screwed the couplers down.

Installing MTL-1015 couplers
Painting freight cars, Hydra-Cushion SP boxcars

Painting undecorated cars can be a daunting task, requiring skills like airbrushing and decaling. However, finding a cheap undecorated car to experiment with and refine these techniques is fairly easy.

Moreover, if you have a decorated car that you never liked, it could be a good candidate for this project.

Painting an SP caboose

Painting an SP caboose, originally in Chessie System color scheme.

Step-by-step on painting an SP caboose. In the late 2000s, I was gifted an inexpensive (and rather imprecise) Chessie System caboose manufactured by Model Power. I wasn’t sure what to do with it until I found reference photos online. I discovered that some older cabooses were repainted with orange ends after 1955.

Chessie System N scale caboose

By the 1970s, it wasn’t uncommon to see these cabooses with their roofwalks and ladders removed. This inspired me to modify and repaint the caboose in Southern Pacific’s brown and Daylight Orange scheme, to use it on my N scale layout.

I know this model isn’t a perfect replica of the C-40-1 class caboose I’m aiming for, but I’m willing to accept the compromise. This project is a great opportunity to learn new techniques and, most importantly, have fun.

Filling holes

Using Tamiya Putty to fill the whole left by the removed roofwalks.

To fill the holes left in the roof after removing the roofwalks, I used Tamiya Putty.

Using a hobby knife, I removed the ladders from the end platforms, leaving only the brake wheel and a low handrail. I also removed the Rapido coupler from the truck to install a Micro-Trains 1015 body-mount knuckle coupler.

Removing ladders from the end platform

Painting an SP caboose

After filling the holes with putty and smoothly sanding them down, I painted the caboose. For the brown, I mixed two Vallejo Model Air colors, adding a few extra drops of Vallejo Brown RLM26 (71.105) to Vallejo Camouflage Medium Brown (71.038) instead of using a 1:1 ratio.

I then masked the shell for the Daylight Orange coat. I used Tamiya 6mm masking tape along with a wider masking tape purchased from a DIY store.

Painting an SP caboose: masking.

To paint the ends Daylight Orange, I used a very old bottle of (now discontinued) Polly Scale SP Daylight Orange that I’ve had since the mid-2000s. I carefully stirred the paint for a few minutes and thinned it at a 2:3 ratio (two parts paint and three parts thinner). Since the paint had aged poorly, I applied it in thin layers to achieve a smooth finish.

Discontinued SP Daylight Orange Polly Scale paint.

The shell is painted, and now I’m ready to paint the chassis. The stairs and the end platform will be painted brown.

Painting an SP caboose: main colors are done

After the paint have dried, I applied a coat of gloss varnish.

Still unlettered, this SP caboose now received a coat of gloss varnish.

Lettering (applying waterslide decals)

To apply the decals, I first cut them out carefully, staying close to the printed edges for a clean finish.

Painting an SP caboose: decals and setting solutions
Cutting decal sheet

I soaked the decals in warm water for 10-15 seconds, just enough to loosen them from the backing paper without over-soaking. I gently slide the decal onto the car, positioning it with a soft brush or tweezers.

Sliding decal onto the model

For tricky areas, I used Microscale Micro Set decal-setting solution to help the decal conform to surface details like rivets or panel lines. For the most difficult irregular surfaces I used Microscale Micro Sol, to soften the decals for a few seconds before applying it.

Painting an SP caboose: the surface where the decal will be applied is prepared with Microscale Micro Set solution

Once positioned, I lightly dabbed with a cotton swab or soft cloth to remove excess water and ensure the decal sits flush.

Dabbing with a cotton swap

I allowed the decals to dry completely before applying a final coat of clear matte to seal and protect them.

Painting an SP caboose, almost complete.

I painted the handrails white with a small paintbrush, using Vallejo white paint.

Trucks and Couplers

Trucks needed to be upgraded, so I used Micro-Trains 1184 (Bettendorf Switch Motion Caboose Trucks). I also installed Micro-Trains 1015 body-mount couplers.

Micro-Trains 1184 trucks
Micro-Trains caboose trucks and body-mount couplers installed

Weathering

I started by applying AK Paneliner (Black) brushing it onto every panel line. Before proceeding, I removed the wheel axles and the couplers.

I then masked the sides of the trucks where the axle points sit.

Then, I applied a thinned layer of tan paint (20% paint, 80% thinner). I had an old Acqueous Hobby Color that was still in great condition, so I used it. Several thin layers have been applied to the lower part of the body and trucks to simulate dust accumulation from operation.

I brushed the trucks with some brown powder, which has a very flat finish and effectively simulates layers of rust and grime.

I added streaks of dirt running down from the roof exhaust.

Then, I applied a coat of Tamiya XF-86 Flat Clear to seal the weathering on the caboose.

Southern Pacific N scale cupola caboose weathered

Conclusion

While this model isn’t a perfect replica of the C-40-1 class caboose, I think it’s a great addition to the roster. Plus, it’s been a fun and quick project that I completed over the course of a few evenings.

Weathering Flatcars

Weathering flatcars to make plastic look like wood

Using acrylic paints, India ink, and a set of paintbrushes, you can achieve convincing results when weathering flatcars. I weathered the Atlas BN flatcar pictured below as well as an old Con-Cor SP flatcar, in service on my N scale layout.

Atlas BN flatcar

I first removed the trucks with couplers, then proceeded using Vallejo acrylic colors.

The key is to work in light layers. For the Southern Pacific flatcar, which already had a brown base, I applied a wash of dark brown for added depth.

I used Vallejo colors: White (71.001), Uk BSC 64 Portland Stone (71.288), Beige (71.074), N. 41 Dark Olive Drab (71.316) and Dark Rust Wash (76.507). Additionally, I prepared a solution by mixing a couple of drops of Winsor & Newton India Ink with water and 10 drops of isopropyl alcohol. I painted each groups of 2-3 wooden planks in different shades to create natural variation.

Vallejo colors

Here is the Con-Cor SP flatcar receiving a wash of diluted black India ink.

Wash of diluted black India ink

I used Vallejo Retarder Medium (70.597) to extend the drying time of acrylics, making brushwork easier and more controlled. First, I applied a wash of White (71.001).

Applying the first wash with white Vallejo 71.001

While Retarder Medium helps with layering by slowing down drying time, it also extends the overall drying process. I made sure the paint was completely dry before applying a wash of India ink, allowing it to seep into the gaps between the wooden planks by capillary action.

Weathering flatcars with India ink wash
Using a fine brush to apply India ink
Weathering flatcars with India ink

Then I carefully applied Vallejo Wash for rust effects, focusing on the area around rivets.

Using Vallejo Model Wash for rust effects
BN flatcar with added rust effect

I applied another diluted, random layer of Mahogany (71.036) and N. 41 Dark Olive Drab (71.316) to tone down the red rust color.

Weathering flarcars using Vallejo Mahogany color
Using Dark Olive Drab

Here is the BN flatcar after the paint has dried.

BN flatcar weathered
Weathering a flatcar, done!

And here is the final result on the SP Con-Cor car. The goal was to create the look of old wooden planks weathered by the elements and stained by various load spills over time.

Weathering flatcars: SP Flatcar finished