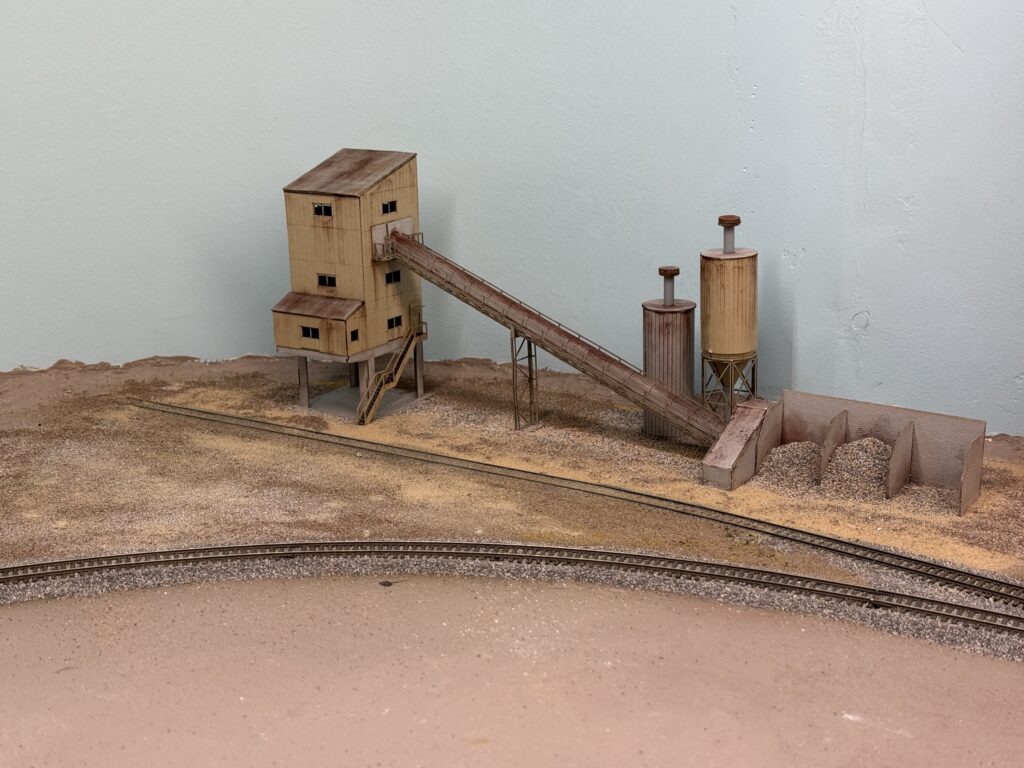
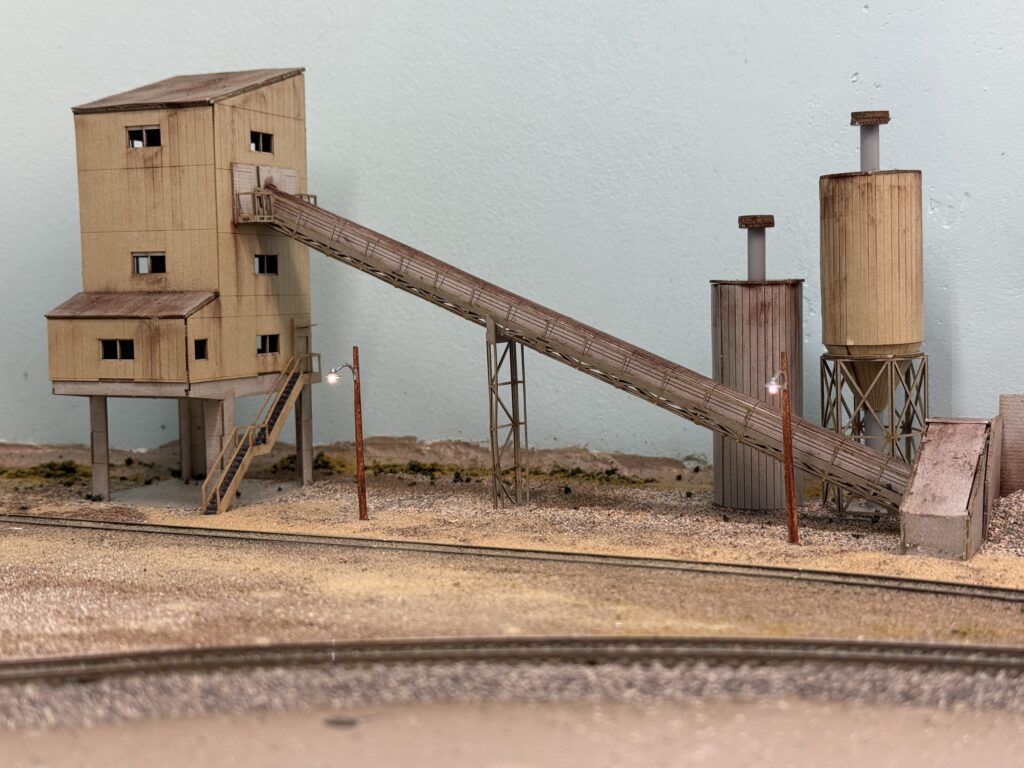
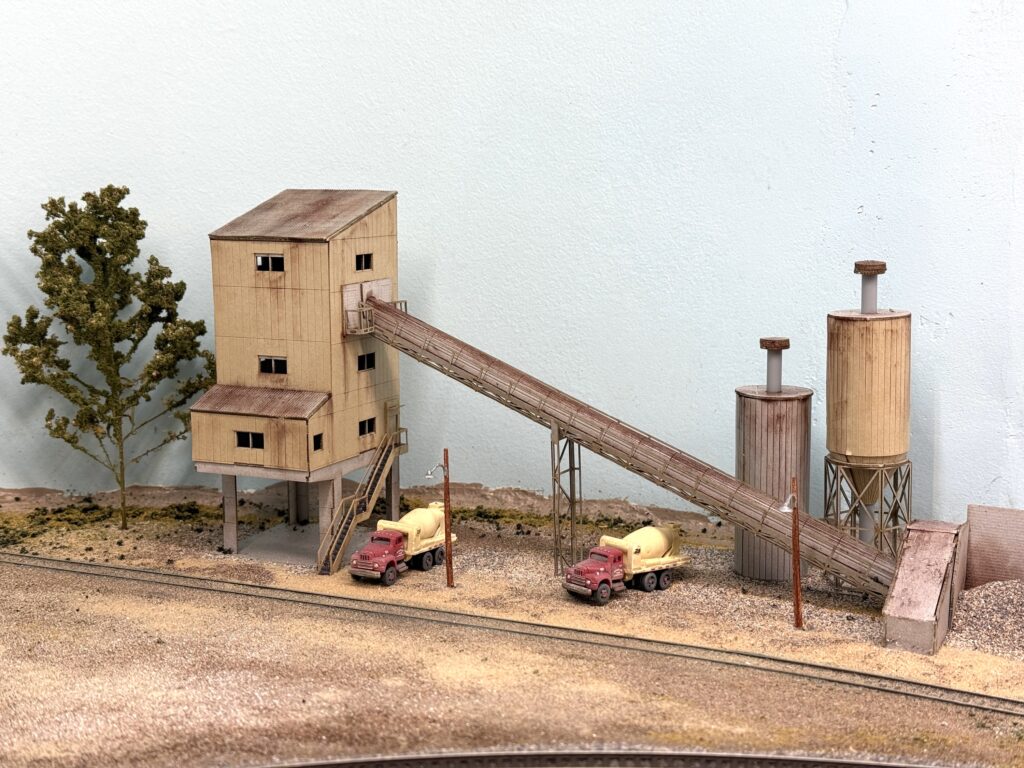
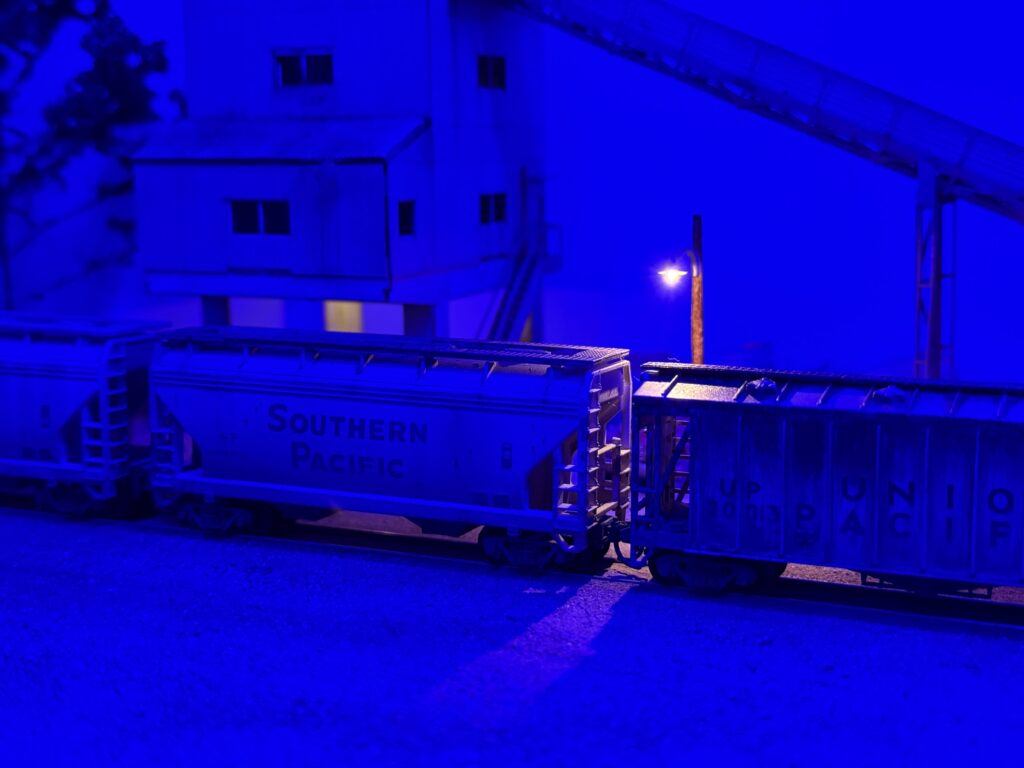
After installing the bridge, I placed the ConRock Ready-Mix Cement Plant
The layout corner where the ConRock Ready-Mix Cement Plant is located will be the first area to receive scenery.
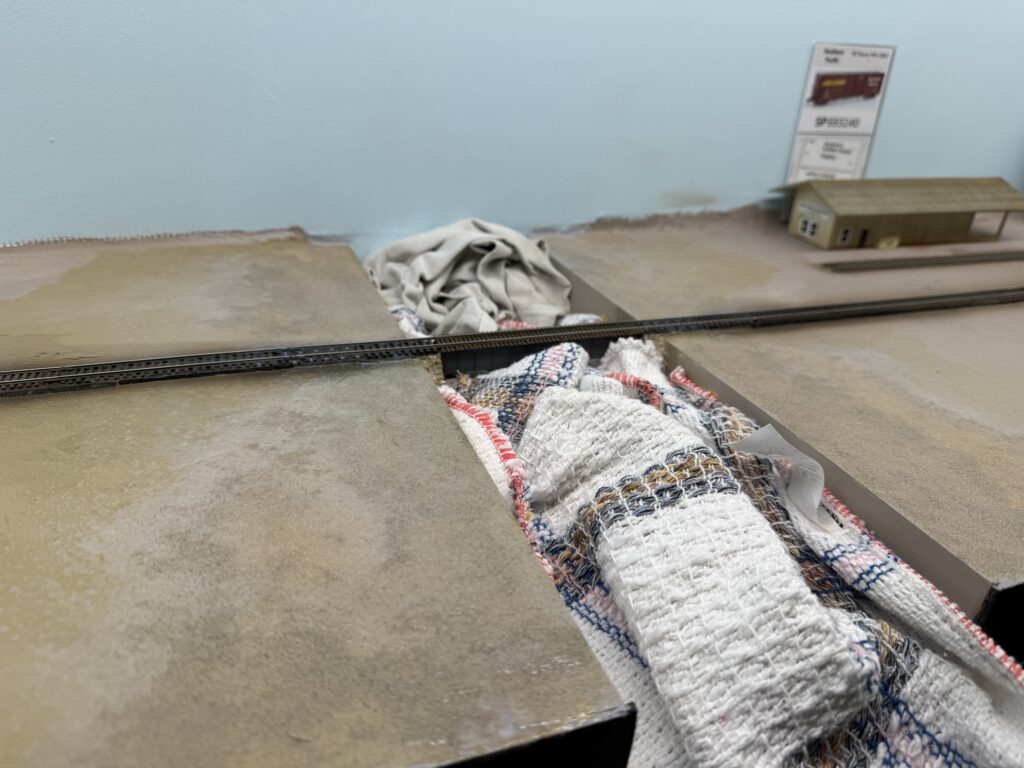
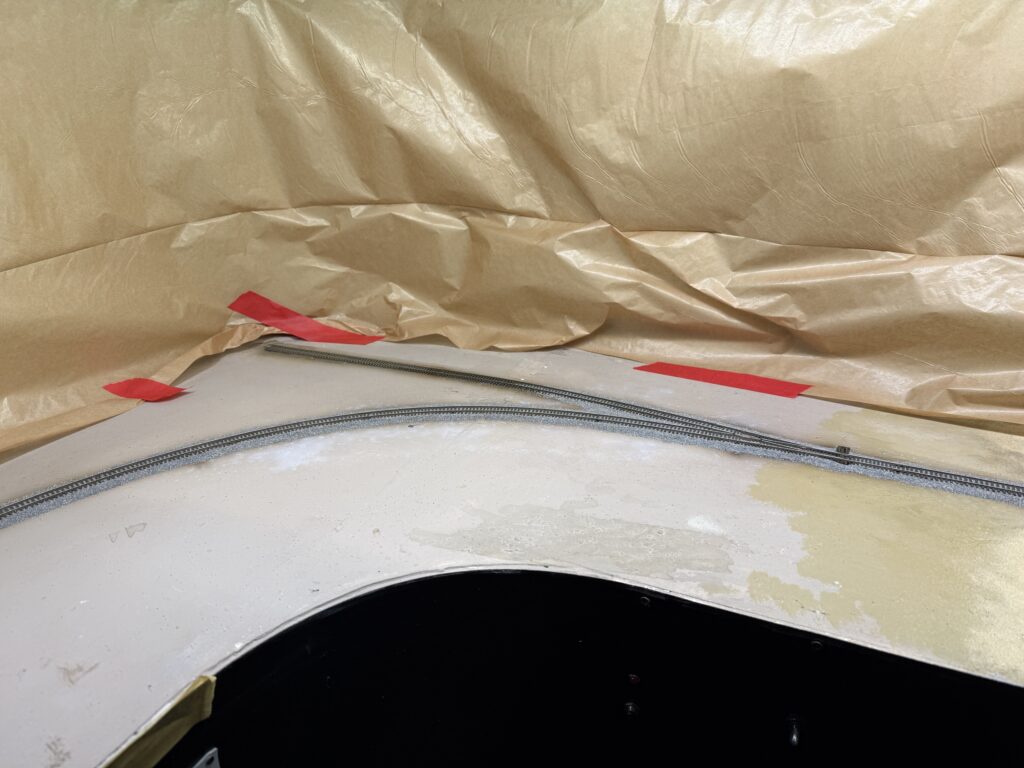
I added rough terrain texture near the bridge and ballasted the first section of track. To protect the bridge scene, I laid a couple of towels over the riverbed.
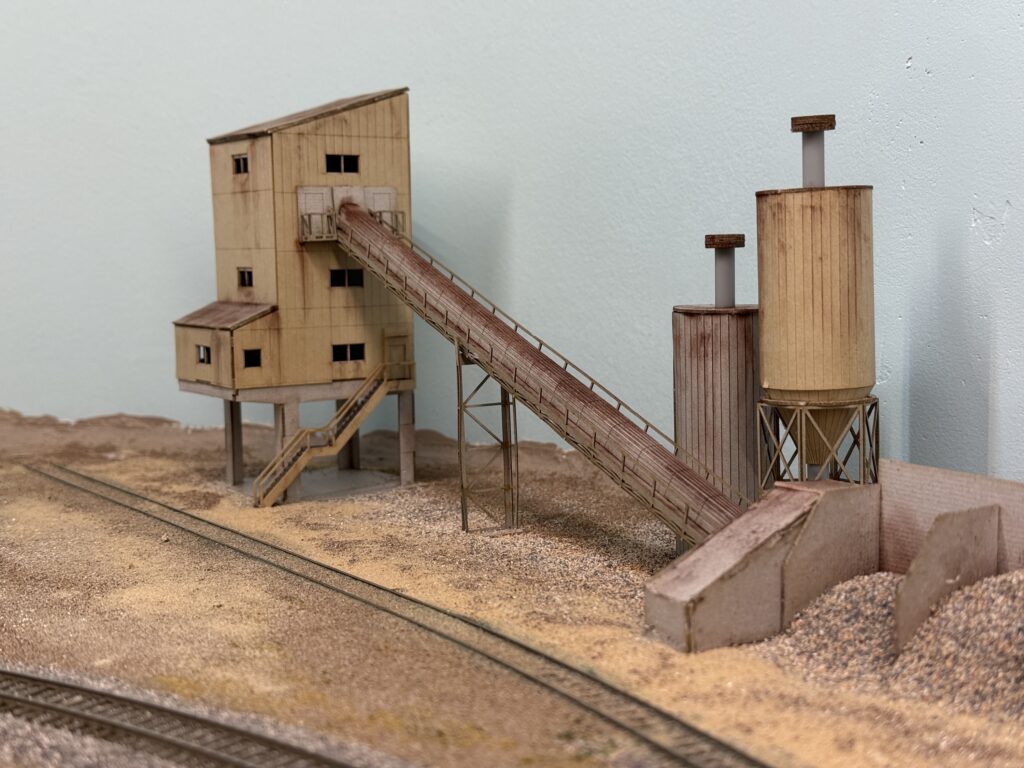
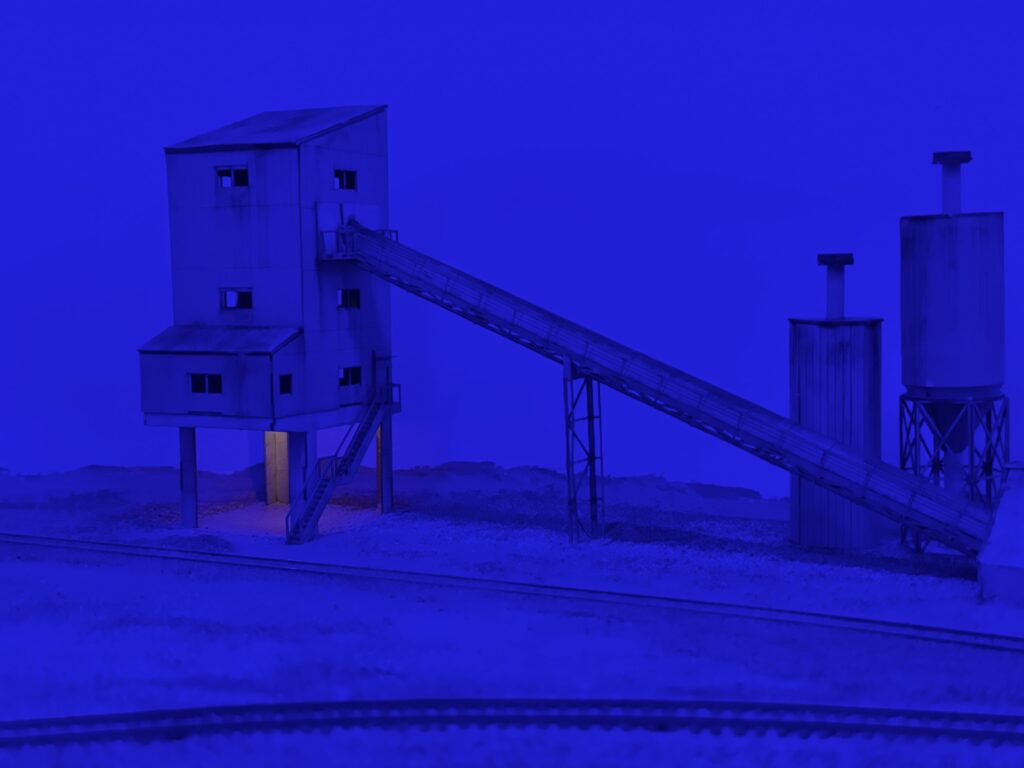
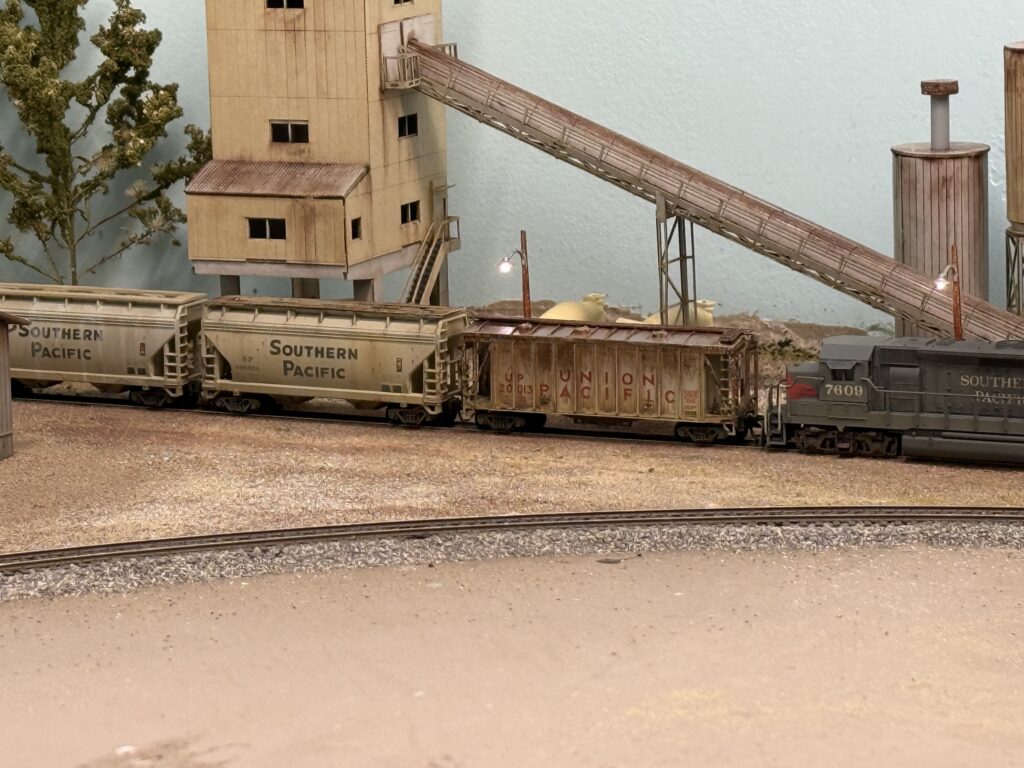
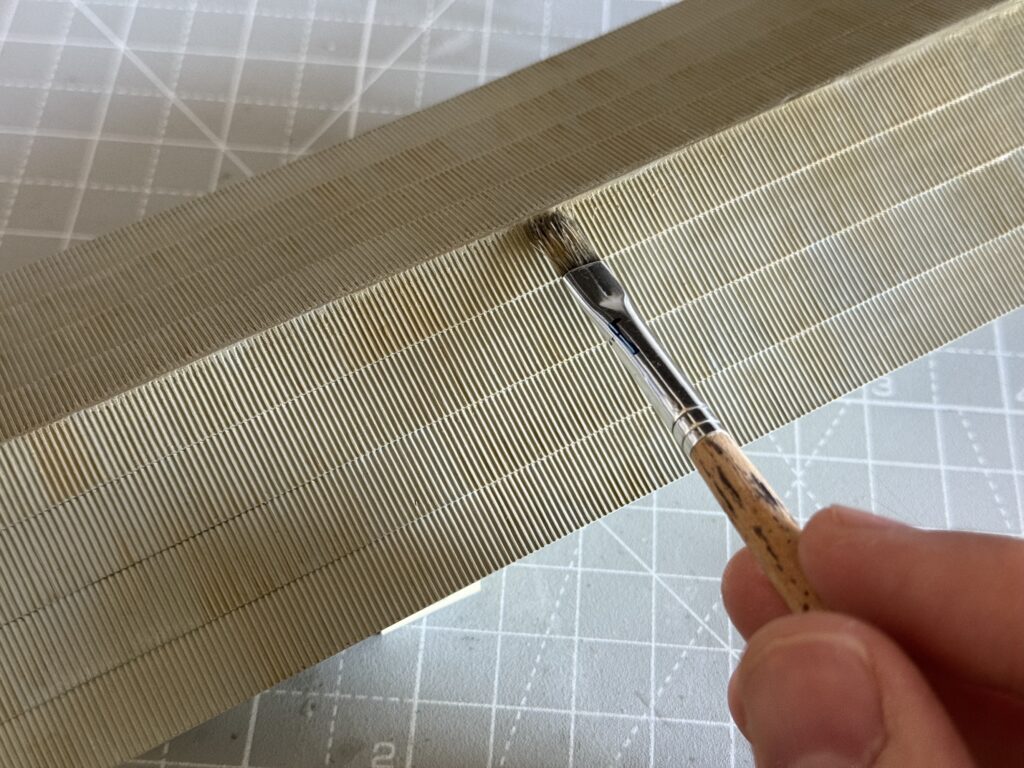
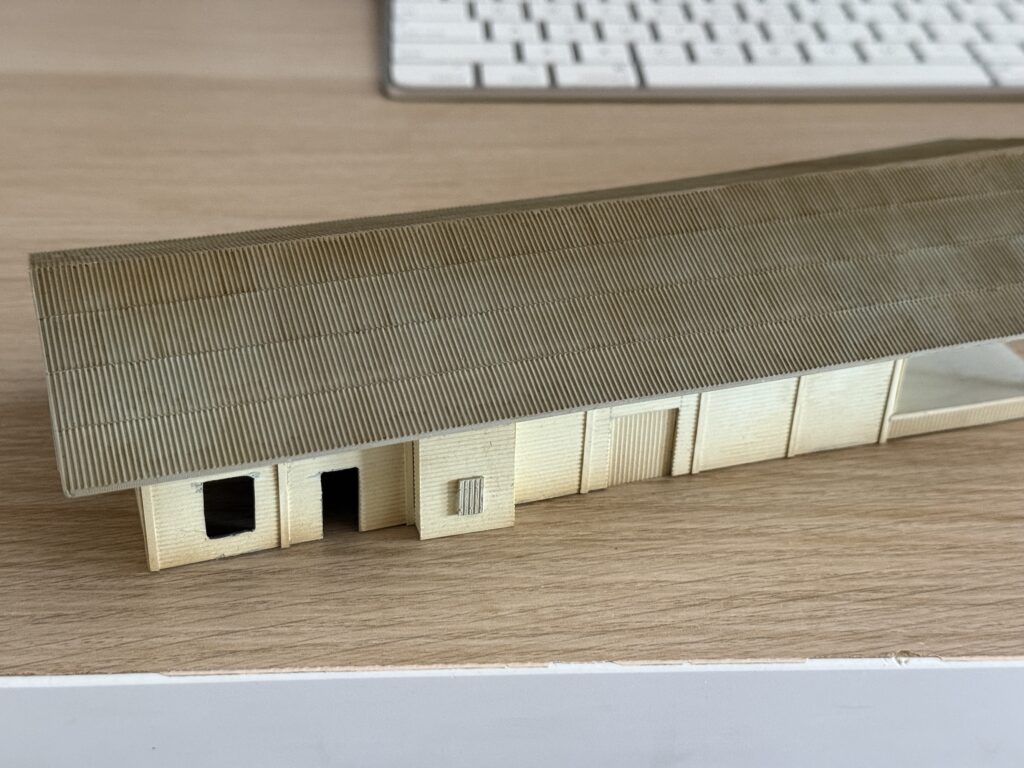
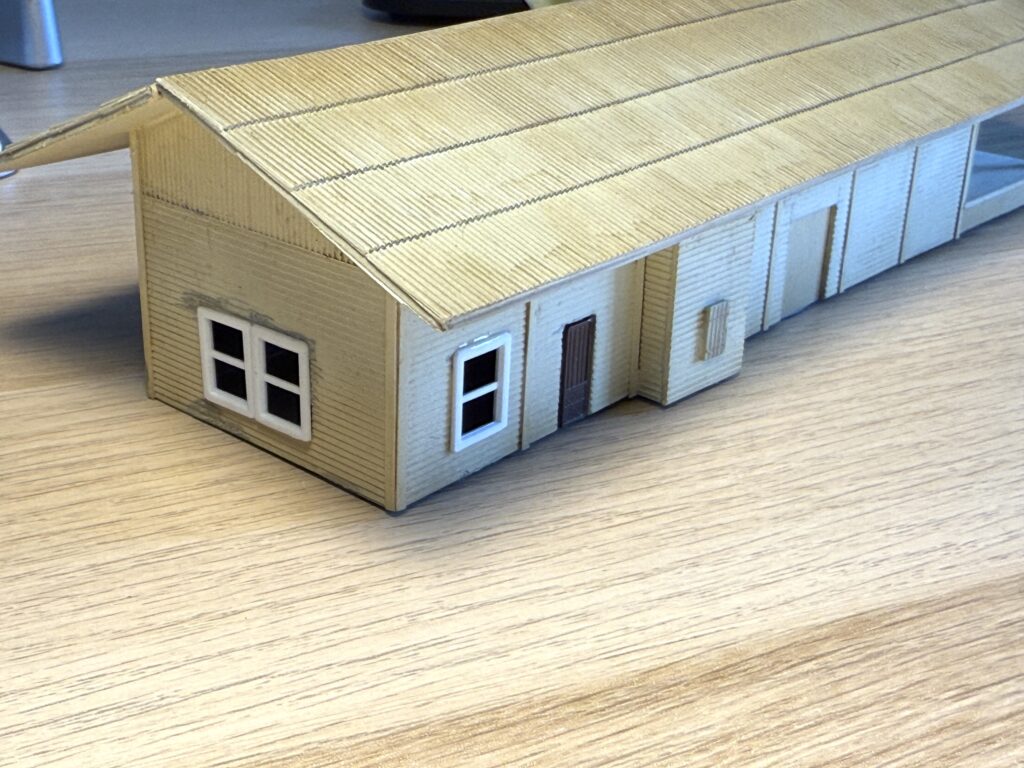
Then, I installed the cement plant structure. The building is a Japanese laser-cut paper kit that fits my needs perfectly.
The kit is made by a Japanese brand called Advance. It is a 1:150 scale model, but it still looks very good and fits the scene nicely.
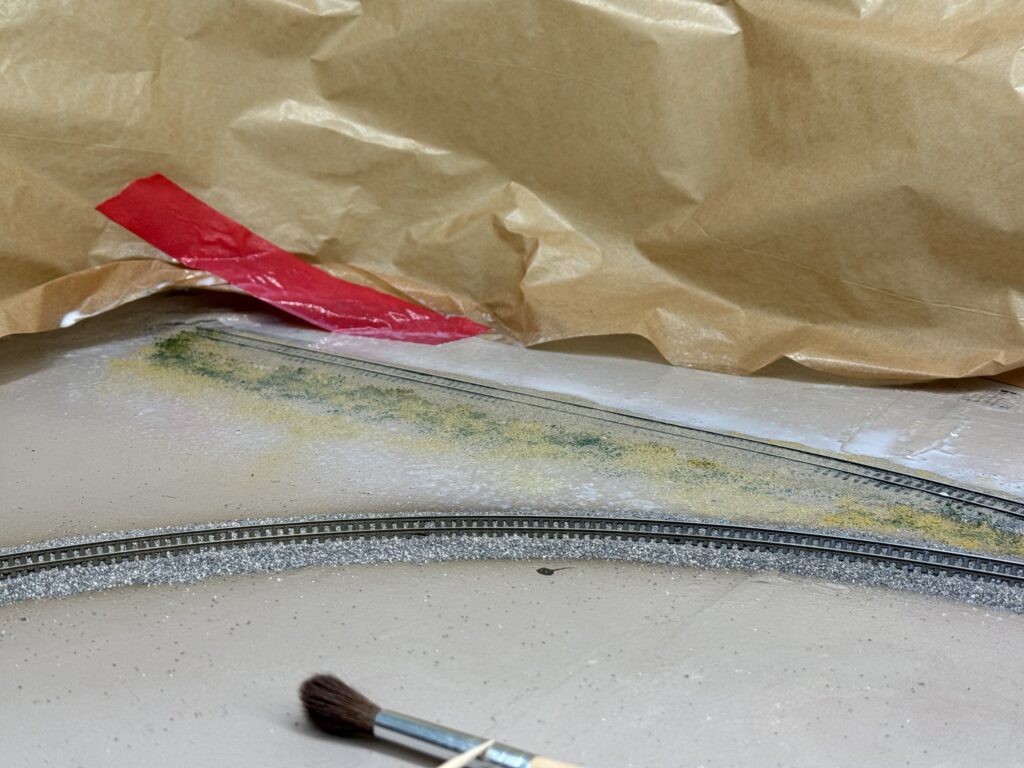
I first sprayed a 50:50 mix of alcohol and water to reduce surface tension. Then, I sprinkled on some terrain powders and followed up with a 50:50 mix of matte medium and water.
The kit was weathered with powdered pigments, and the surrounding terrain was glued in place using Liquitex Matte Medium.
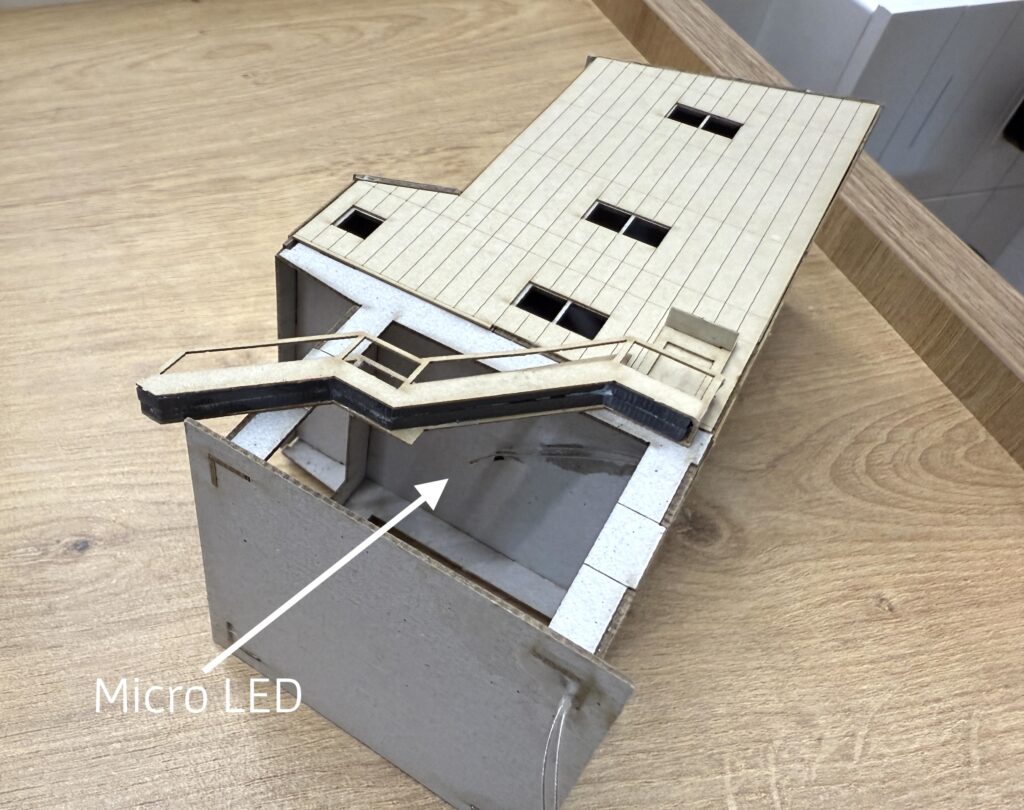
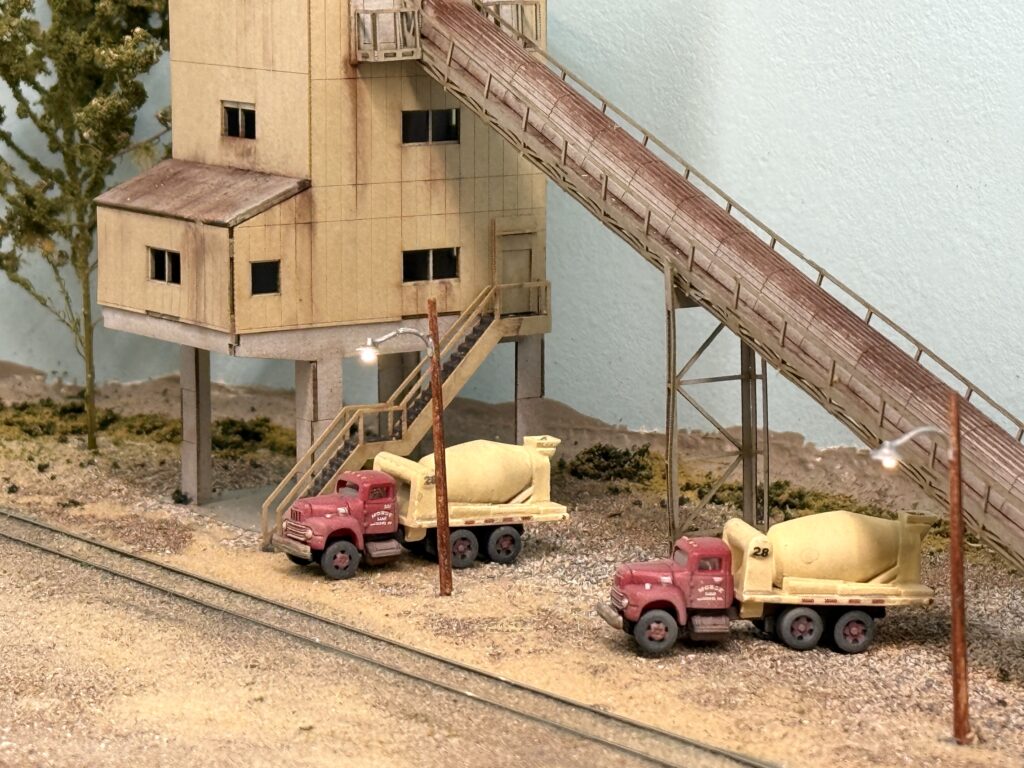
Before securing the structure to a sheet of styrene, which was later glued to the plywood base, I installed a micro LED to illuminate the scene at night. I secured the LED with CA glue and poked a hole in the structure base to run the wires through.
Adding Details
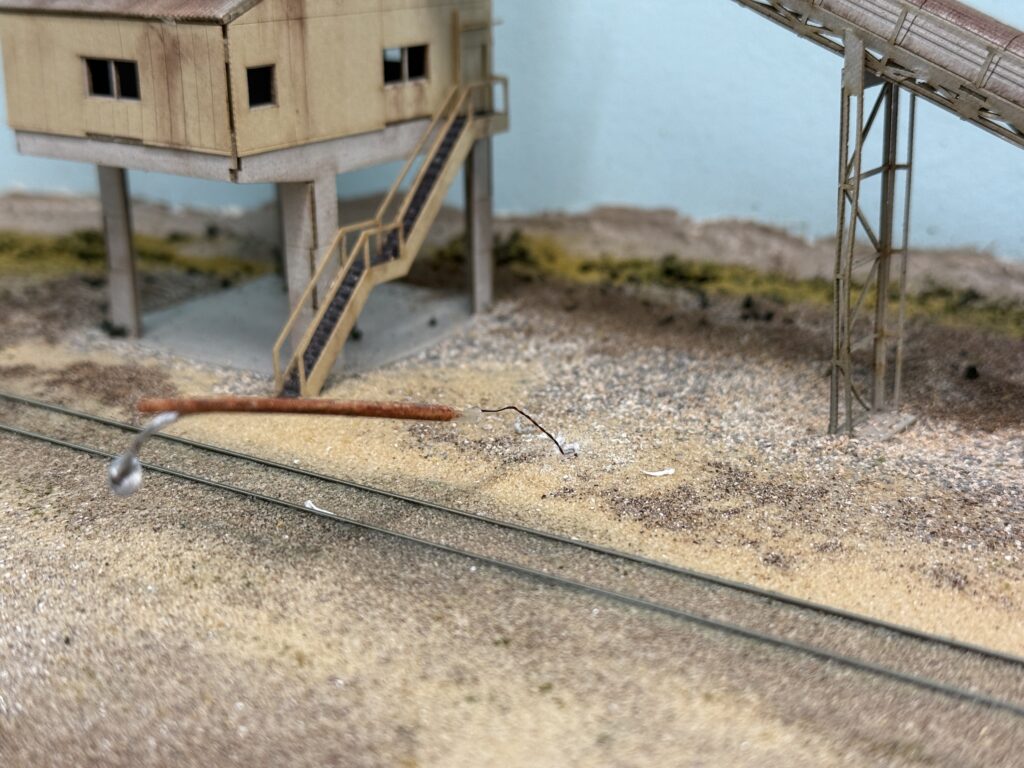
The cement plant is finally in place and it feels like the scene has gained real character. Next I will focus on adding life around it, because the area still looks a bit empty.
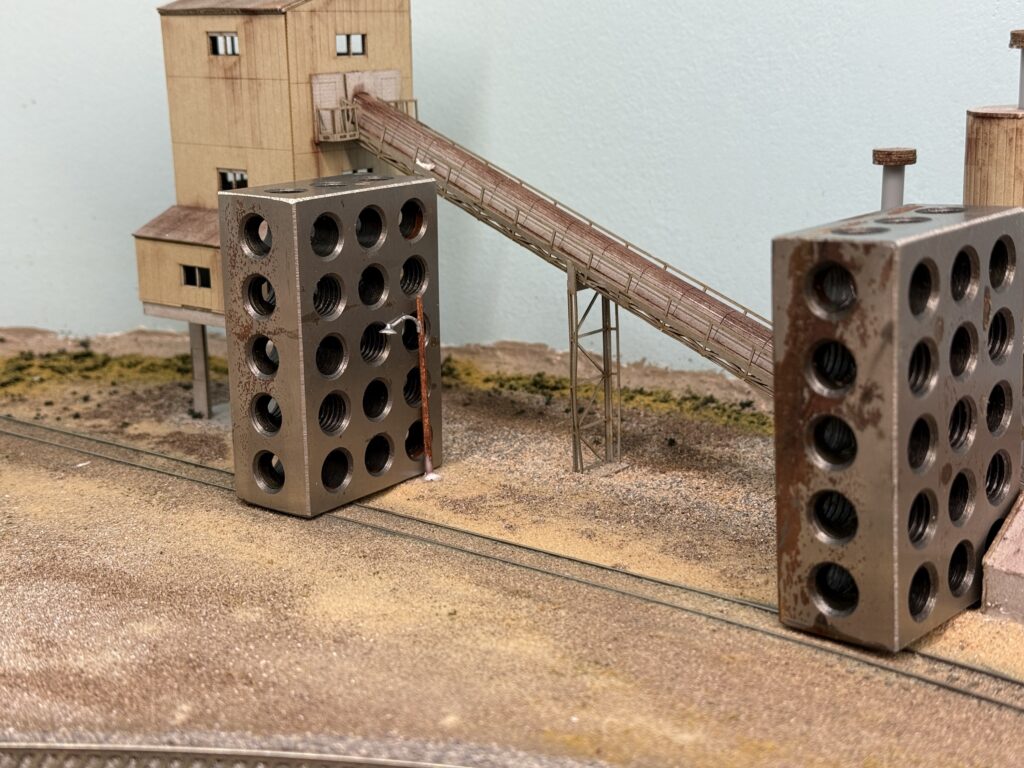
I added a couple of Woodland Scenics wooden streetlights. I drilled two holes, passed the wires through them, and glued the streetlights in place with matte medium. While the glue dried, I used some metal machine blocks to keep the poles in their final position.
Afterwards I positioned a couple of concrete mixer trucks near the loading spots and added a tree.
Once more vegetation is set, I will install a metal fence to frame the whole structure. So the scene will grow step by step and the finished area should blend nicely with the rest of the layout.
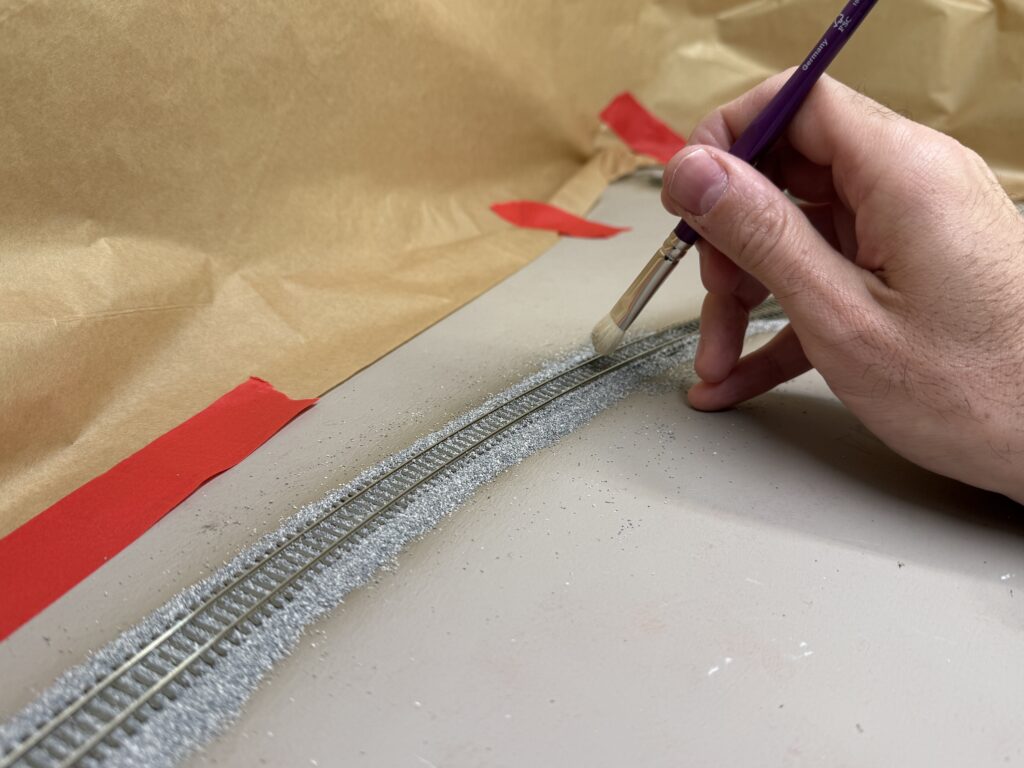
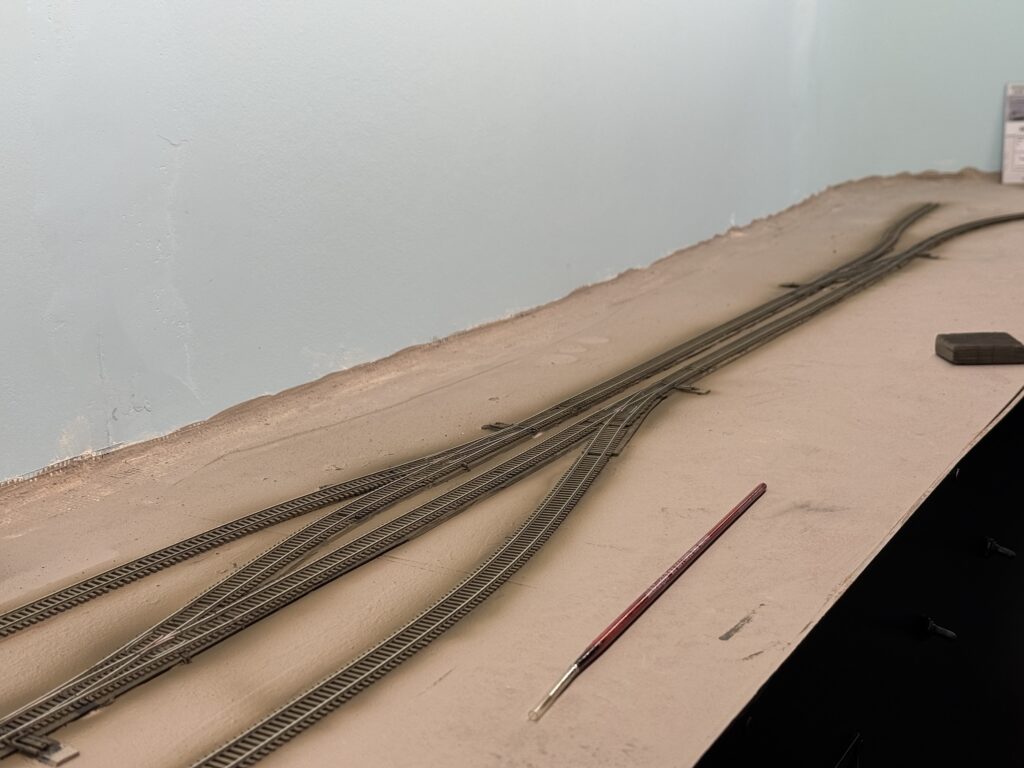
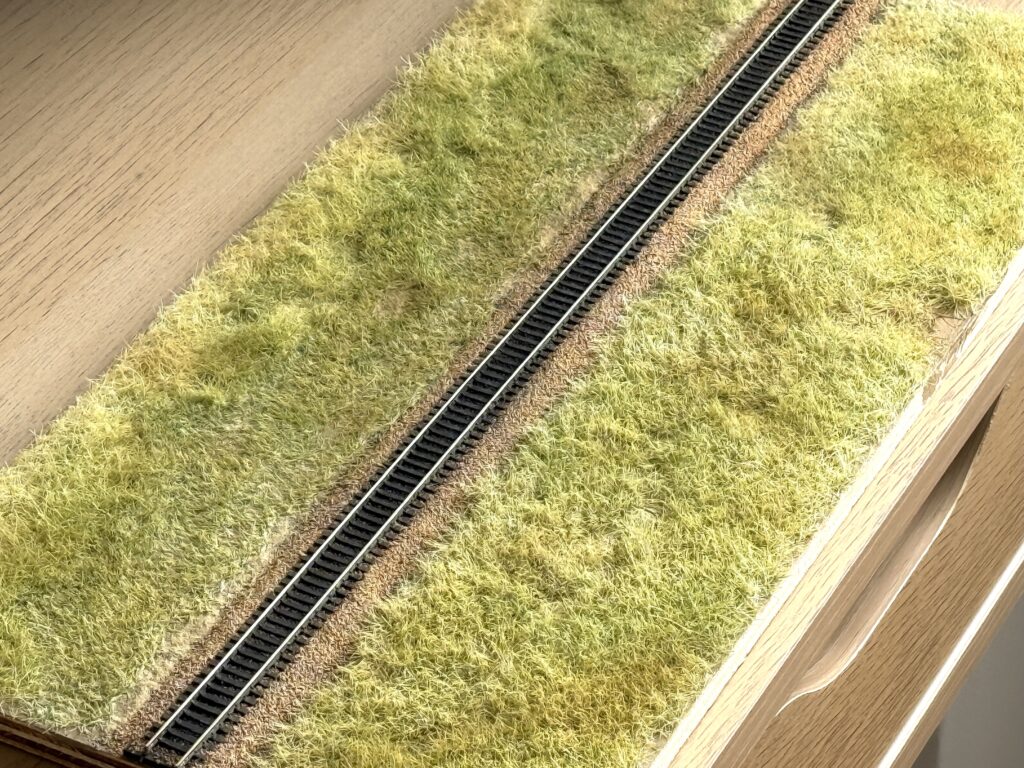
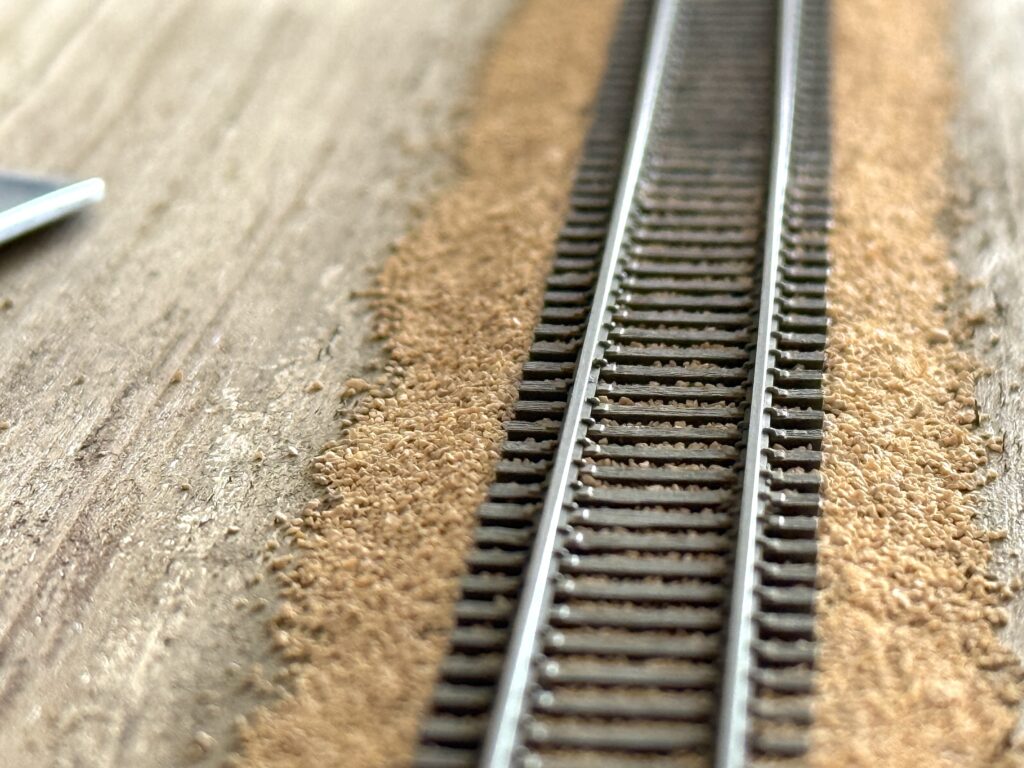
Adding track ballast to the Burbank Branch in N scale
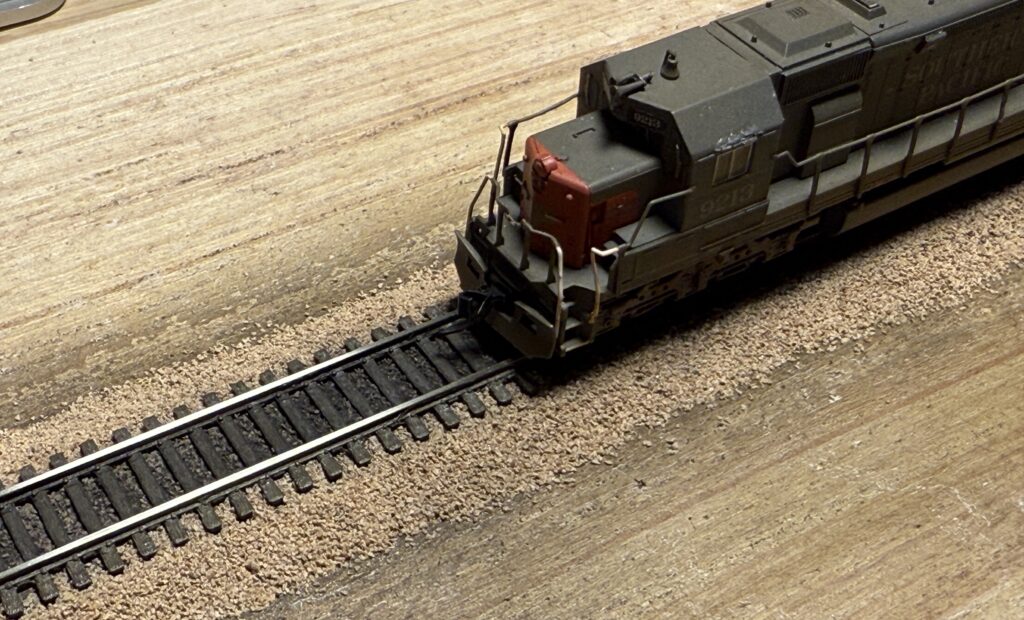
Adding track ballast is one of my favorite parts of the process. It is the stage when a model railroad truly starts to take shape and look real, like when I painted the track.
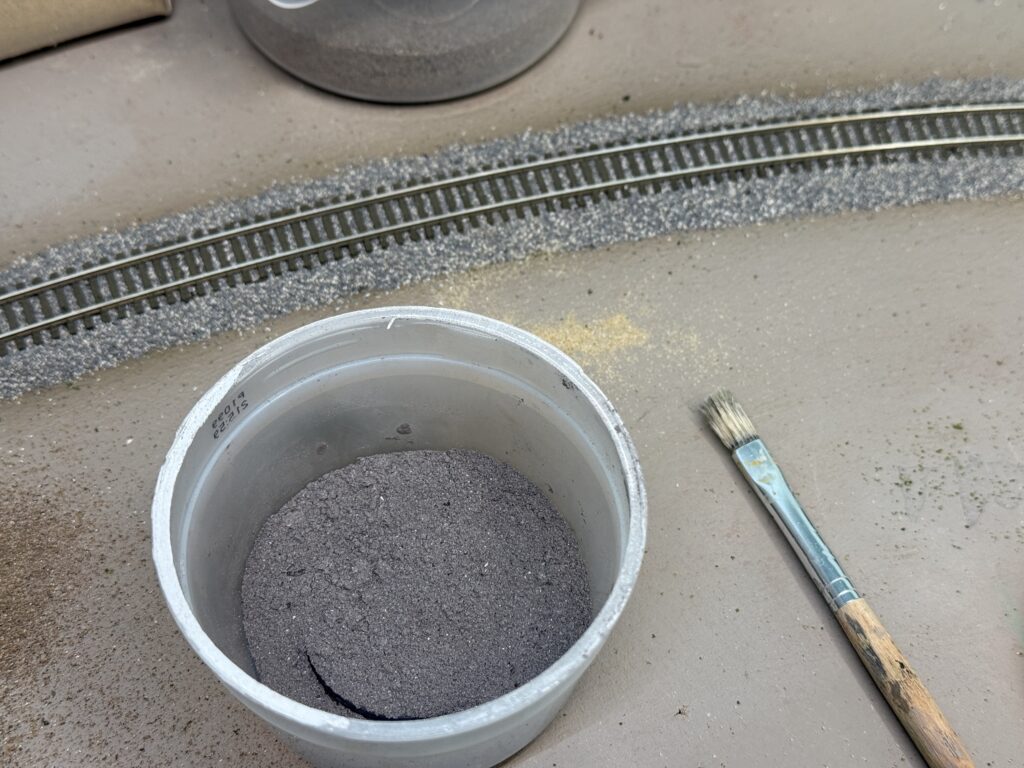
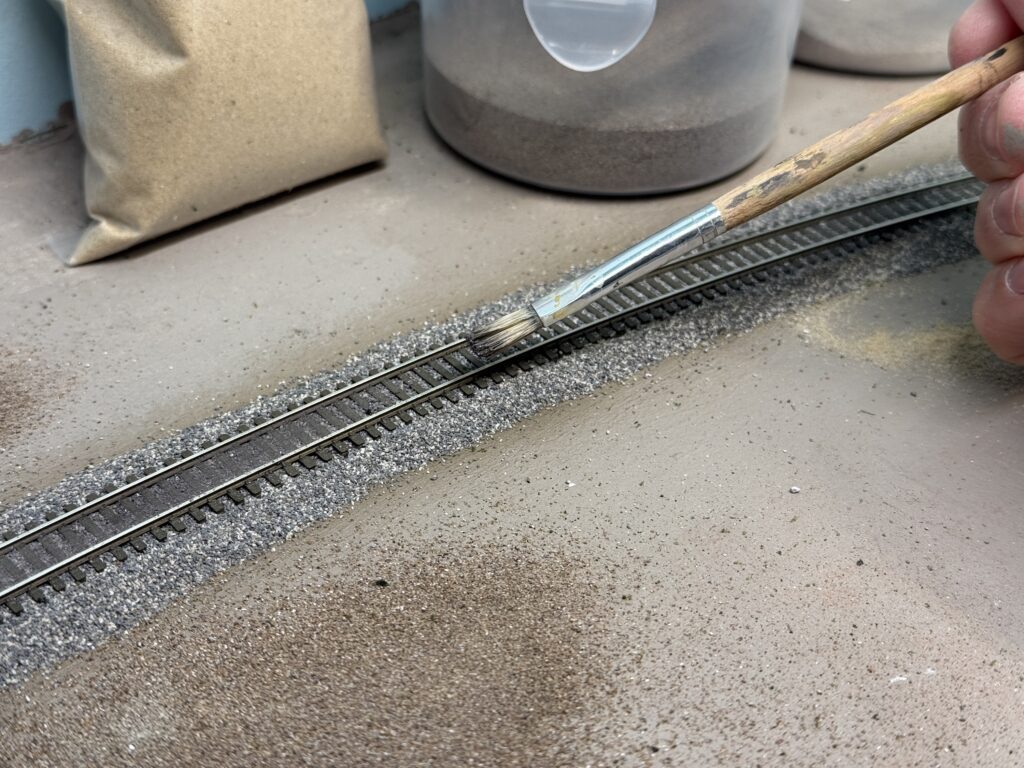
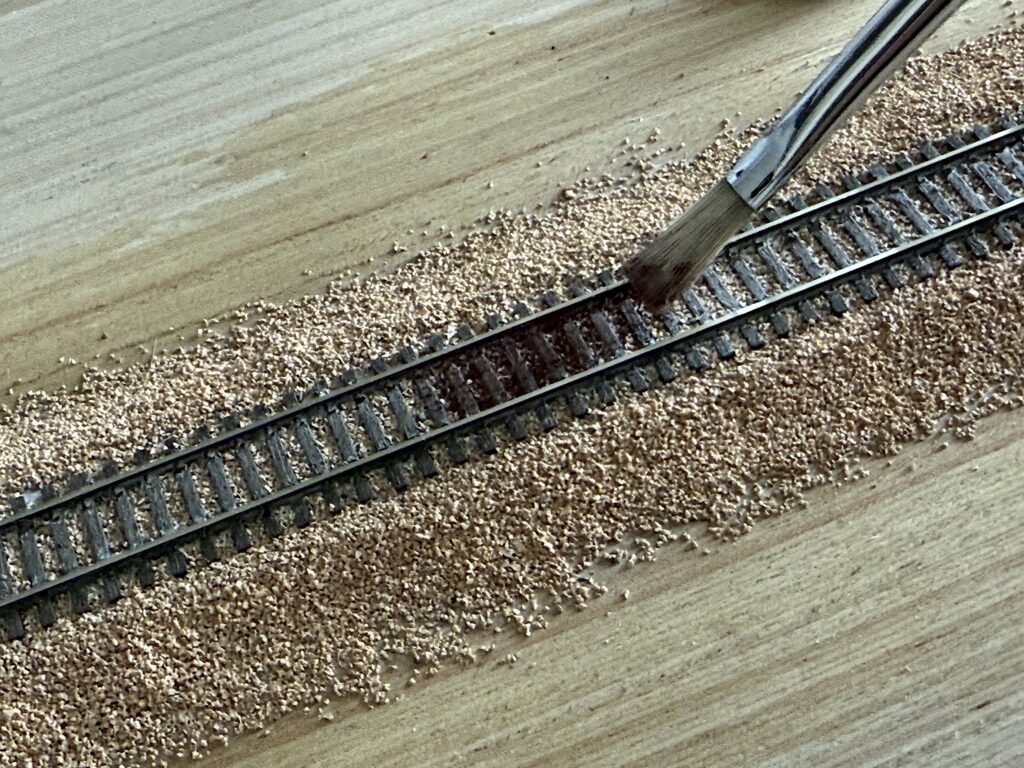
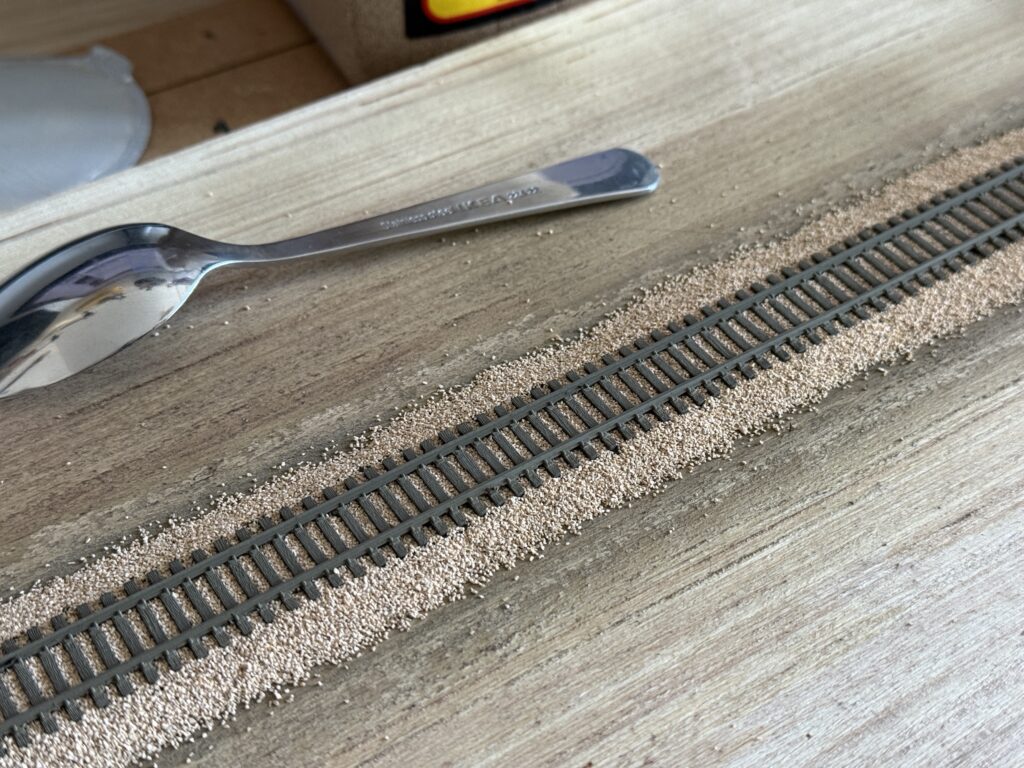
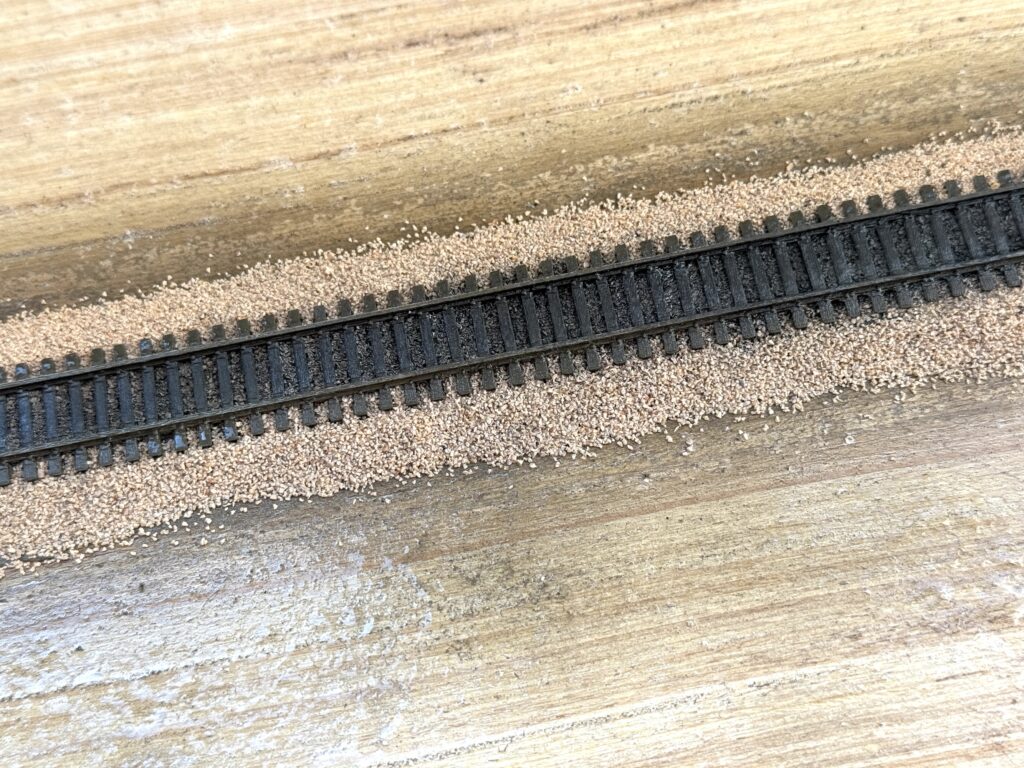
Afterwards, I used Woodland Scenics fine ballast as I usually do. This time I mixed equal parts of Gray (B1375) and Light Gray (B1374). I spread the ballast with a spoon, then shaped it carefully with my index finger and a soft paintbrush.
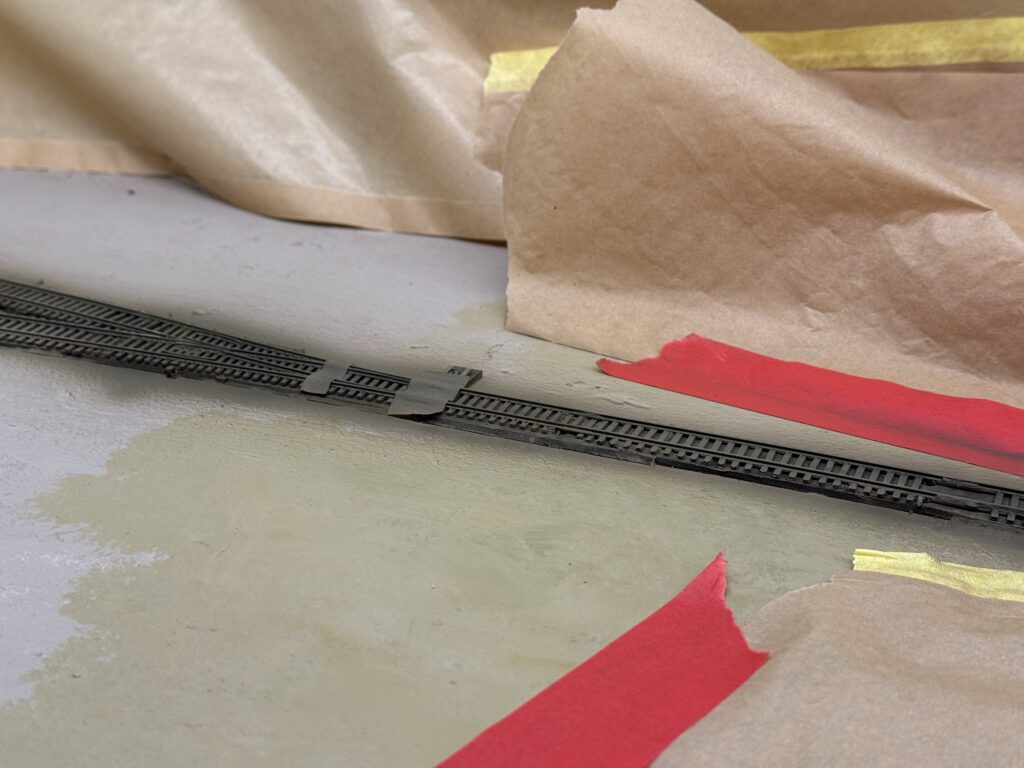
After that, I made sure no ballast remained on the ties or along the rail sides. I also payed special attention to the turnouts, usually avoiding the points area altogether.
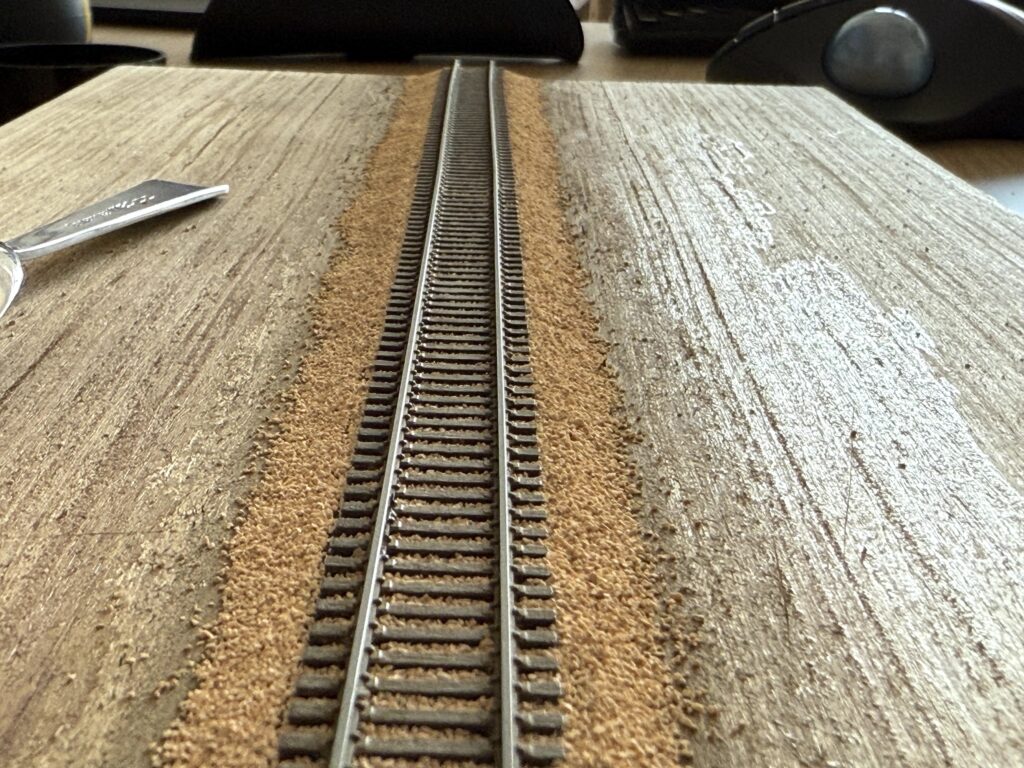
With some careful painting, it is easy to disguise the missing ballast.
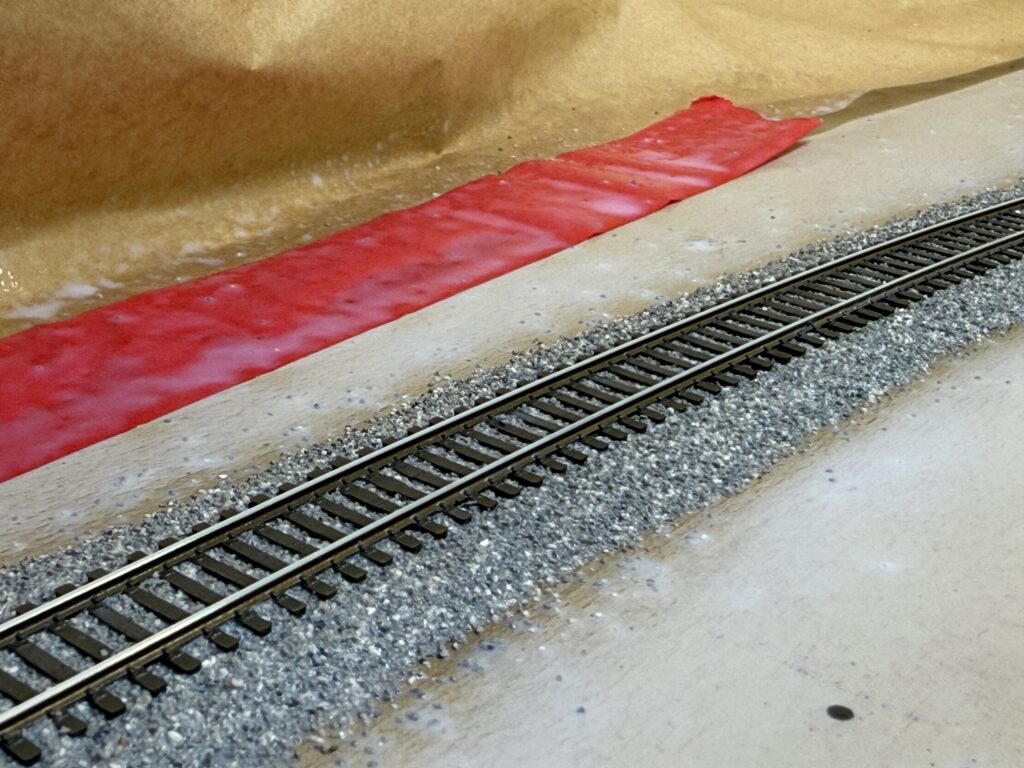
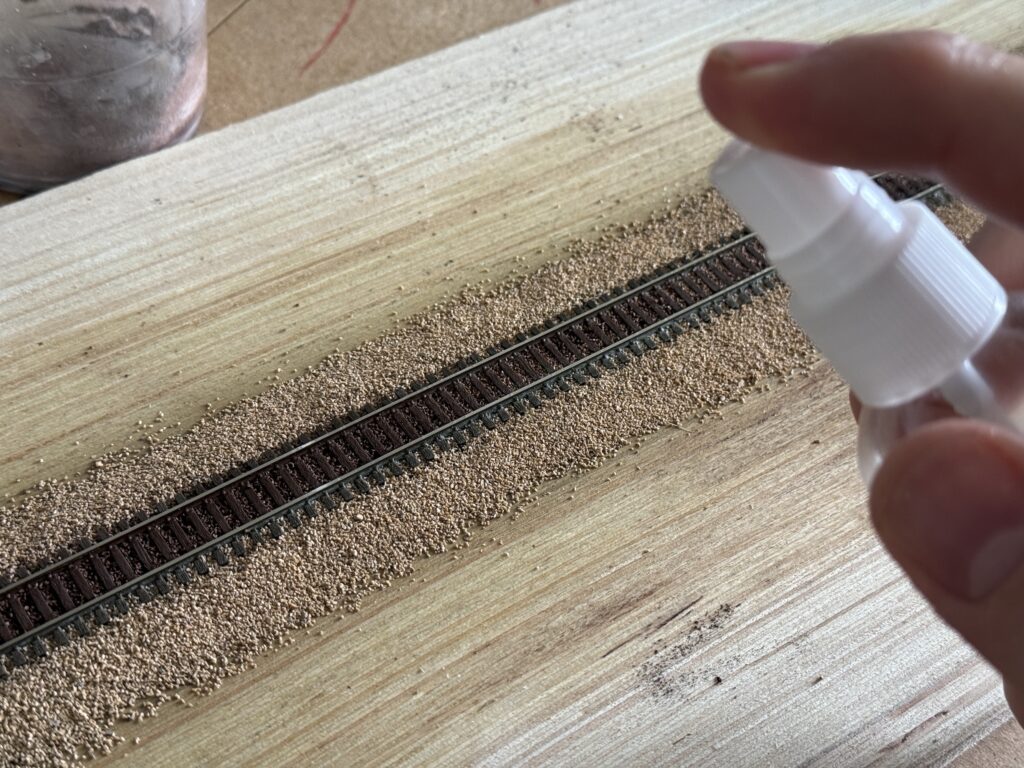
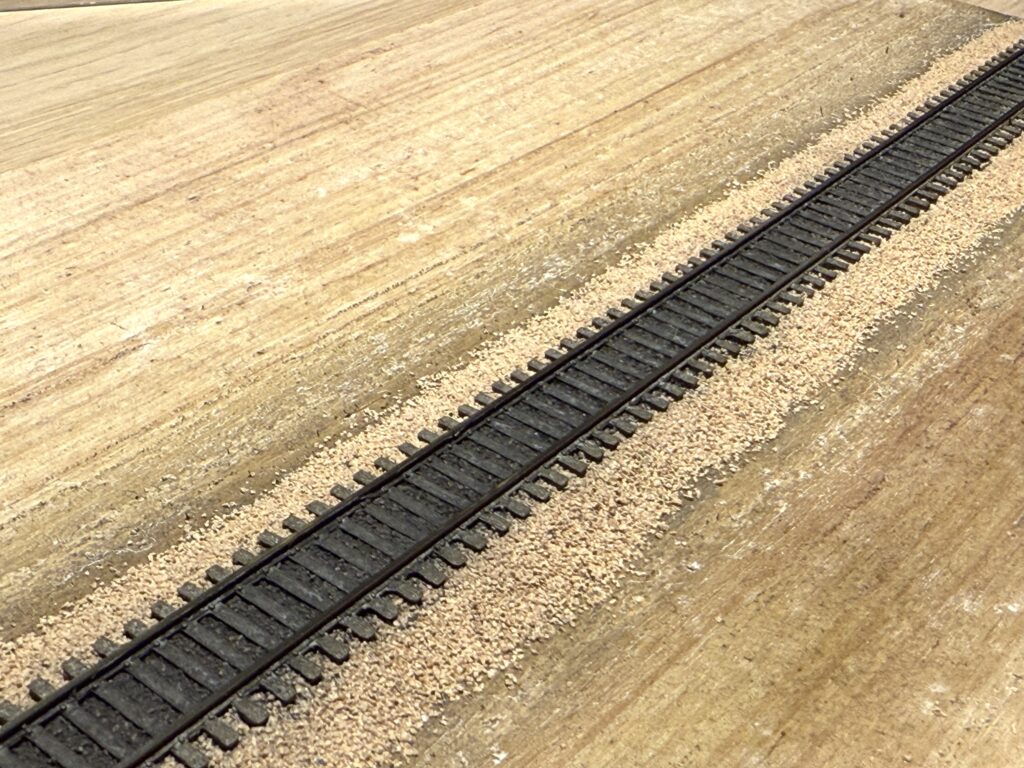
After the ballast was in place, I misted the tracks with a 40:60 mix of 99.9% isopropyl alcohol and water, letting it soak thoroughly. This helps break the water’s surface tension and allows the glue to penetrate the ballast. Once it was well soaked, I sprayed a 50:50 mix of water and Liquitex Matte Medium.
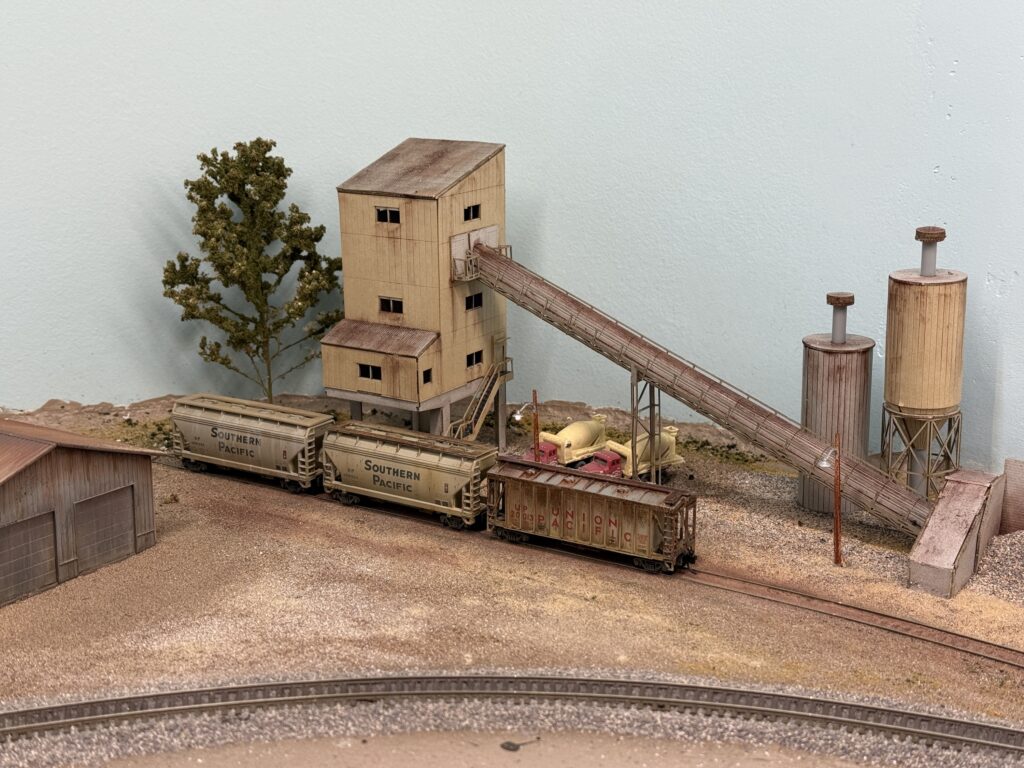
At the ConRock Ready-Mix Cement Plant, I used some tan terrain material to slightly bury the track and give it a more realistic, dirt-embedded look.
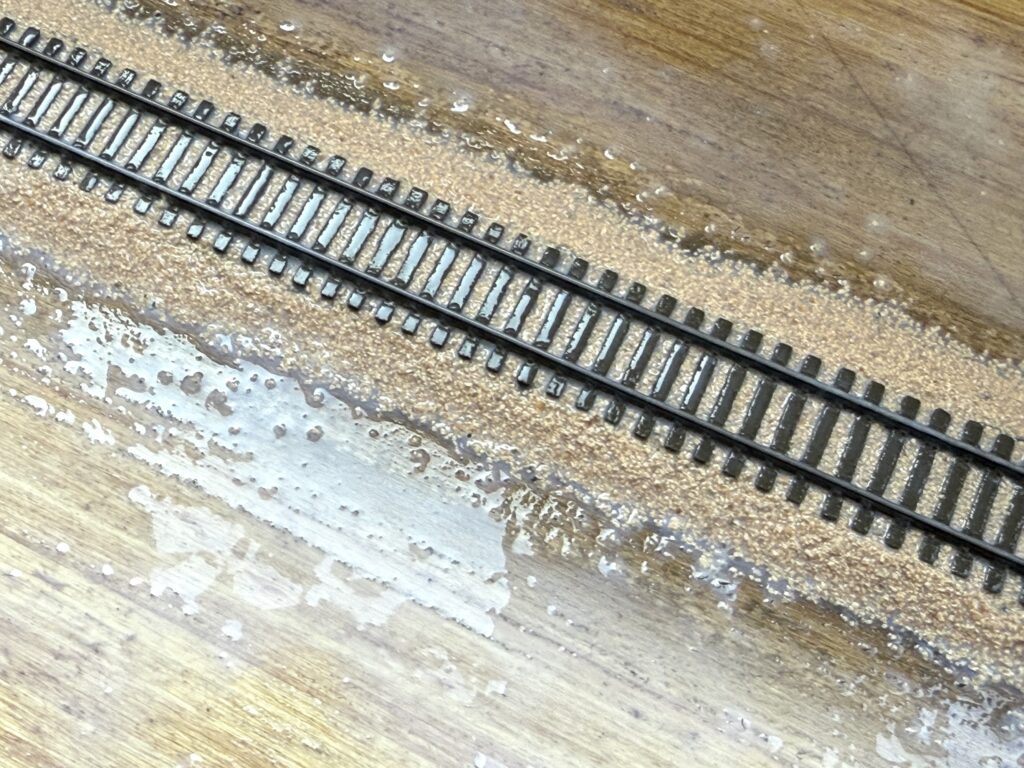
Track Weathering
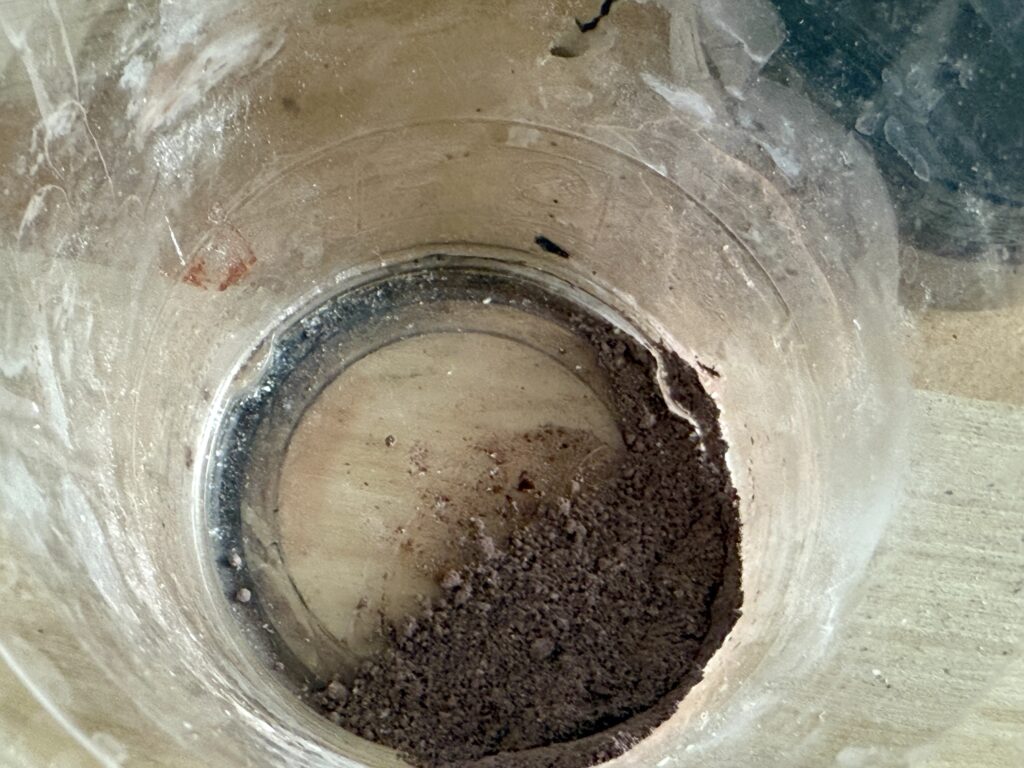
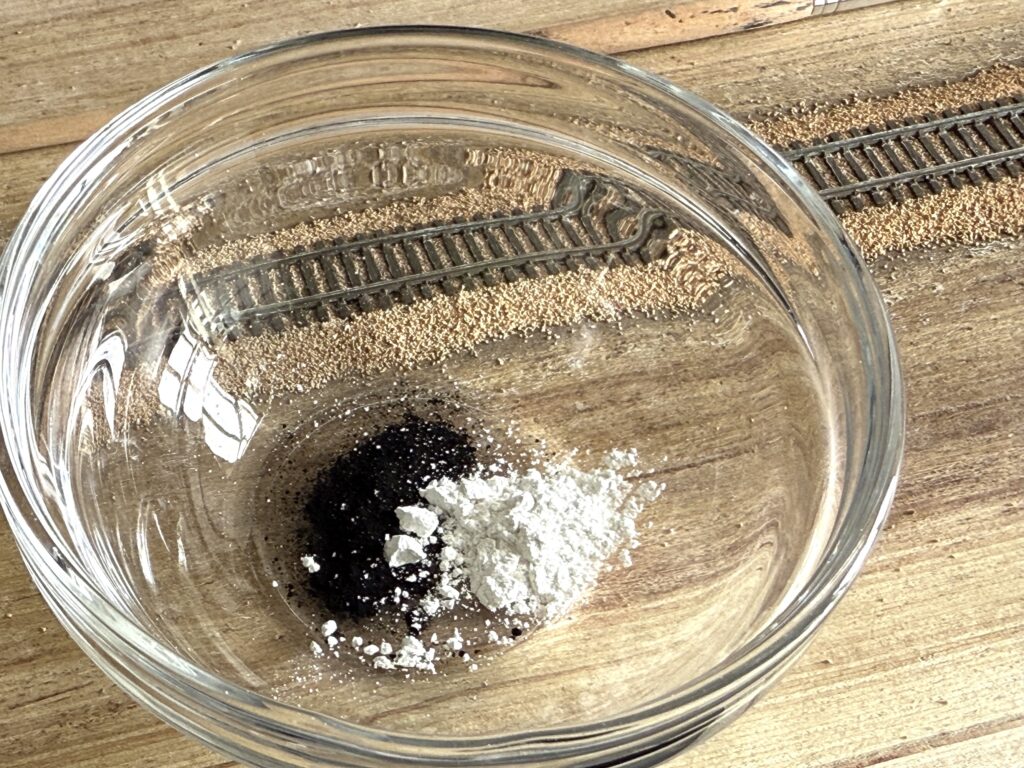
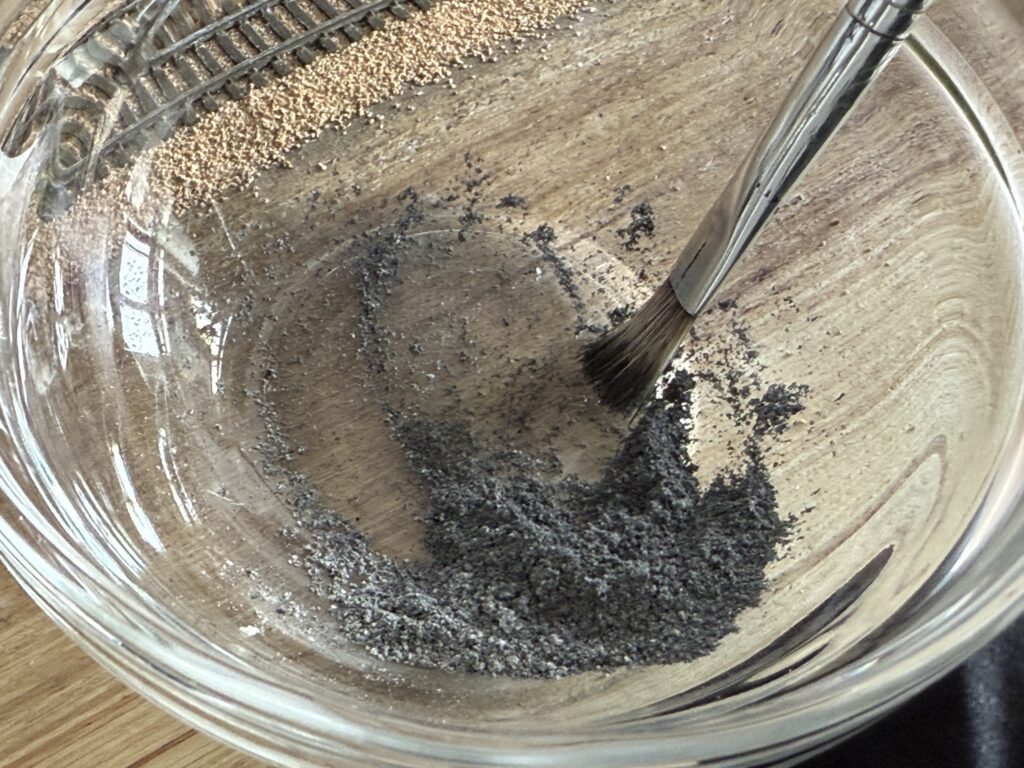
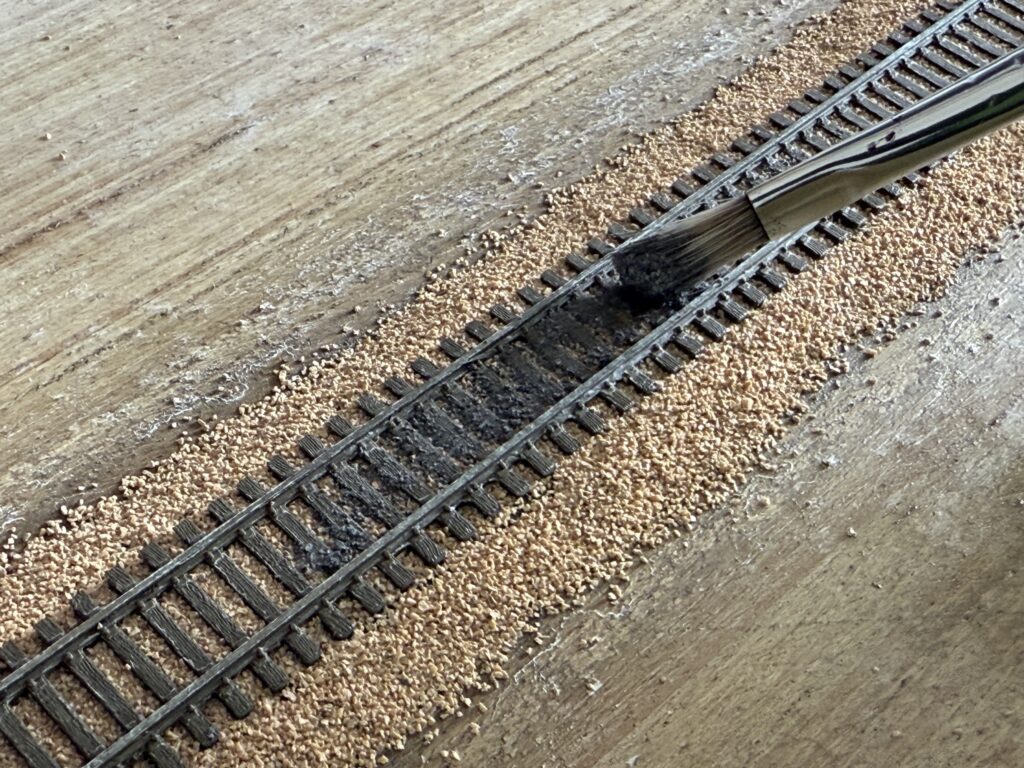
I weathered the area between the rails using a mix of plaster and black powdered pigments in a 2:1 ratio.
Then, I spread the mixture between the rails with a fairly stiff flat brush. Afterwards, I misted the area with water, which activated the plaster and sealed everything firmly in place.
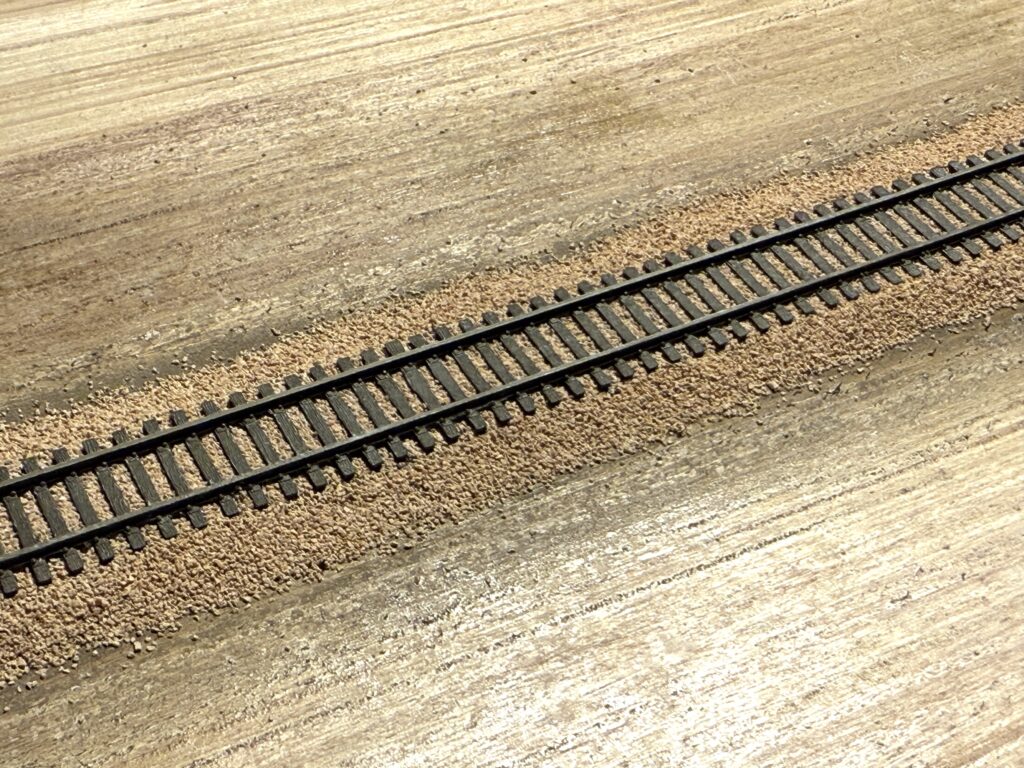
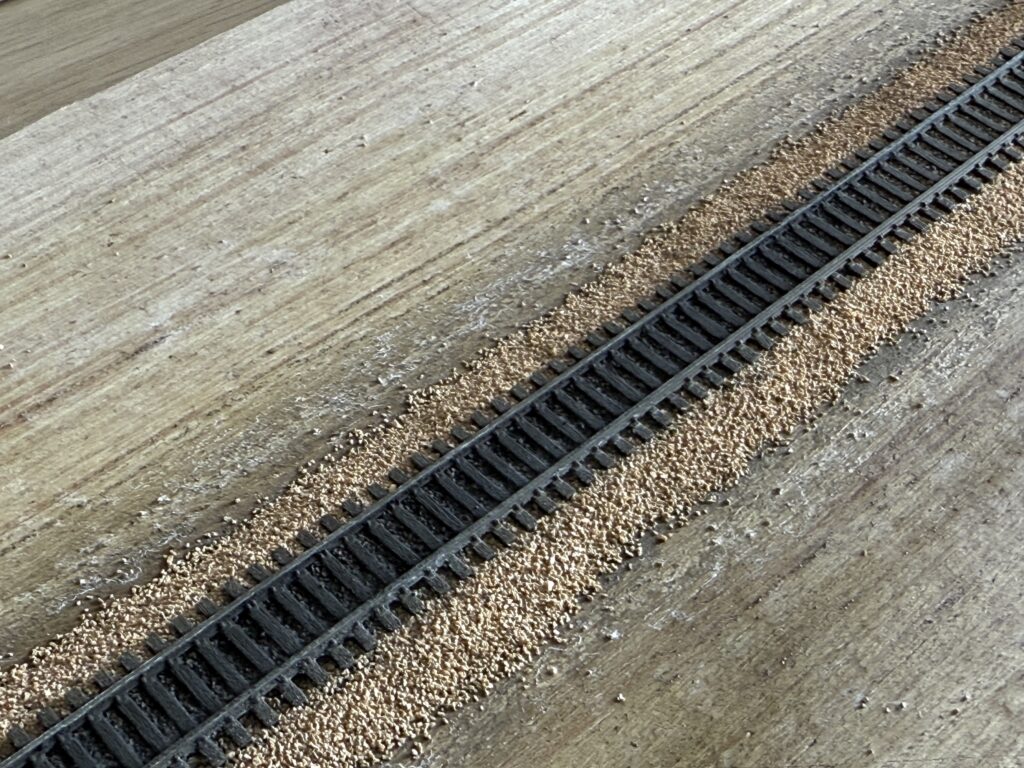
Here is a photo of the weathered track after the plaster of Paris and pigment mix had fully dried.
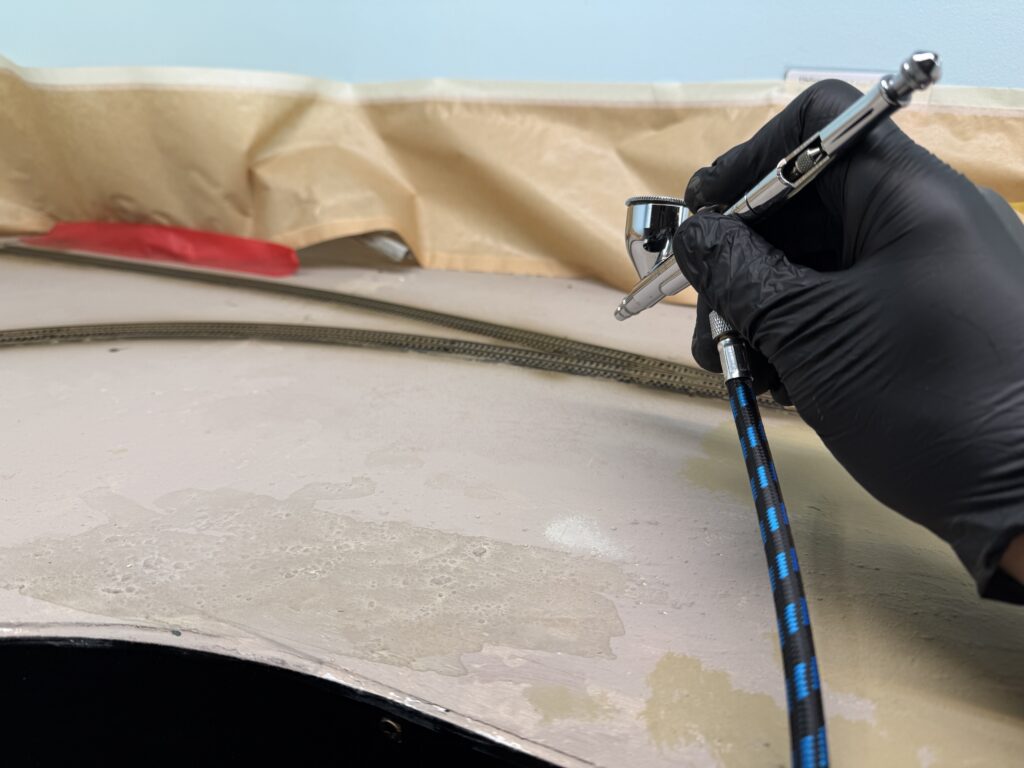
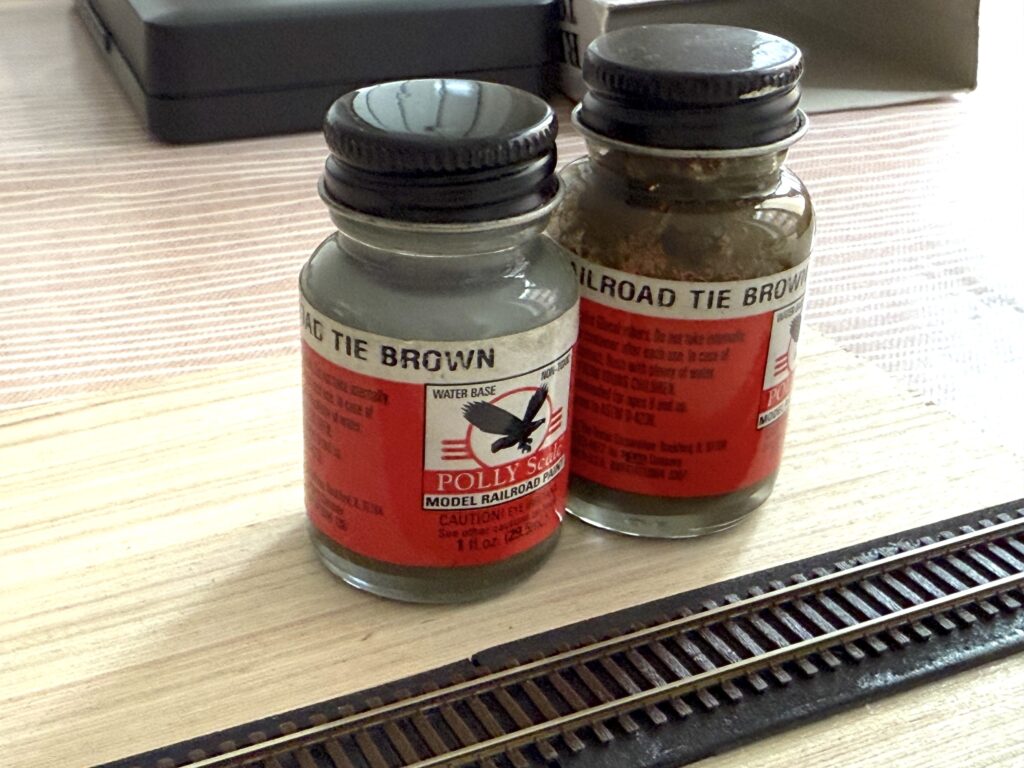
Before ballasting, I usually paint the track with a brown-gray color.
I found a fifteen-year-old bottle of Polly Scale Railroad Tie Brown that I had used on my previous SP Coast Line layout to paint the track.
The paint had aged very well, so I was able to use it and airbrush it over all the tracks.
I masked the areas where the points hinge and where they touch the stock rails.
Afterwards, I used a fine paintbrush to carefully paint the masked sections, making sure the paint did not interfere with electrical contact.
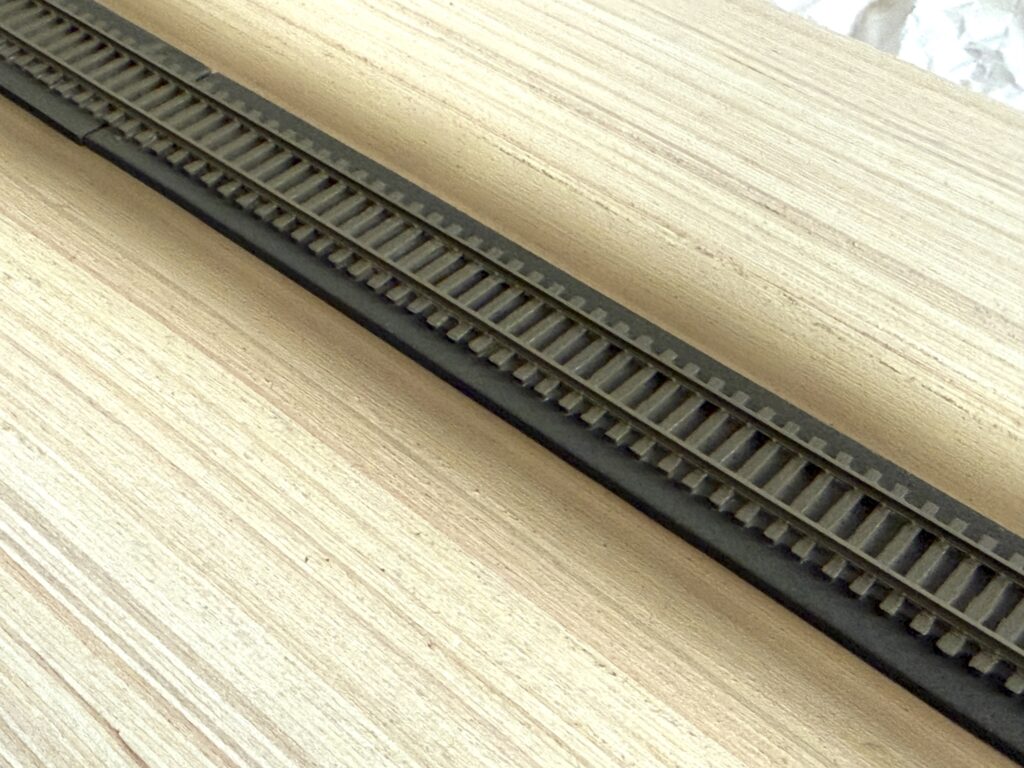
A painted track makes a huge difference in the final appearance of a layout. Even a light coat of color immediately tones down the unrealistic shine of the raw plastic ties and the bright nickel-silver rails.
The Atlas code 55 ties, in particular, have a uniform brownish tone that looks toy-like until blended with a more natural brown-gray wash. Painting before ballasting gives the scene a visual foundation. Rails, ties, and ballast will later merge into a single, believable texture.
Once weathered and ballasted, the track will no longer stand out as a manufactured part, but rather blend seamlessly into the landscape, enhancing the realism of the entire scene.
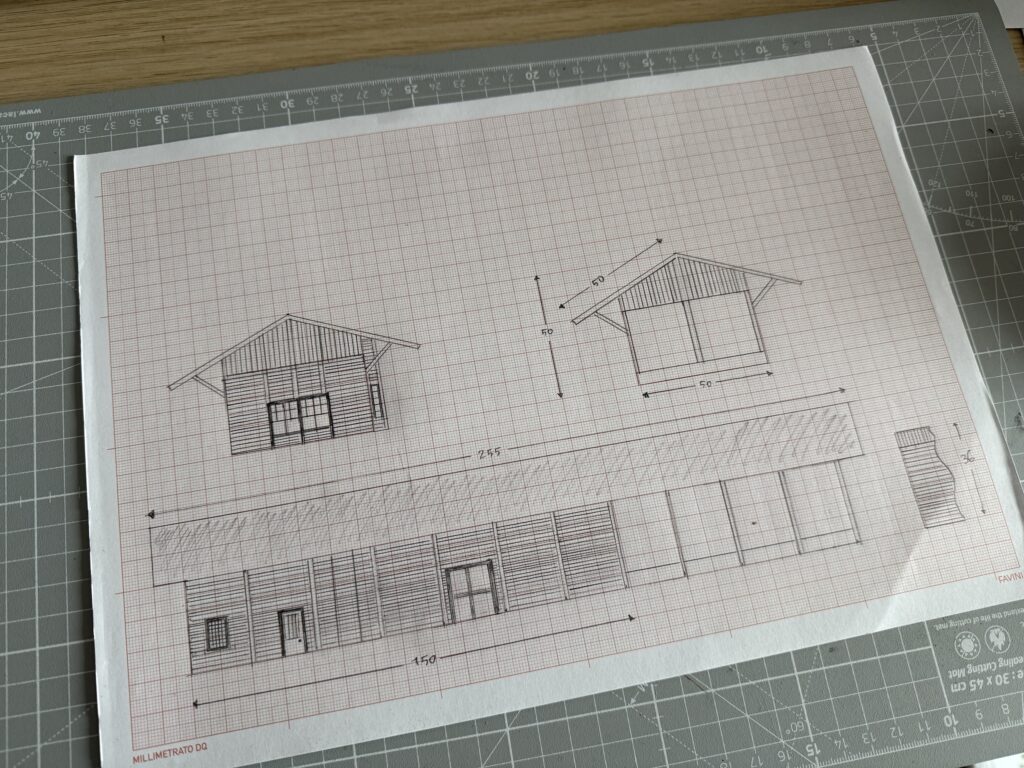
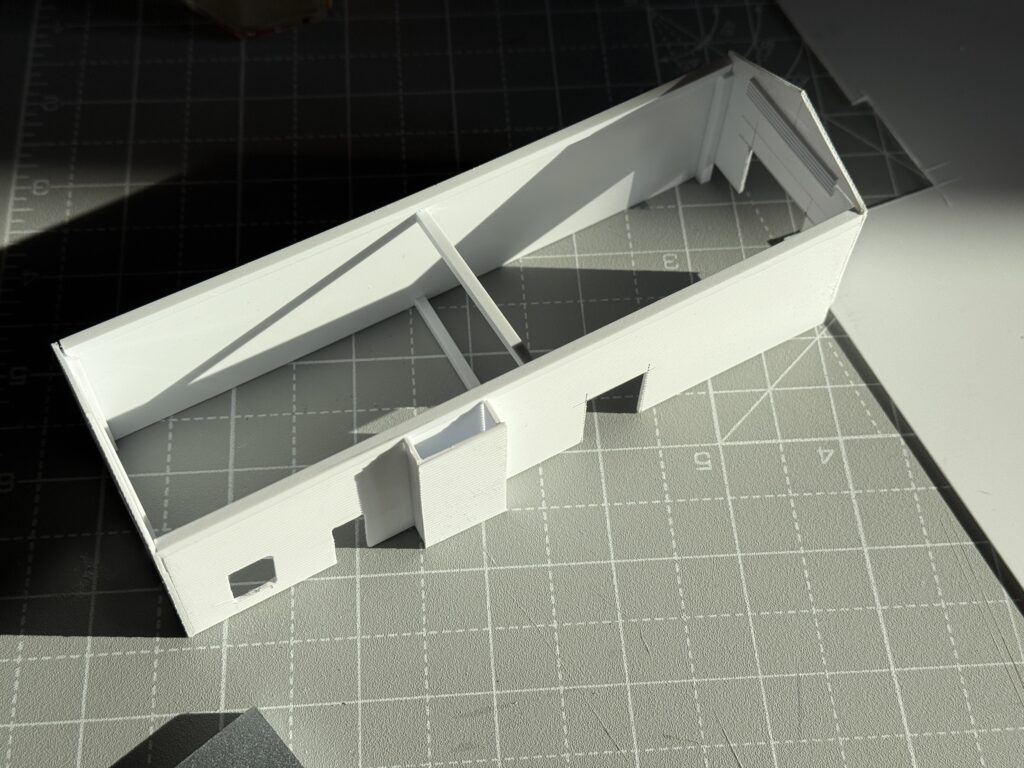
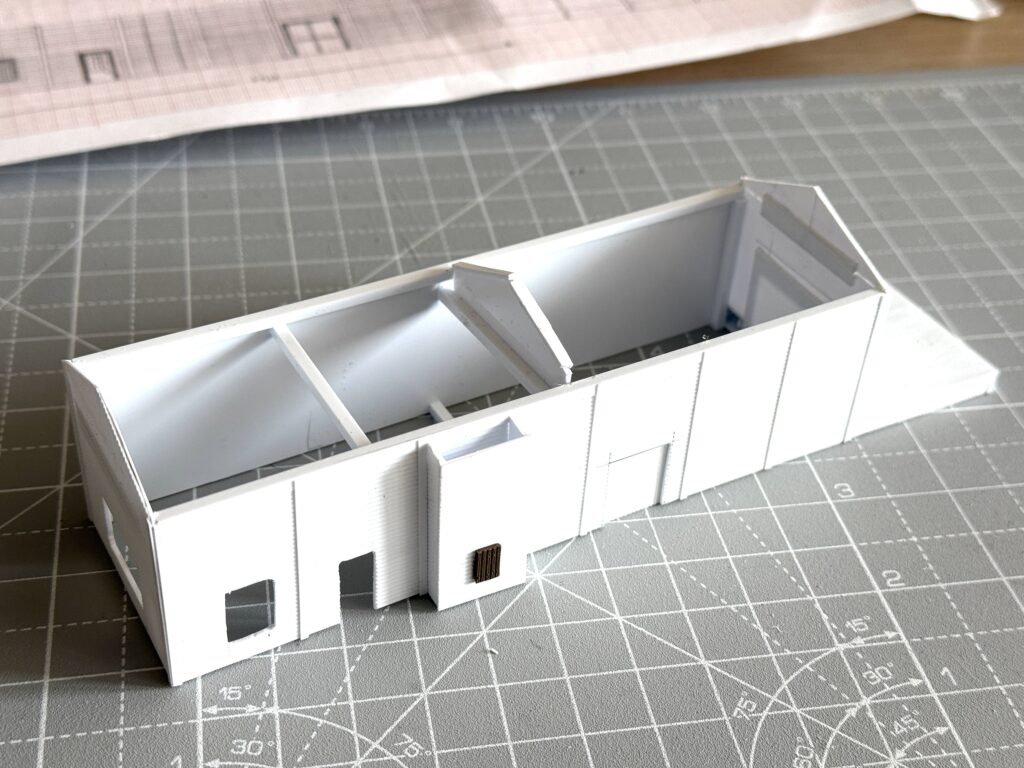
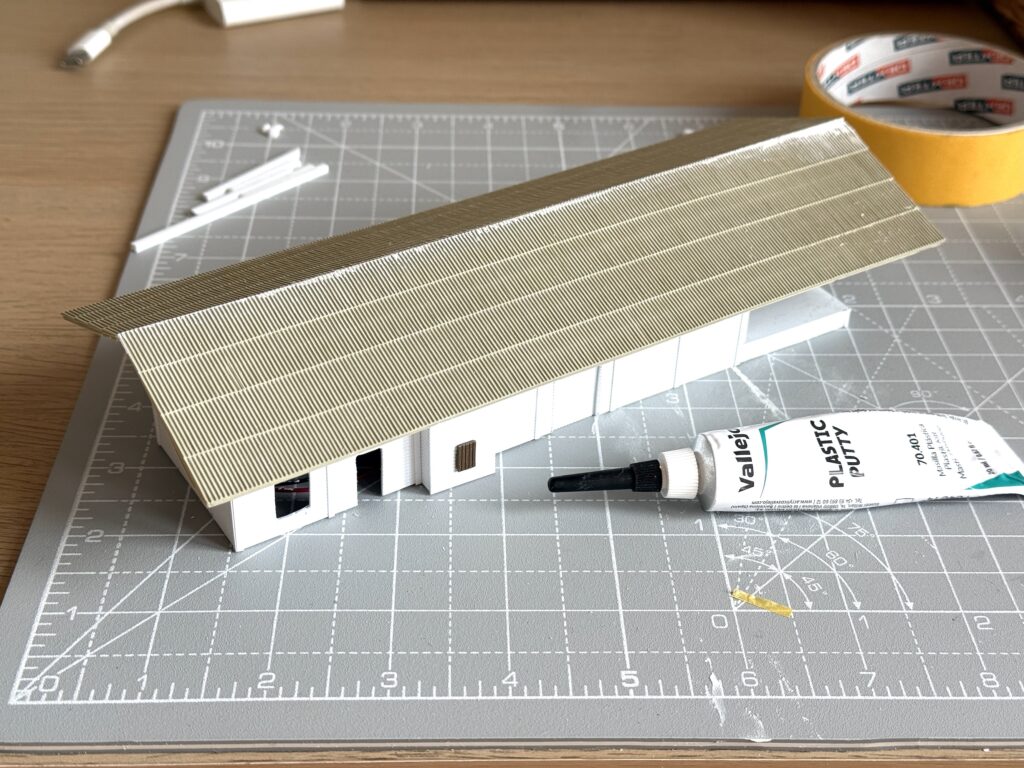
Step-by-step on scratchbuilding a structure with styrene
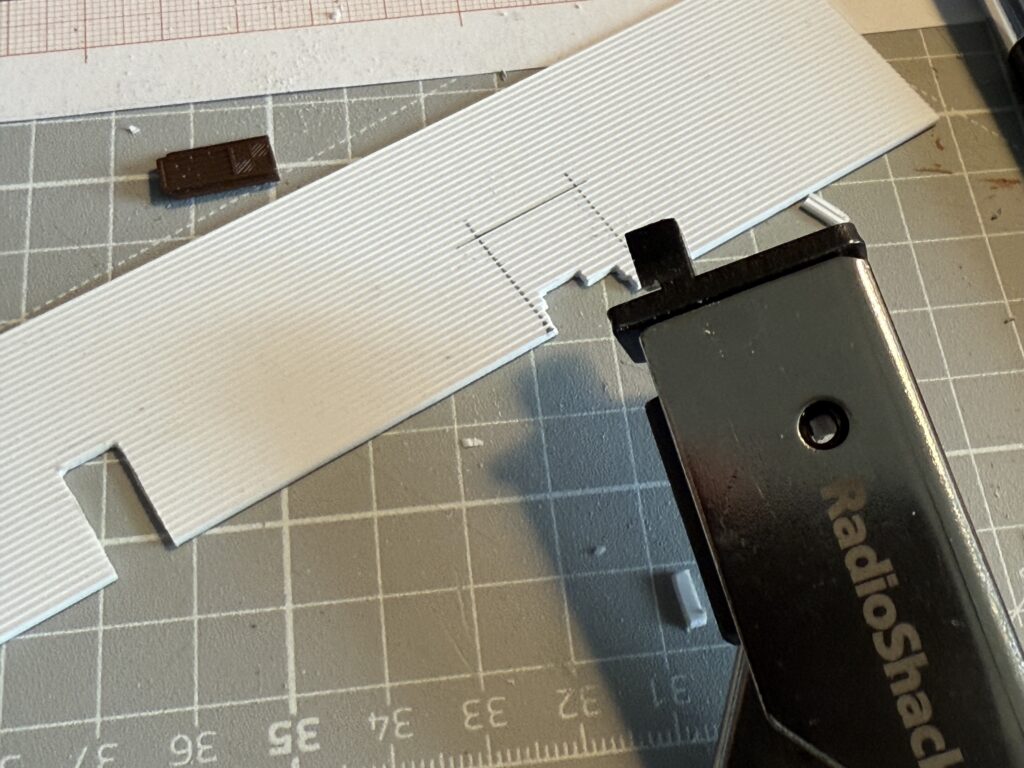
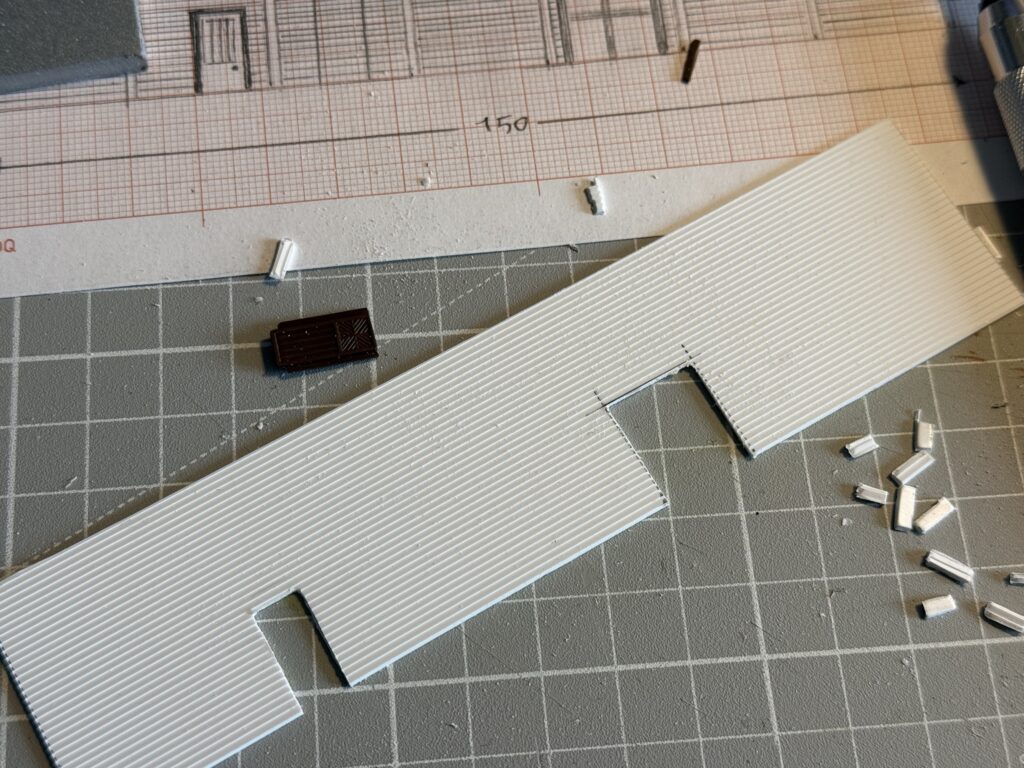
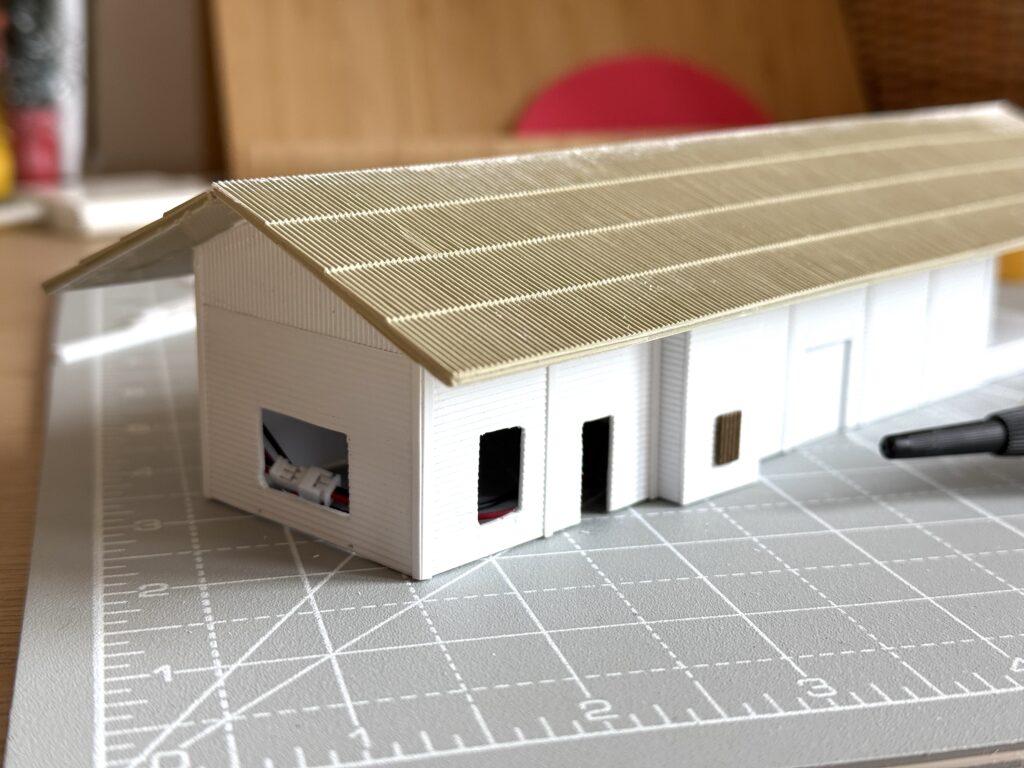
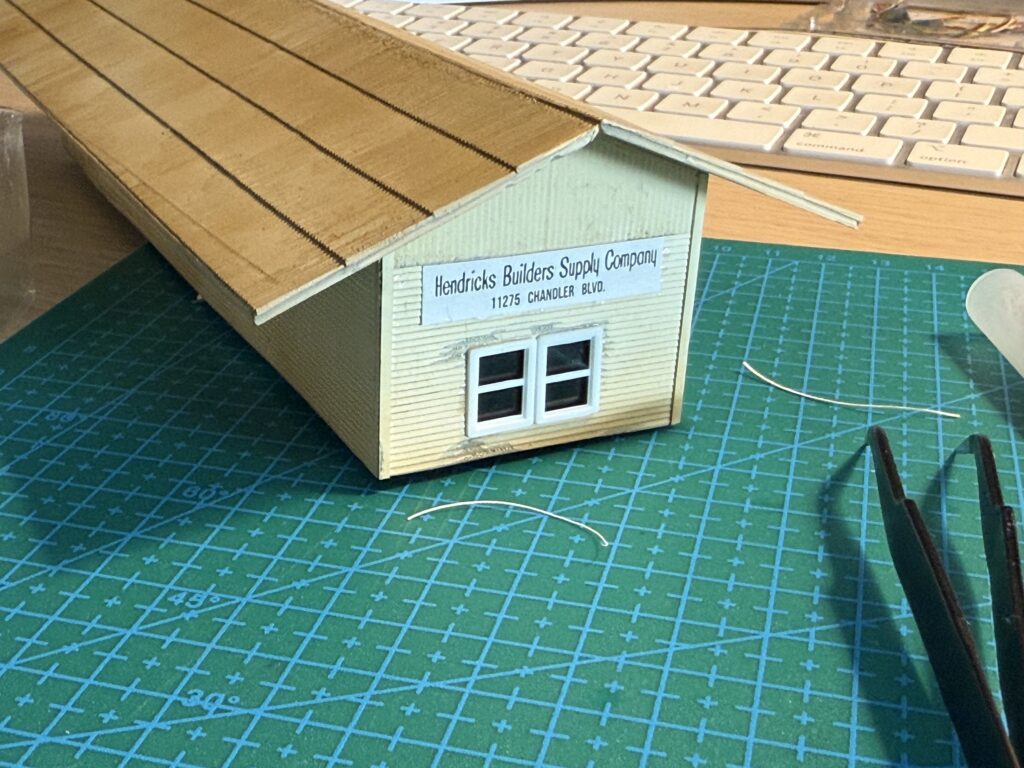
I had wanted to embark into scratchbuilding a styrene structure for years but never did it properly. This time, I decided to model the Hendricks Builders Supply Company in Lankershim/North Hollywood.
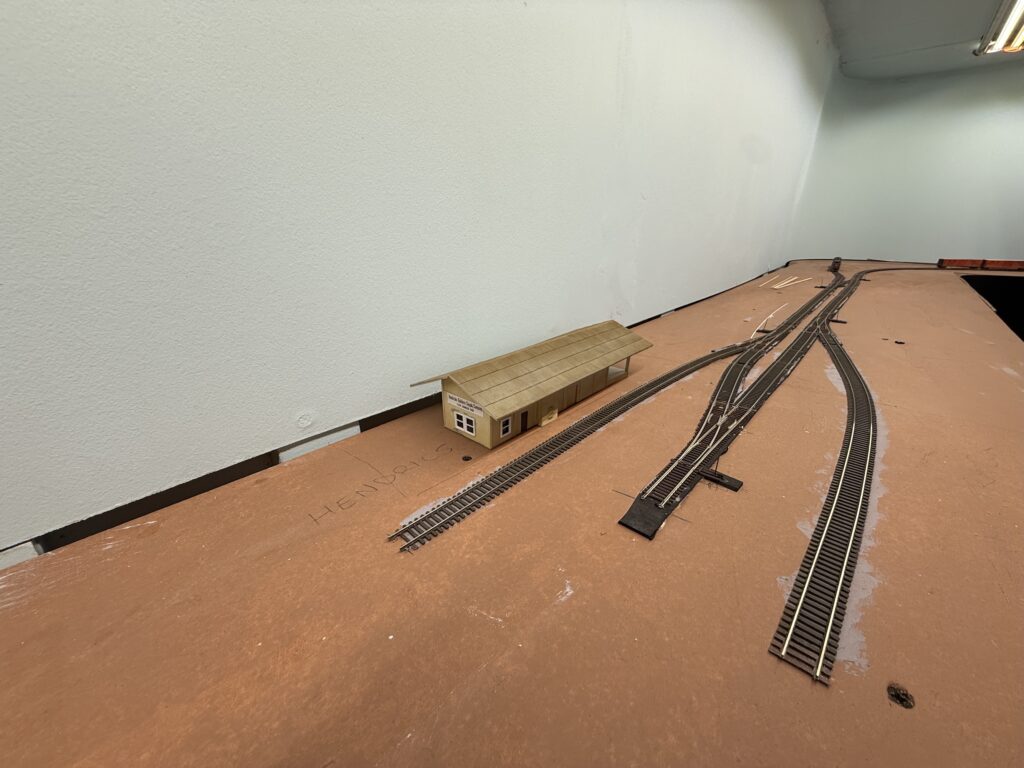
This structure will be placed on the layout according to the trackplan.
Drawing
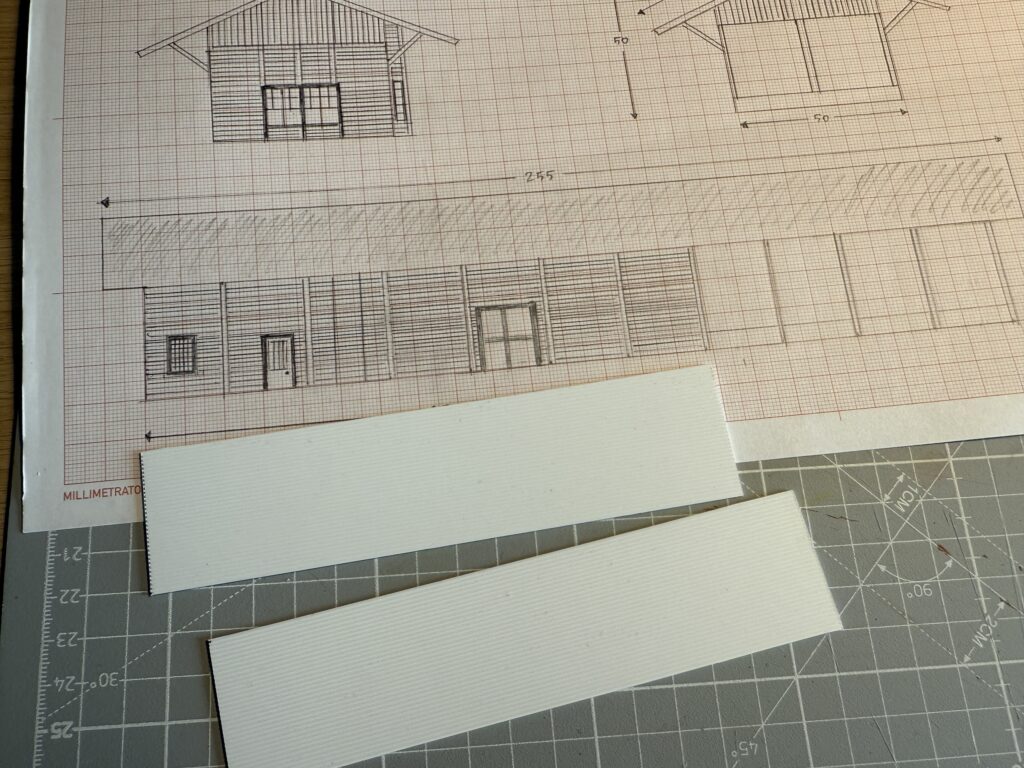
I started by drawing a rough plan on millimeter graph paper.
Two 2.5 mm strips also reinforce the middle of the structure.
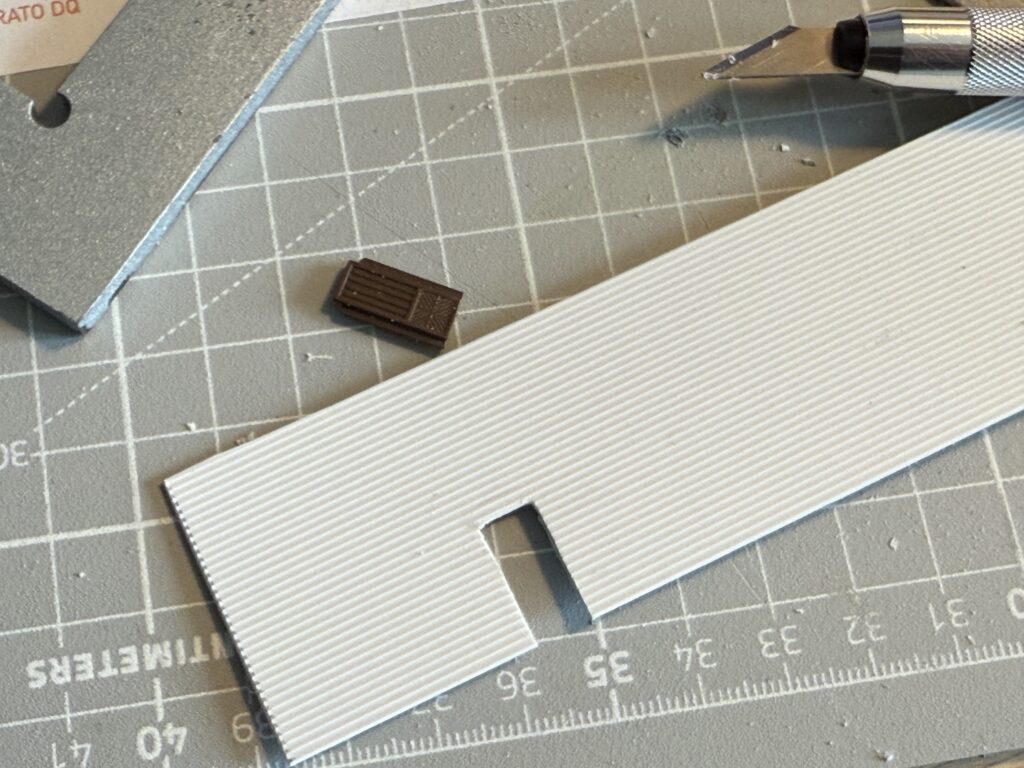
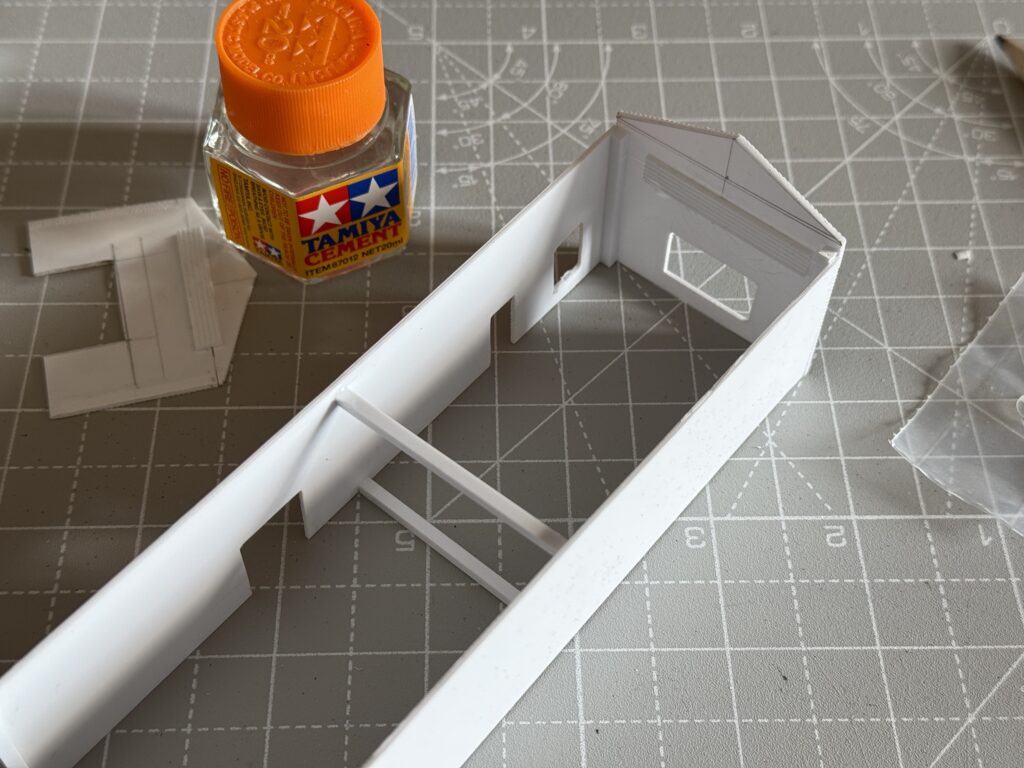
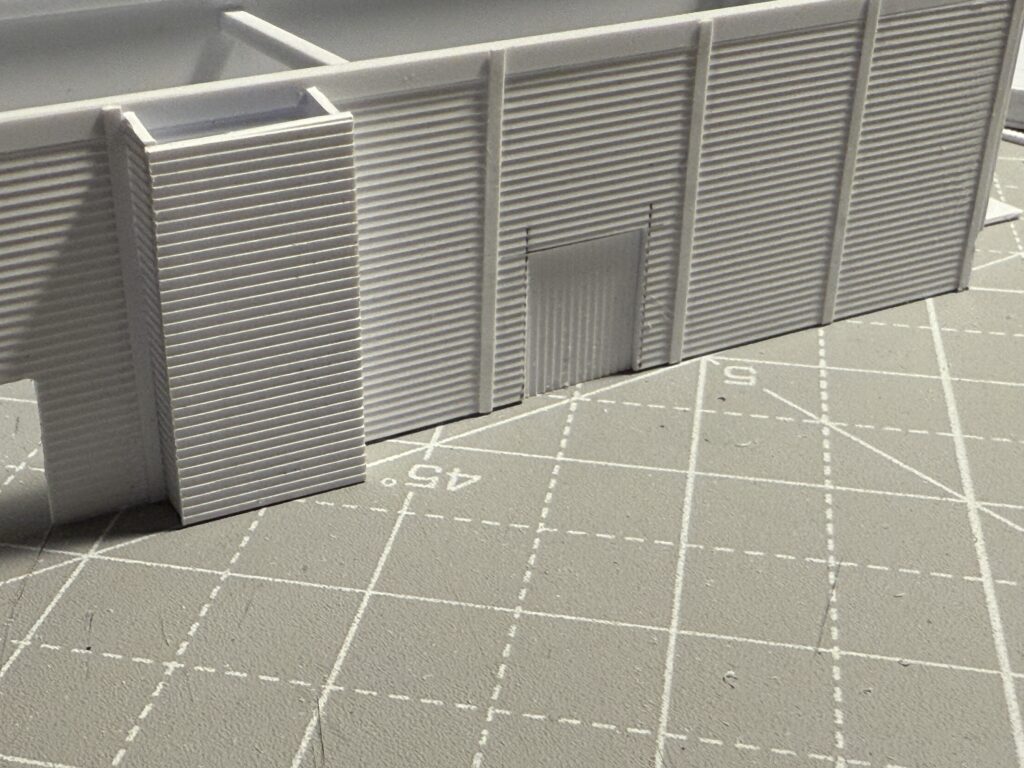
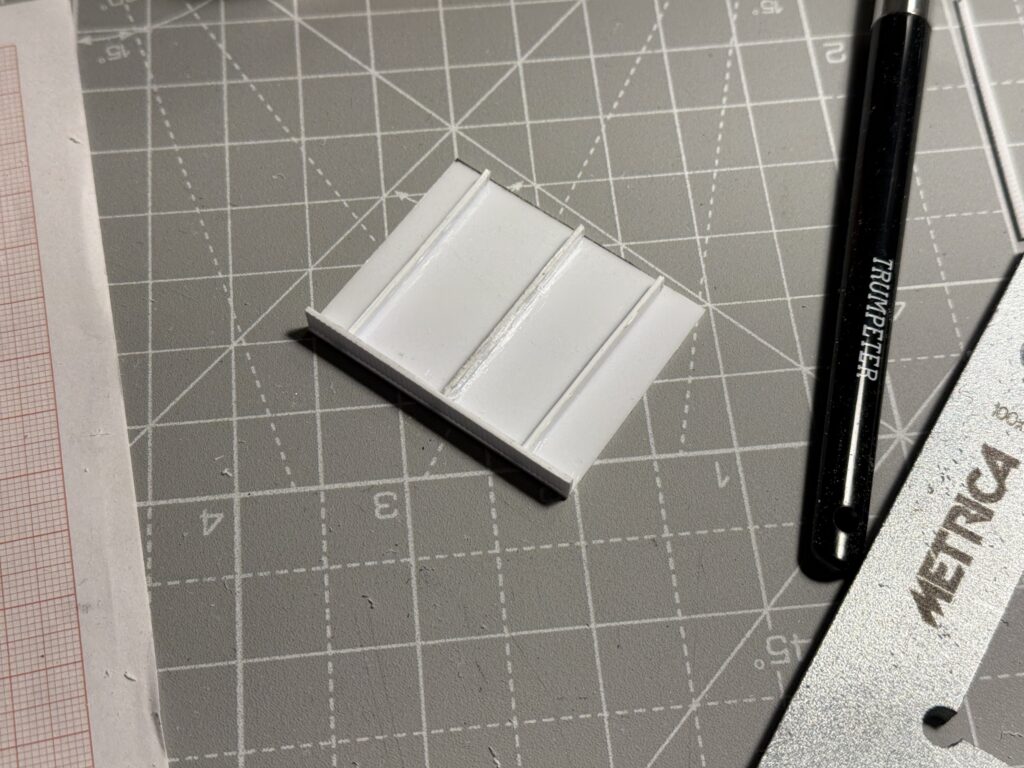
I made the wooden door from clapboard styrene sheet and glued it inside the wall. On the outside, I added vertical styrene strips for detail. For smaller pieces, I used Tamiya Extra-Thin Cement.
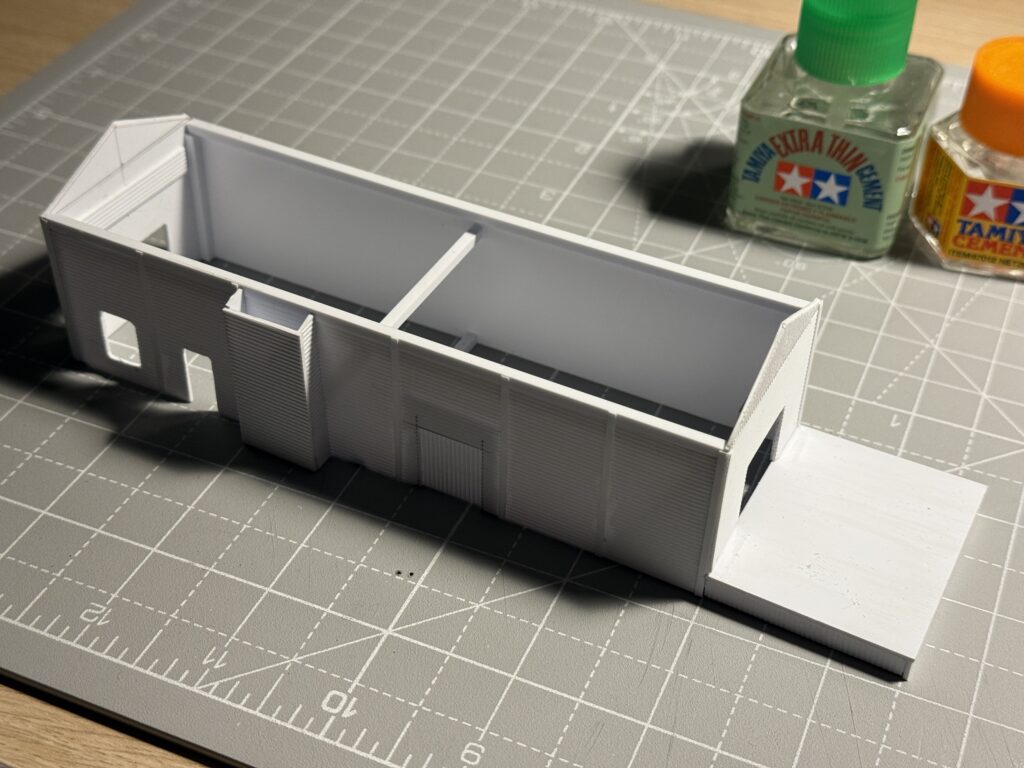
To strengthen the loading platform, I inserted reinforcement strips underneath.
Then, I glued the platform to the main structure.
Before adding the roof, I reinforced the center with a triangular styrene piece.
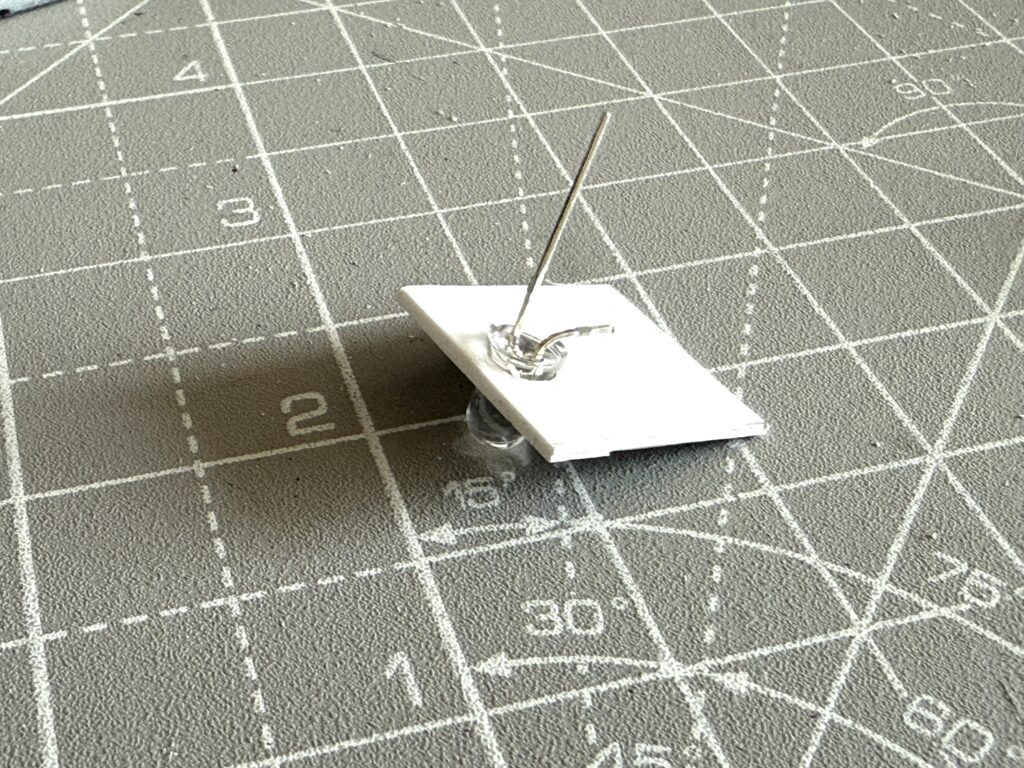
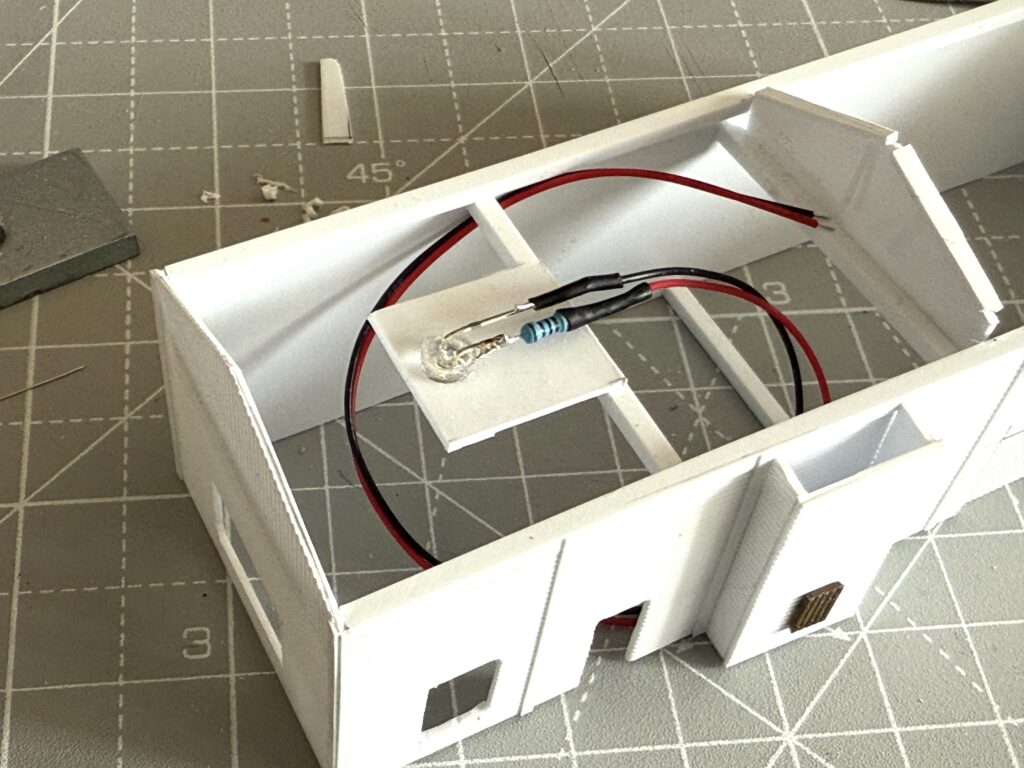
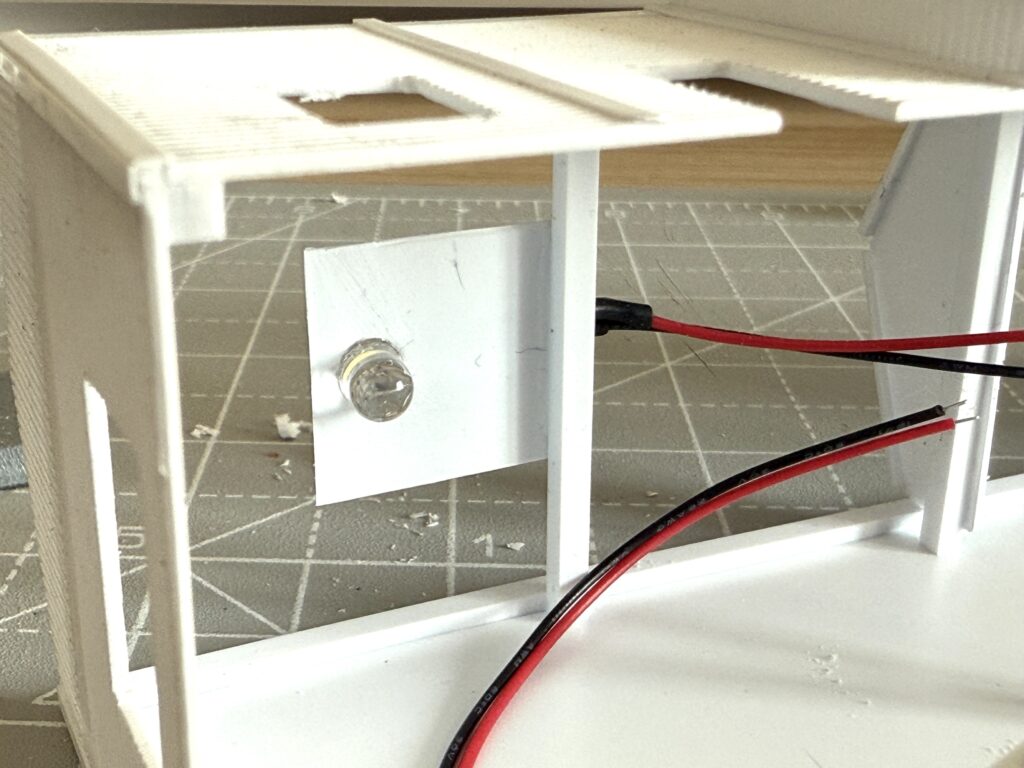
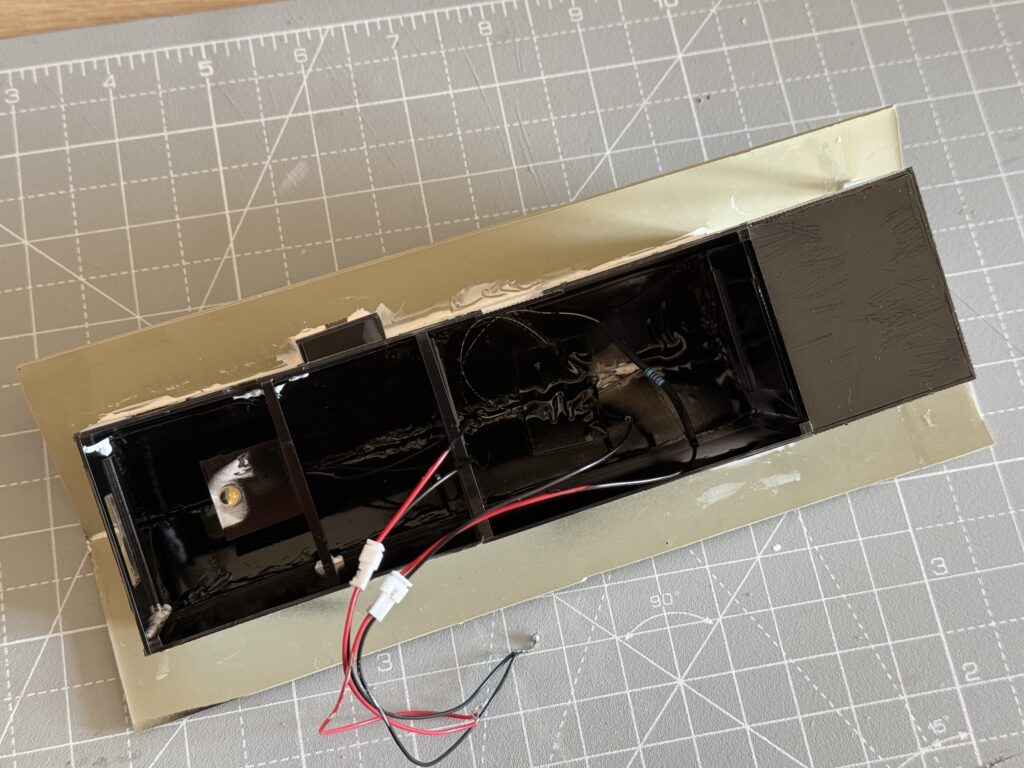
Scratchbuilding a structure: Lighting
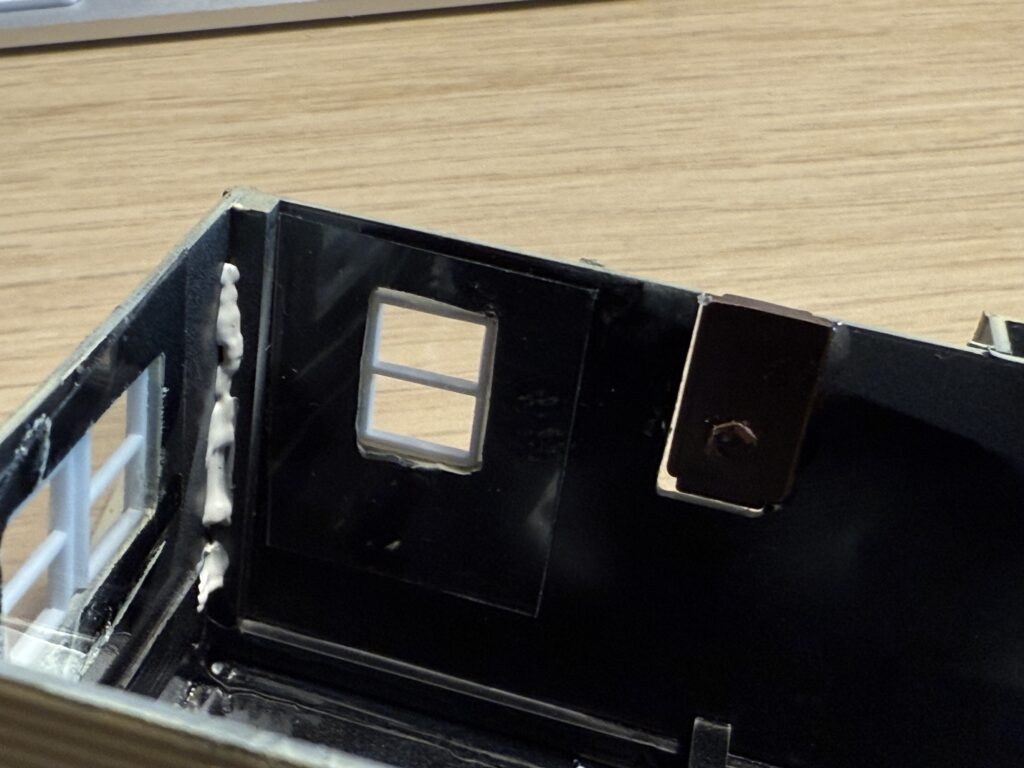
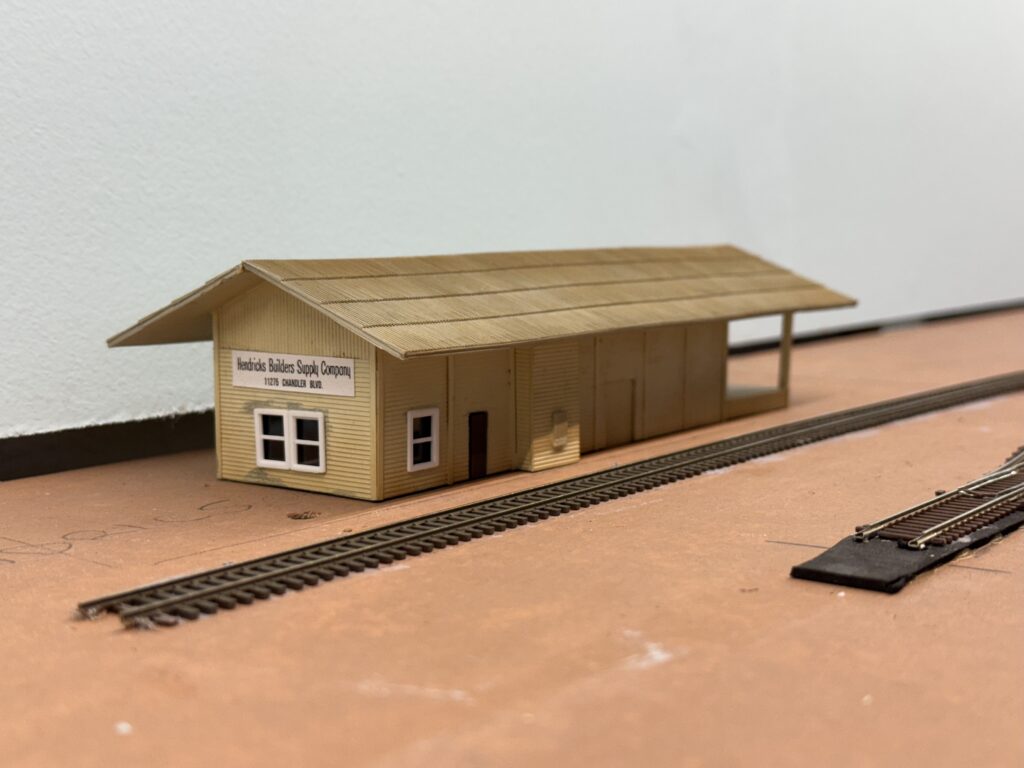
I wanted interior lighting, so I mounted a warm-white LED onto a small styrene support.
Roof
Then, I installed the roof. I used Vallejo Plastic Putty to fill a few gaps in the roof joint.
I spray-painted the interior walls black to prevent light from bleeding through the thin styrene.
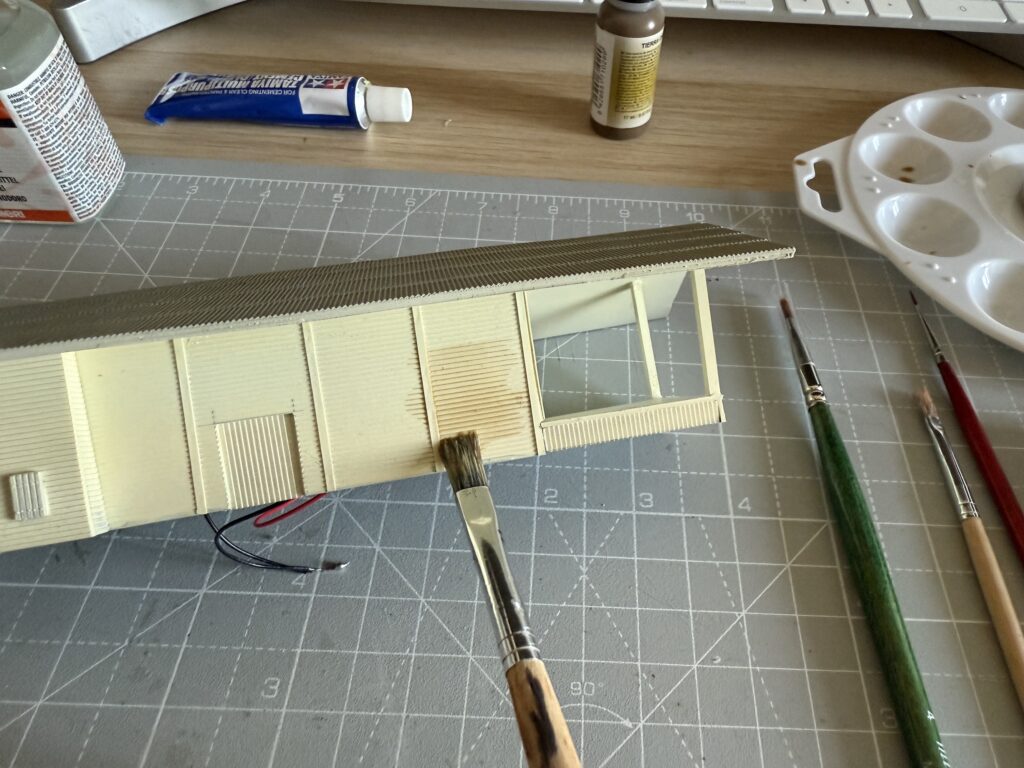
I started weathering the walls by applying a dark brown acrylic wash.
Next, I added more streaks of brown paint to weather the roof.
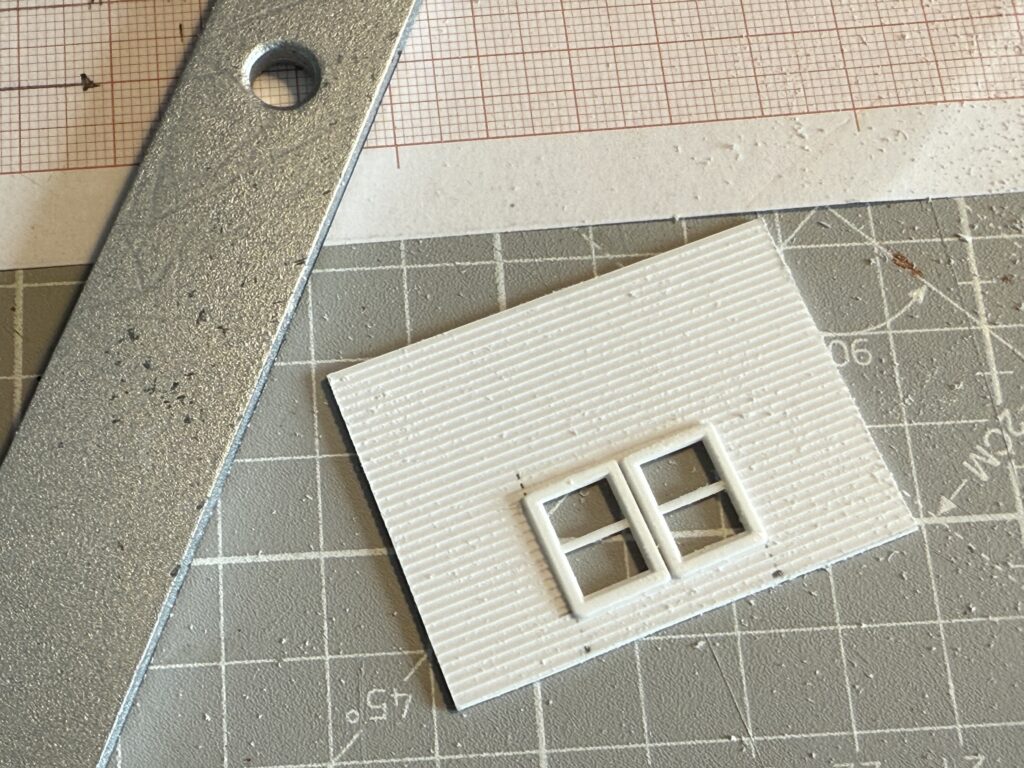
Then, I glued the windows and the door in place. I used products made by the German firm Auhagen.
I added a piece of clear plastic to the inside of the windows.
Next, I applied the “Hendricks Builders Supply” sign on the structure side.
Here is a test-fit on the final location on the Burbank Branch in N scale layout.
Scratchbuilding a structure has been a rewarding project. While I had scratchbuilt a few simple structures before, this is the first time I completed a slightly more complex one.
The structure is not a perfect replica of the real thing; however, it works well as a rail-served industry and adds to the visual experience during operating sessions.
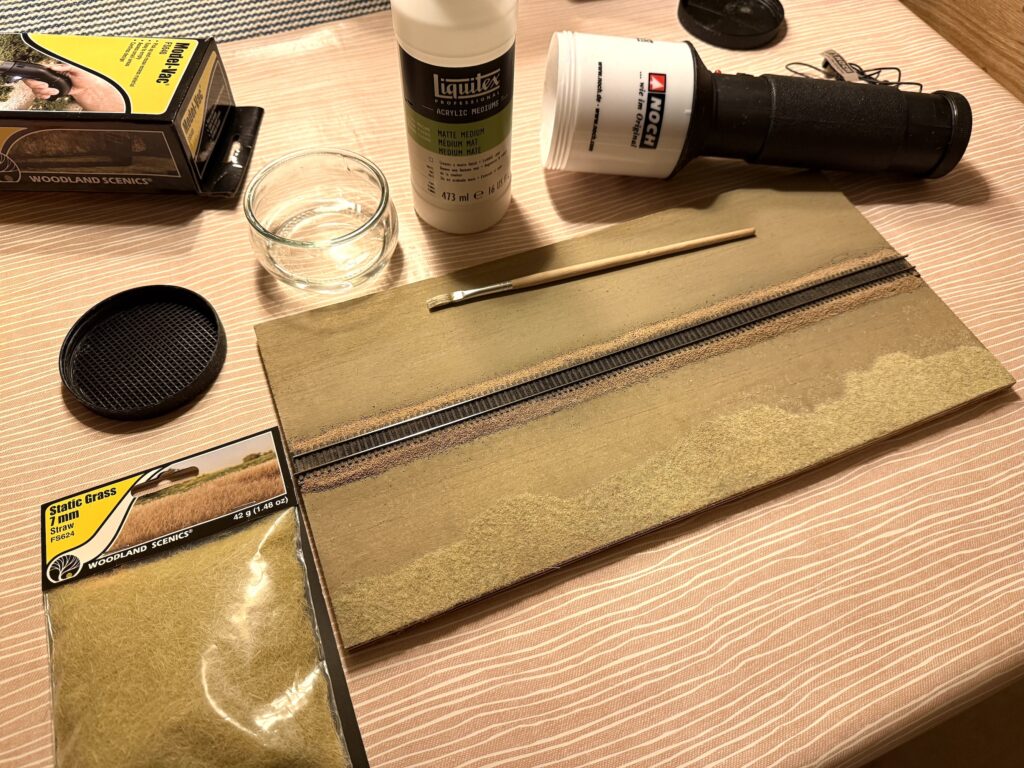
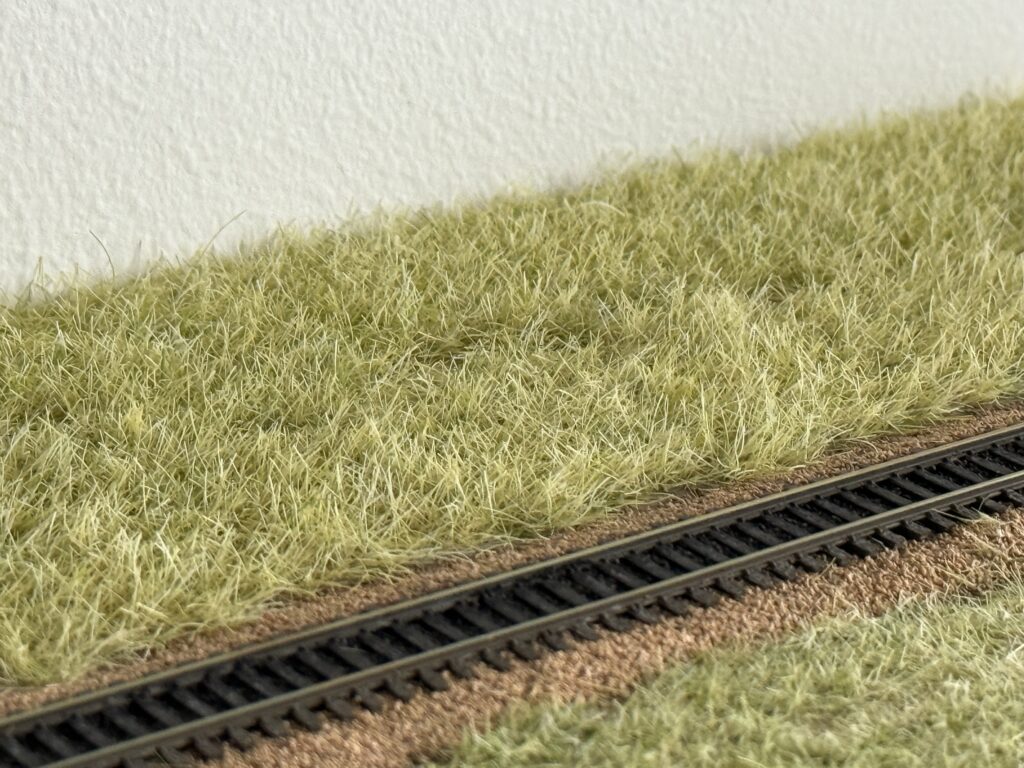
On this second part we’ll focus on applying static grass with a Noch Gras-Master 3.0 applicator.
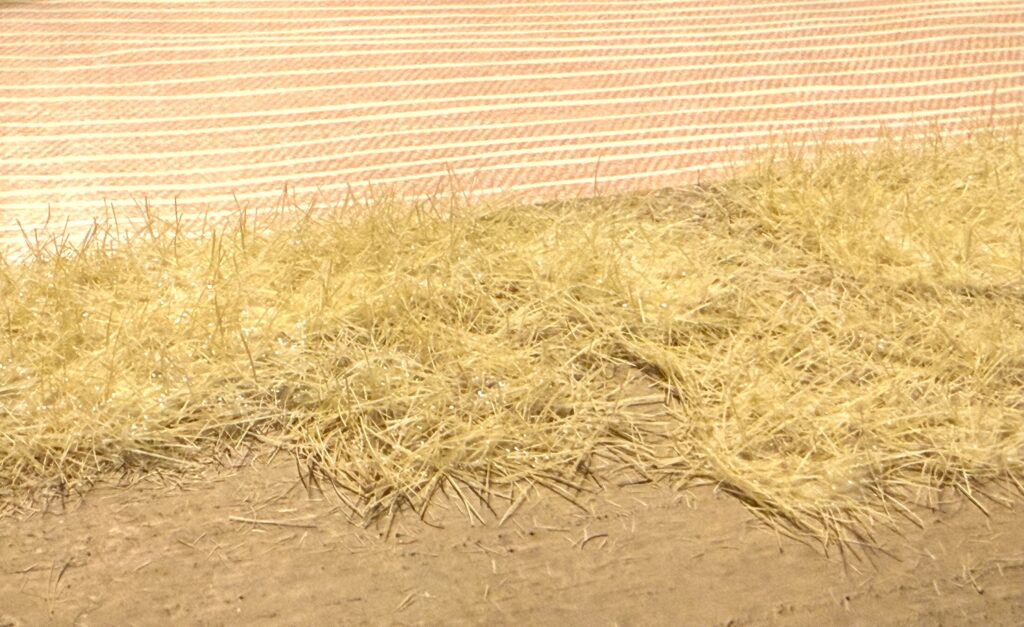
I applied a first layer of 2 mm Woodland Scenics Straw static grass mixed with some Noch 2 mm green static grass, using Liquitex Matte Medium to glue it in place. I brushed on a random patch of glue, then loaded the Gras-Master with static grass and applied it over the glued area.
After the glue had dried, I applied a second layer of matte medium in a random patchwork and added 7 mm Woodland Scenics Straw static grass.
To create some variety, I mixed Light Green and Straw Woodland Scenics static grass. I applied both 7mm and 4mm layers.
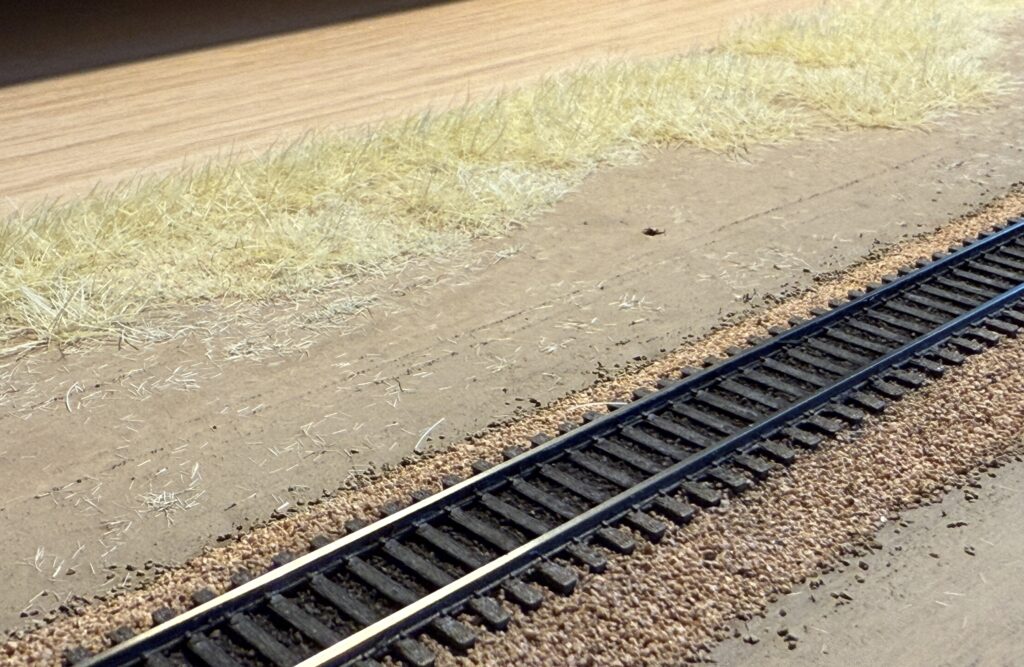
Honestly, the result wasn’t as good as I’d hoped. I had better outcomes on previous layouts. The problem seems to be the sieve filters I used for the 7mm grass – the finest one isn’t ideal. I also switched to a 9V DC external power supply instead of using a battery.
Alternative Sieves and External Power Supply
Here’s the result of applying a mix of Light Green, Medium Green, and Straw static grass in roughly random proportions. I applied separate layers of 7mm and 4mm grass in different spots. I also kept the ground clip close to the applicator and moved it along during application.
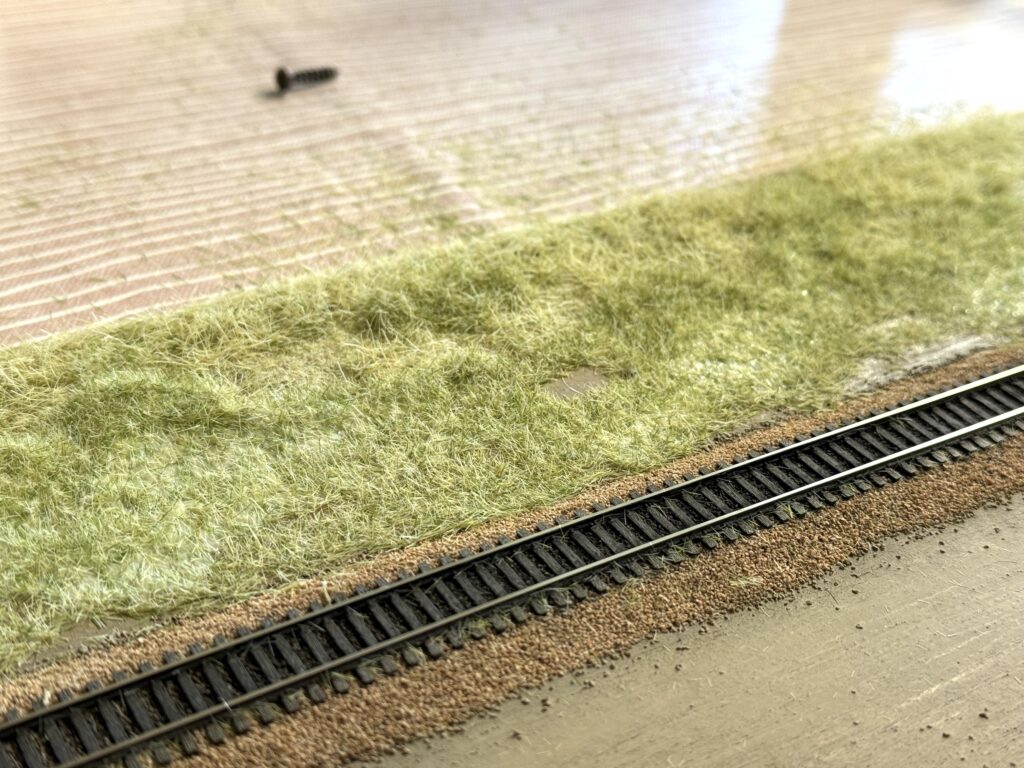
Overall I am quite satisfied, but I wanted to add more variety to the grass. A few touch ups were necessary.
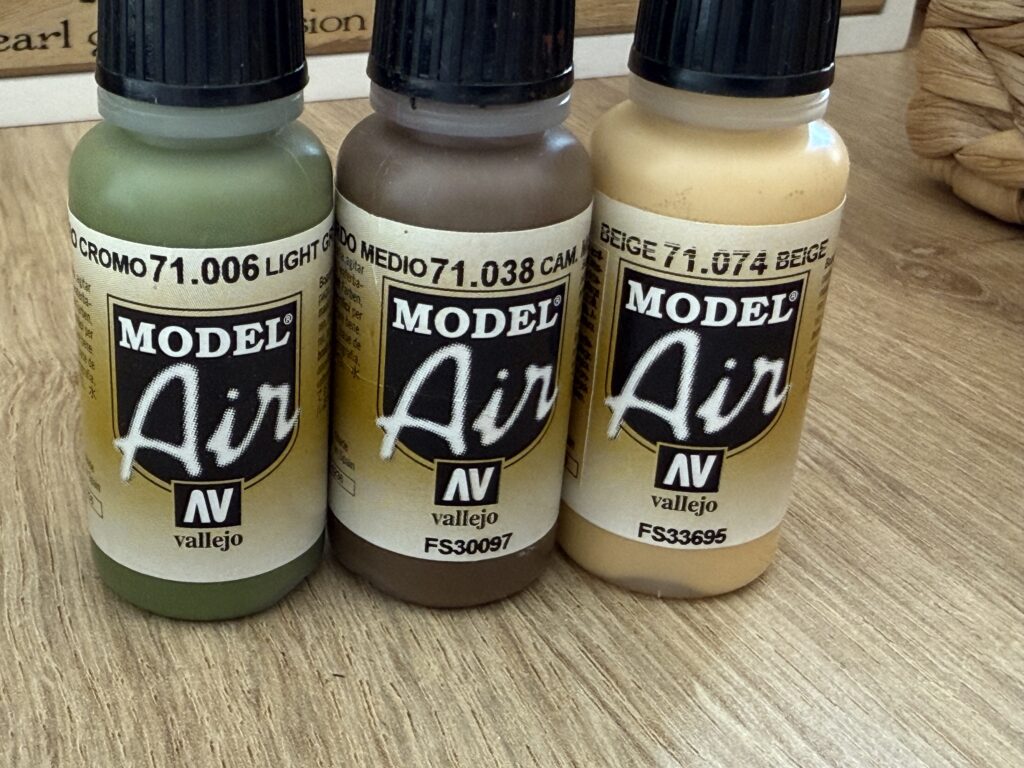
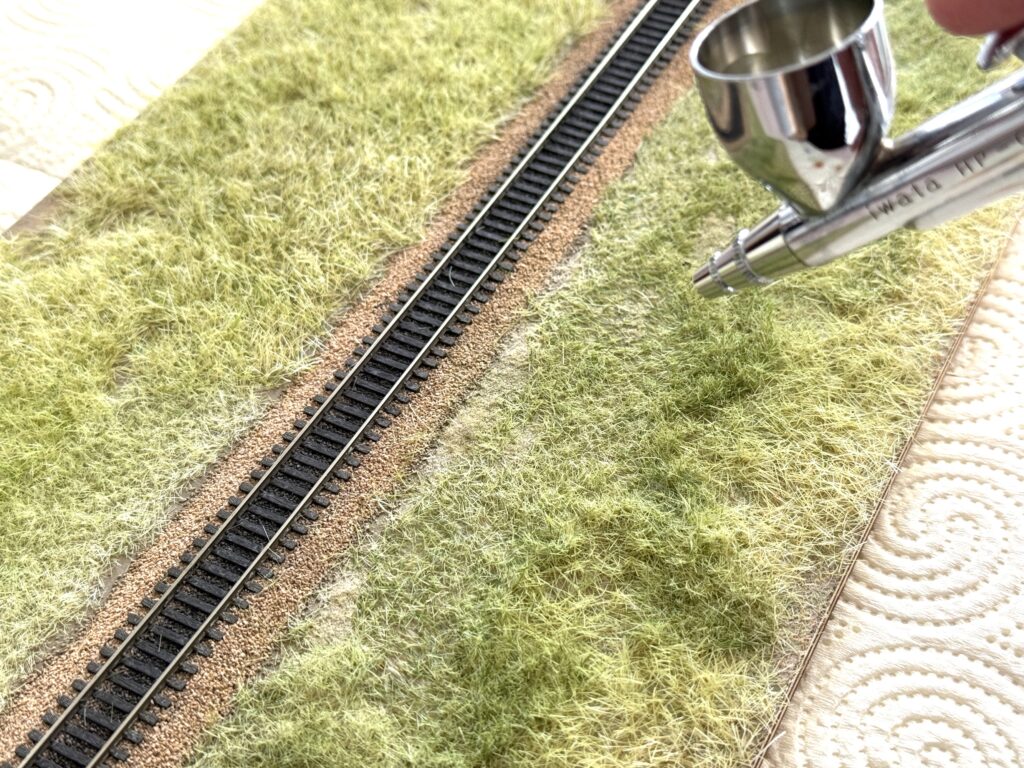
I started with the green, then added beige, followed by brown. I sprayed a light, diluted coat in a random pattern to highlight a few spots here and there.
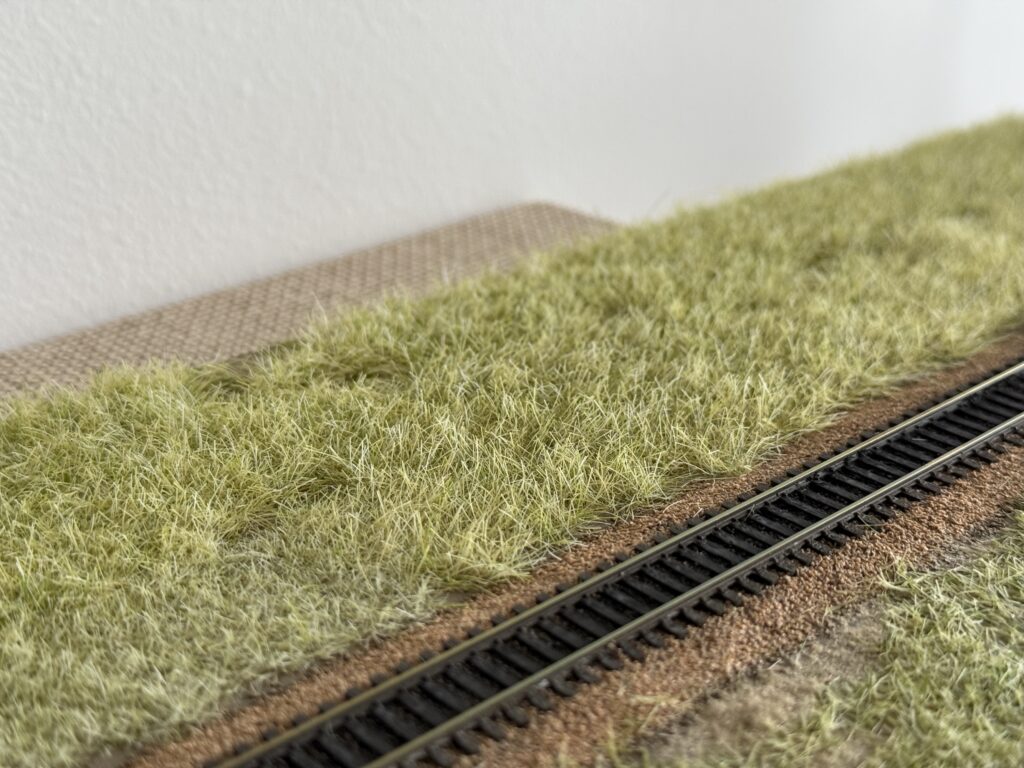
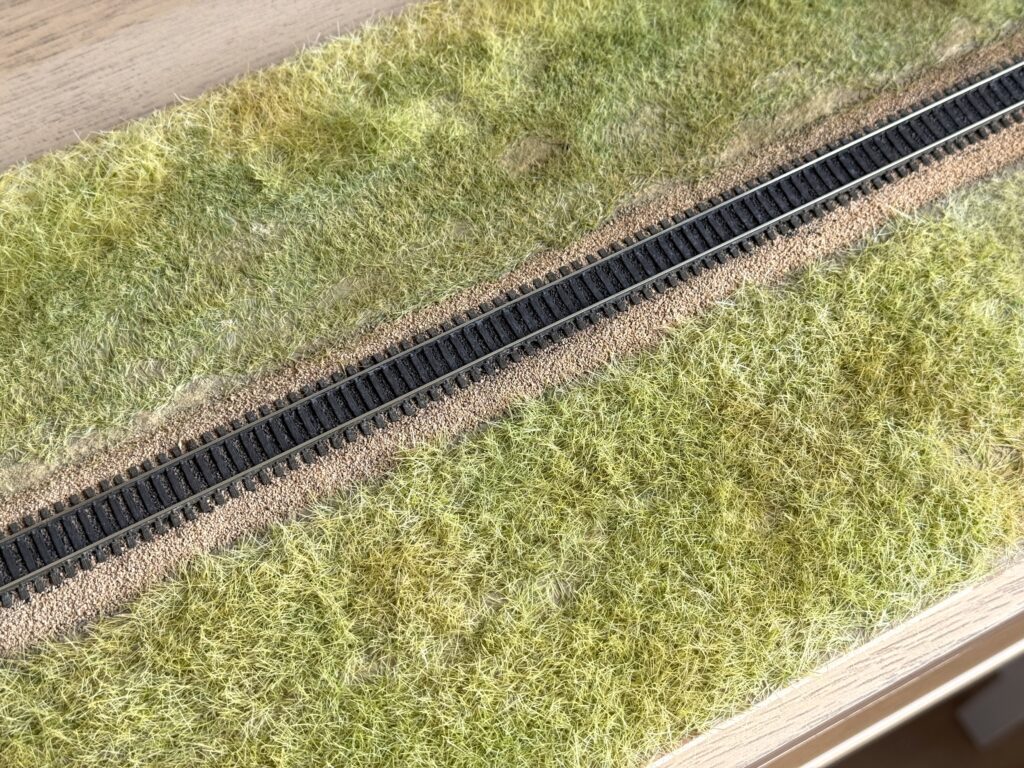
N Scale Diorama: Grass / Conclusions
I like the result. The final airbrush touch-ups helped break up the uniform color and add more variation and more realism.
Once again, working on an N Scale diorama proved to be a smart choice for experimenting with static grass. Before committing to applying grass on the full SP Burbank Branch in N scale layout, I fine-tuned the technique on a disposable base.
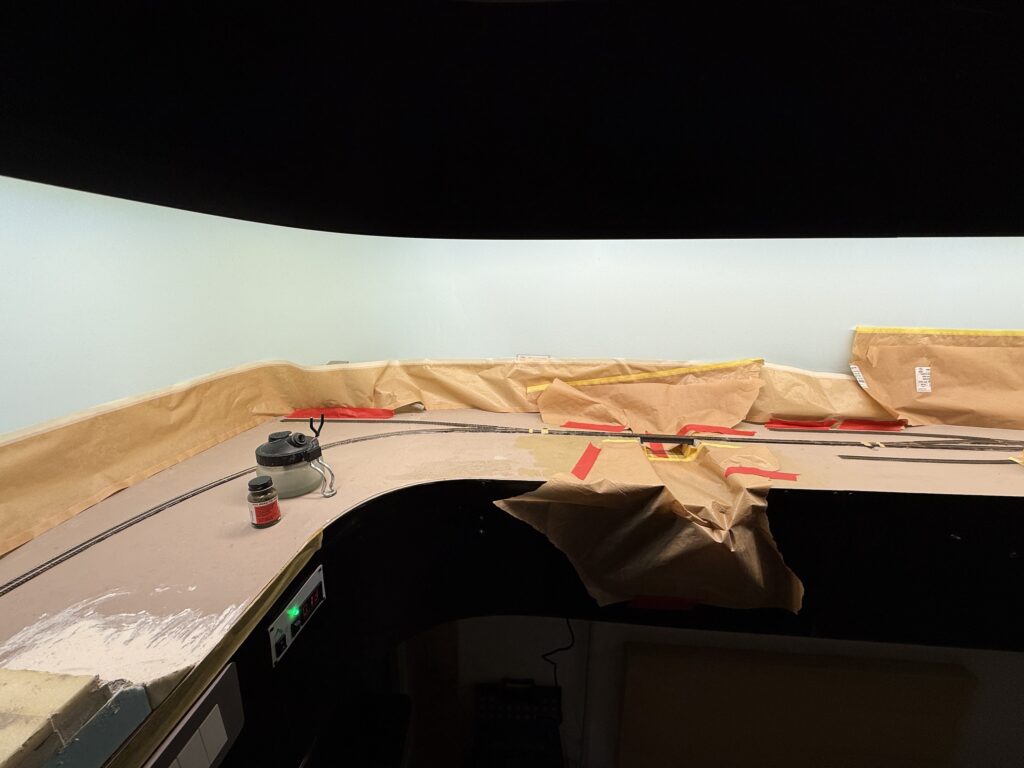
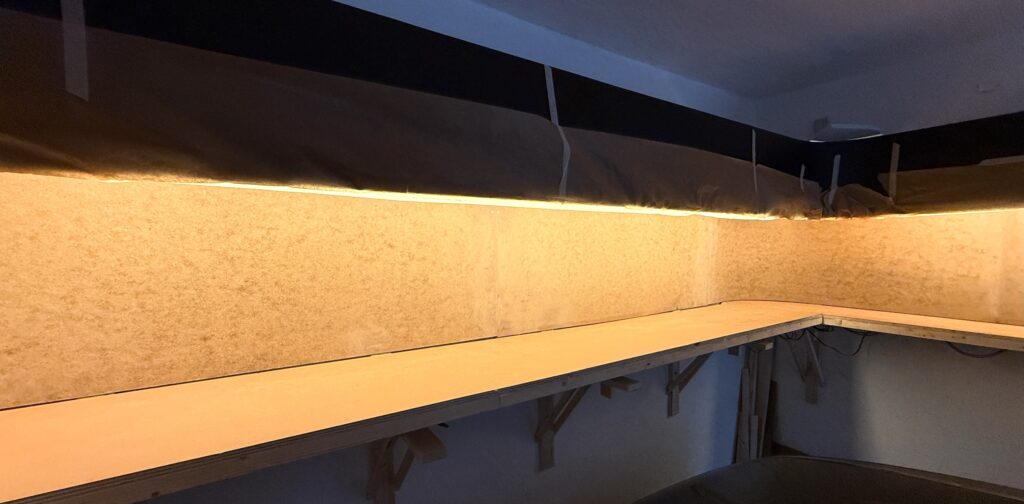
Backdrop reboot. Long story short: don’t be afraid of starting over.
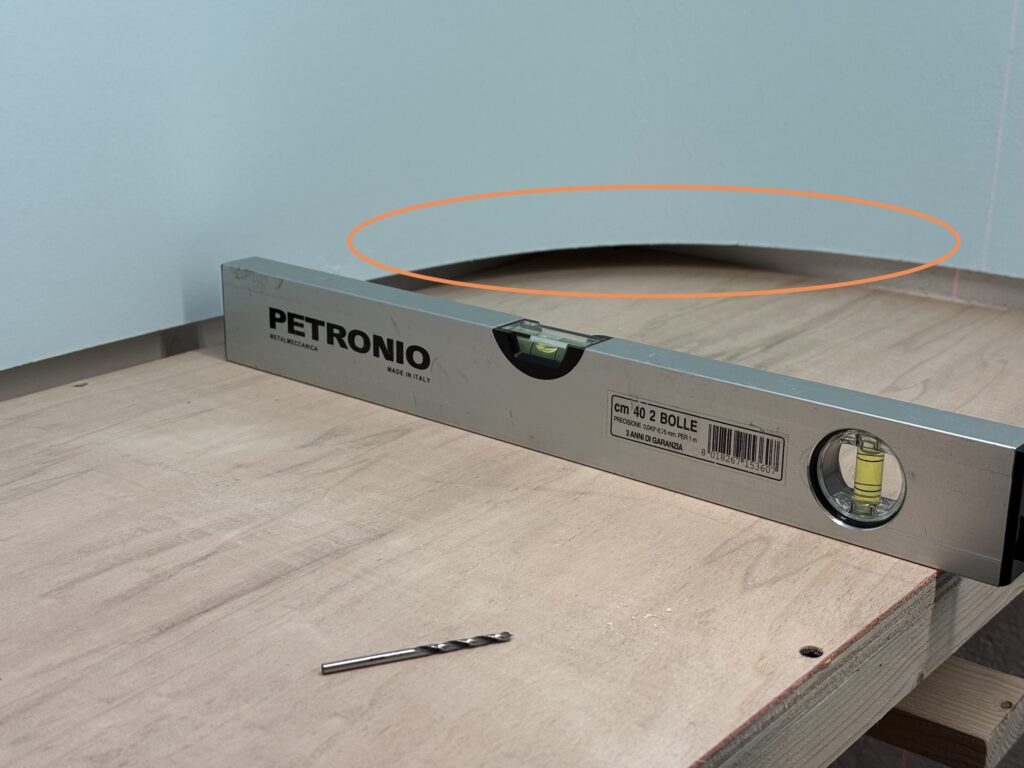
It’s time for a backdrop reboot! I installed the valance and backdrop based on wall measurements, then installed the plywood subroadbed using a laser level. That’s when I realized the valance wasn’t level – and the culprit was the walls, not being square.
Free tip: Always use a laser level. They’re inexpensive and extremely useful – I wish I had bought one before installing the benchwork supports.
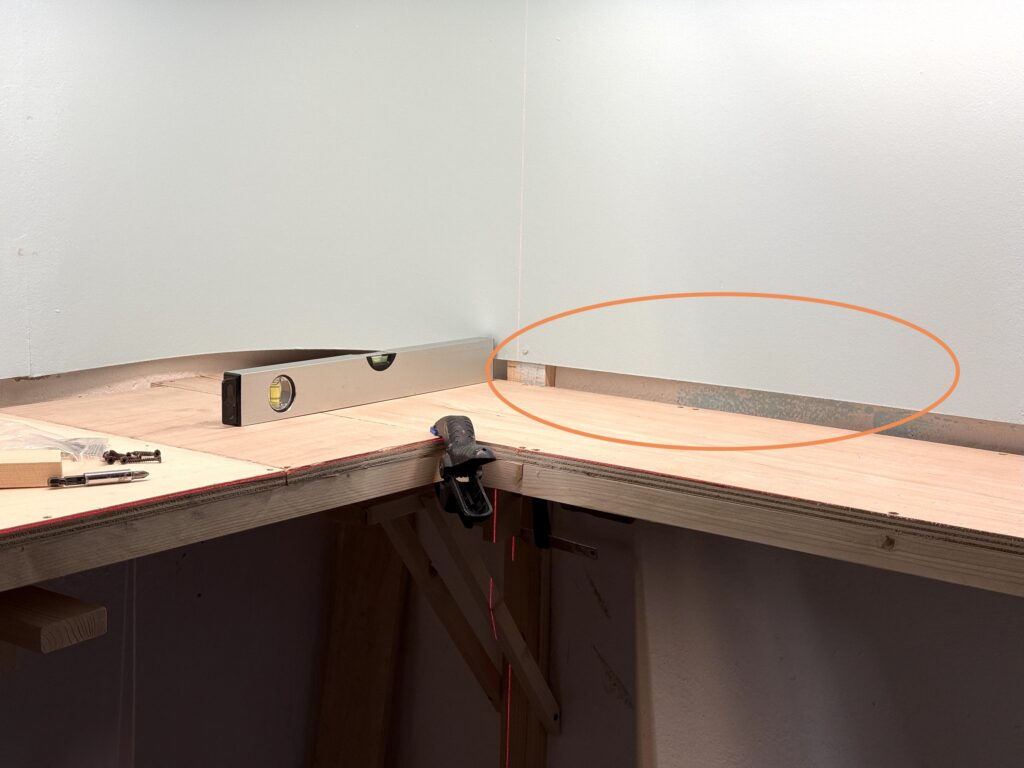
The backdrop is mostly fine, with only a small gap on the west end of the layout. However, the gap increases toward the east, as shown in the photo above. While the plywood base is level, the backdrop has a slight but steady incline.
At first, I thought I could fix it since the scenery isn’t done yet. But I quickly realized that the area I’m modeling is flat, with little vegetation – no hills or dense forests to hide the gap.
I tried thinking of a solution, but the more I considered it, the more I realized the backdrop needs to be scrapped and redone from scratch. So I did.
Starting over
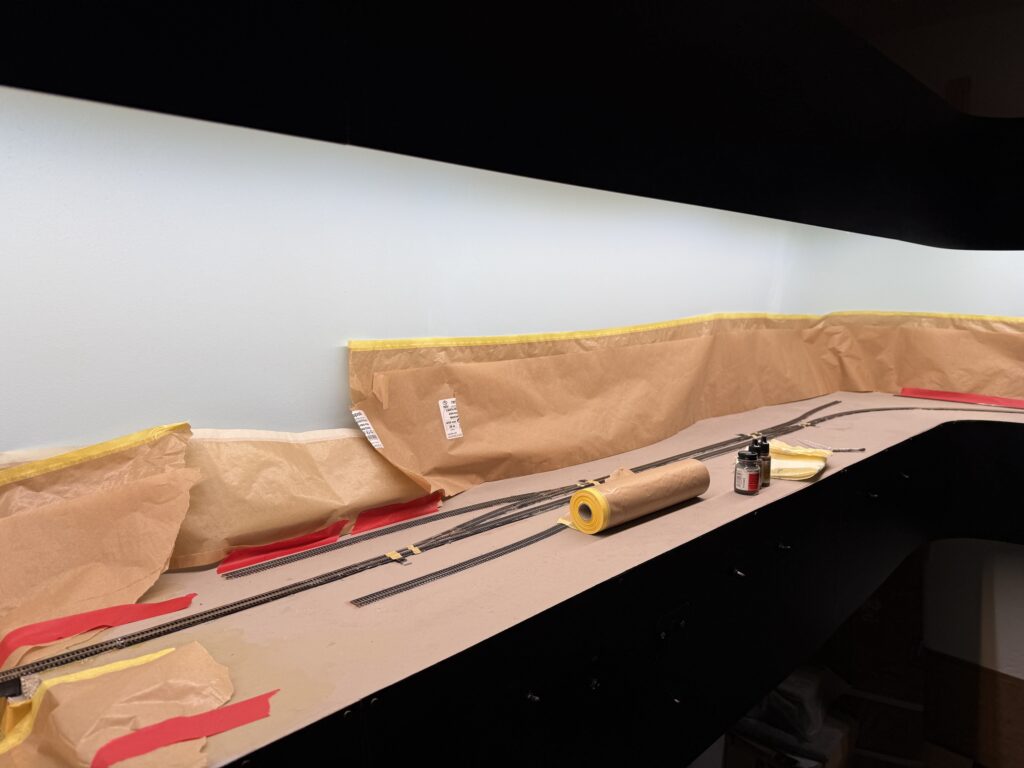
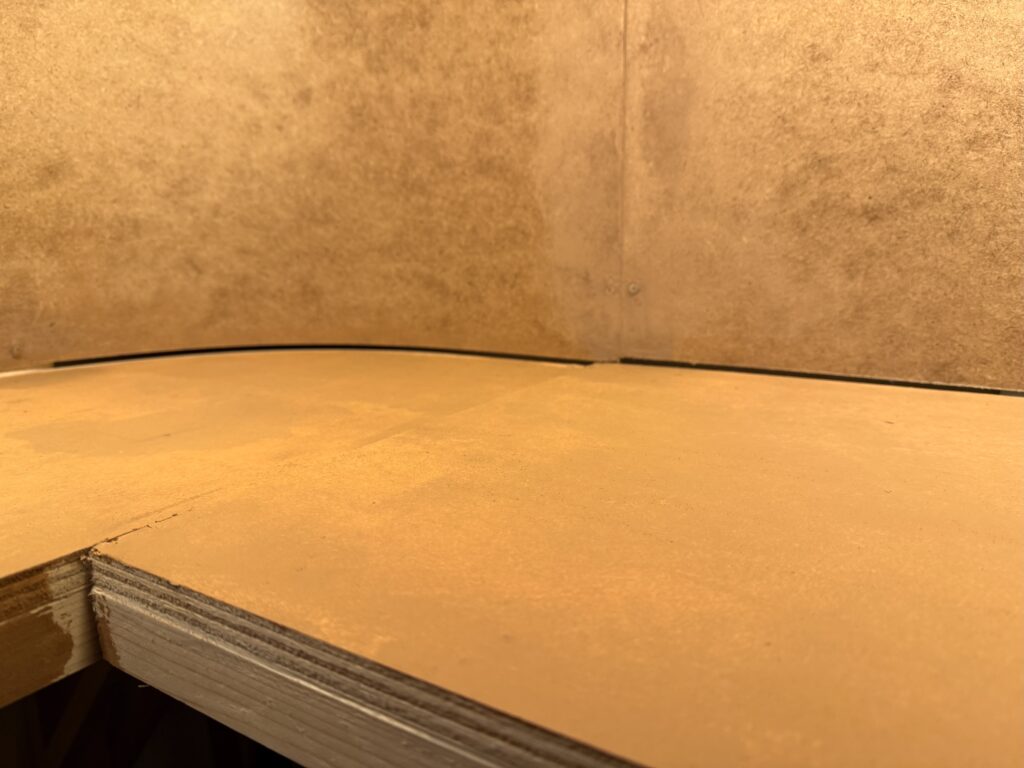
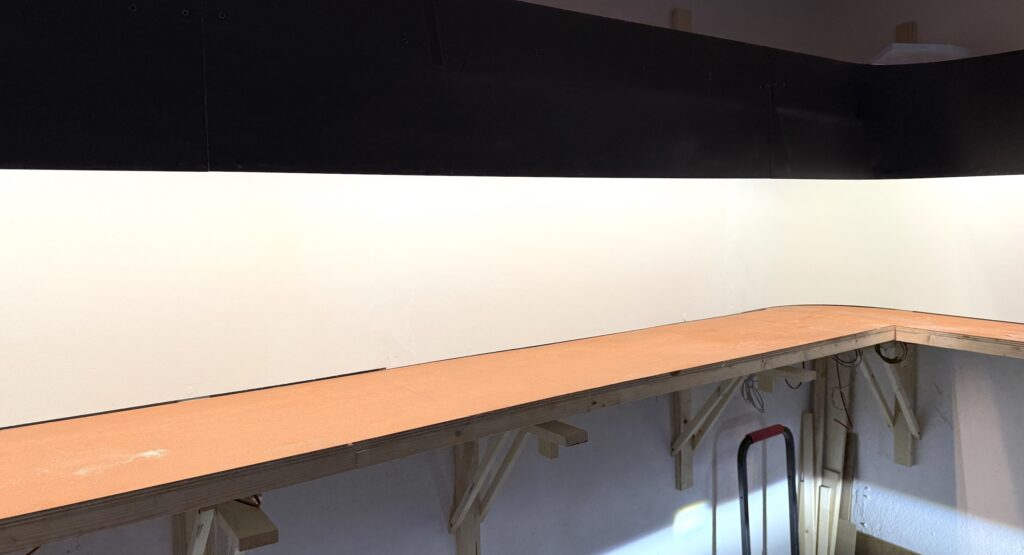
Backdrop reboot! I carefully unscrewed and removed the old backdrop, taking care not to damage the LED strip lights or valance. Then, I installed new Faesite (Masonite) panels, aligning the backdrop with the subroadbed plywood base.
After installing the backdrop, I filled the gap with putty and smoothed it out. Now it’s ready for a coat of blue paint.
Using acrylic colors, I painted the plywood base tan. That serves as a basic color for the scenery.
Starting over can be frustrating, but fixing mistakes early prevents bigger issues later.
Fixing backdrop issues early builds confidence and prevents bigger layout problems down the line. A properly aligned backdrop sets the stage for convincing scenery.
Part I: Building an N scale diorama to test my modeling skills
Before committing to adding scenery to the layout, I want to build an N scale diorama featuring a section of track with ballast, a road, vegetation, and a few details.
It doesn’t have to be perfect, but it should serve as a test of my modeling skills after a 15-year hiatus from model railroading.
Basic Trackwork
I glued a strip of EVA foam to a piece of plywood, then secured a section of Micro Engineering Code 55 flex track, which I’ll be using on the layout.
Painting
Next, I painted the track Railroad Tie Brown. I had two Polly Scale bottles from the late 2000s, and both held up surprisingly well.
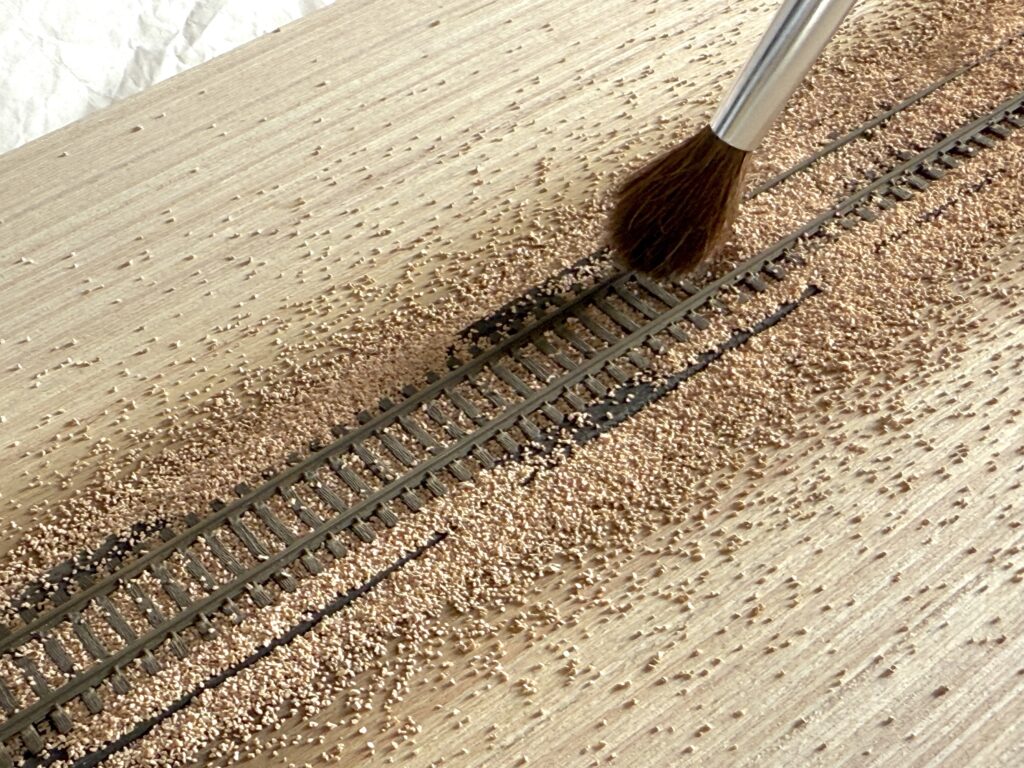
Ballast
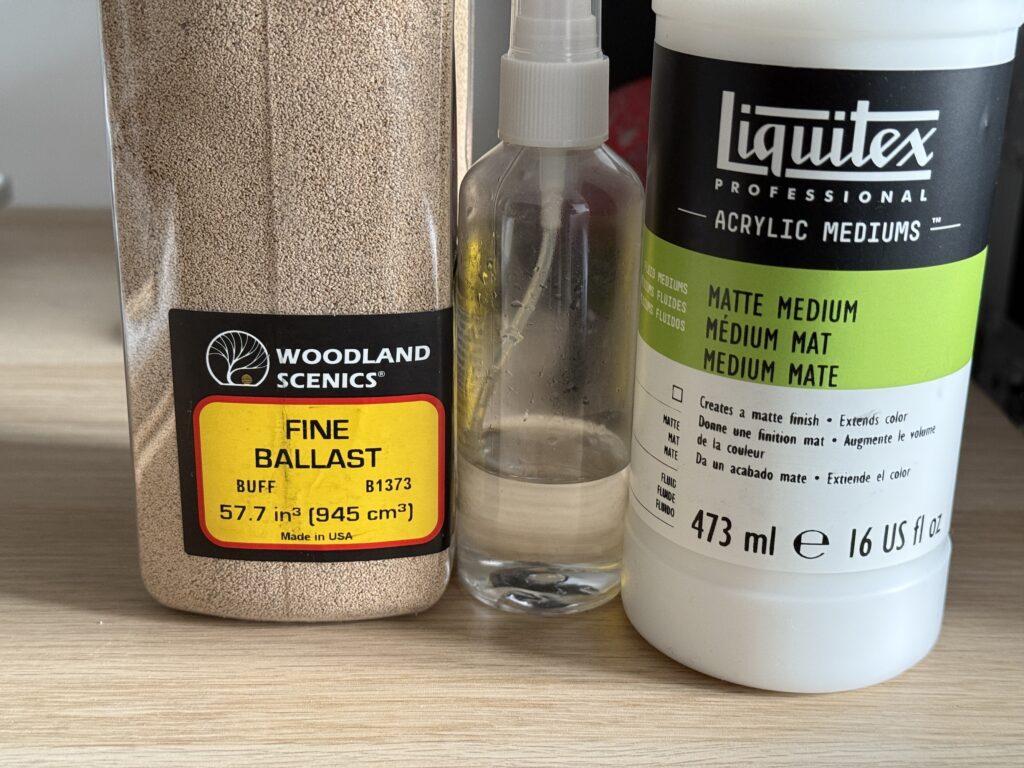
The next step was ballasting the track using Woodland Scenics Buff B1373. I used a technique I have relied on for years – first spreading the ballast over the track, then using both a soft brush and my fingers to evenly distribute it between the ties.
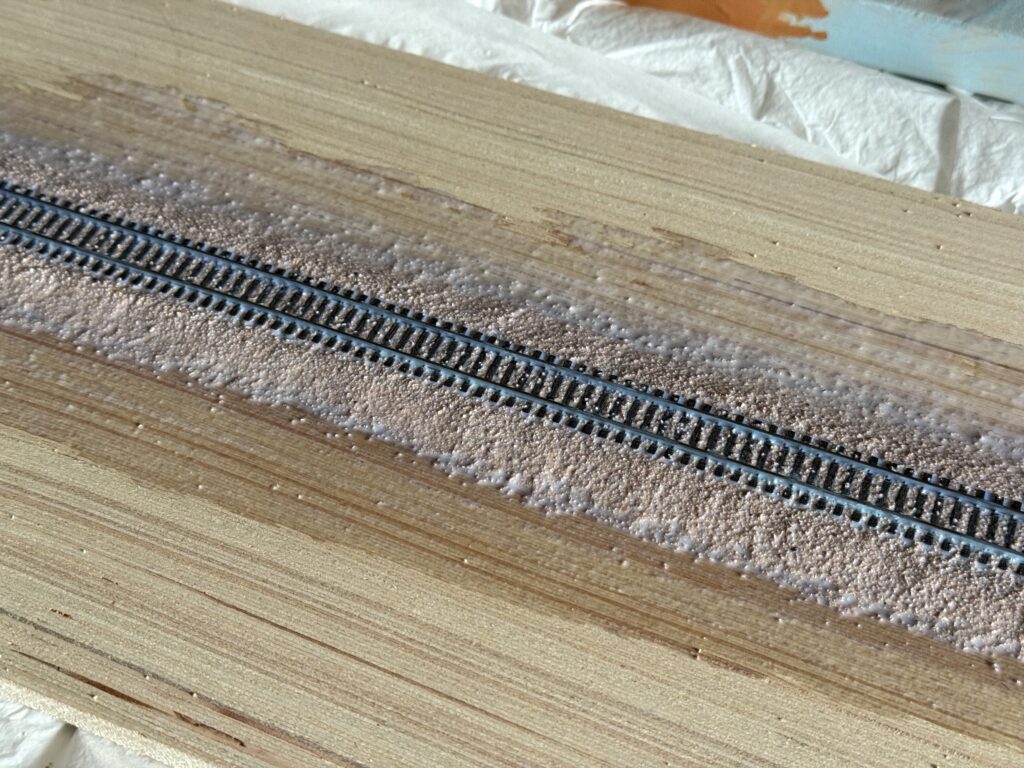
Then, I misted the ballasted track with a 50/50 mix of water and 99.9% isopropyl alcohol, letting it soak for a minute. After that, I used a syringe to apply a 50/50 mix of water and matte medium, slowly sliding it along the rails to glue down the ballast.
Here is the result of the N scale diorama with ballast after the glue have dried.
Weathering the N scale diorama track
For increased realism, I mixed dark brown powdered pigments with plaster of Paris in a 50/50 ratio to weather the area between the rails. Using a brush, I evenly distributed the mixture along the track with several strokes.
Then, I misted the track with water, allowing the plaster to react and permanently set the weathering in place.
Starting Over the N Scale Diorama
Well, I wasn’t happy with the result. The ballast wasn’t evenly distributed, and some grains ended up on top of the ties. I also applied too much matte medium, which left a visible film on the rail sides. Long story short – it was a failure.
And I’m glad I failed. I’d rather make mistakes on a small N scale diorama than on the actual layout. That’s exactly why I built it – to test my skills, learn, and improve. So, I scraped off the ballast, removed the track, and started over.
Referring to other model railroads
I looked through photos of my previous layouts, and to my surprise, the ballast work wasn’t as good as I remembered. It wasn’t terrible, but I now aim for better results. So, I started studying photos and videos of other modelers’ layouts and sought advice on online forums.
One key takeaway was to use less ballast and spread it as evenly as possible. A helpful trick is tapping the tops of the rails with the same teaspoon used to pour the ballast – this helps it settle and compact for a more realistic finish.
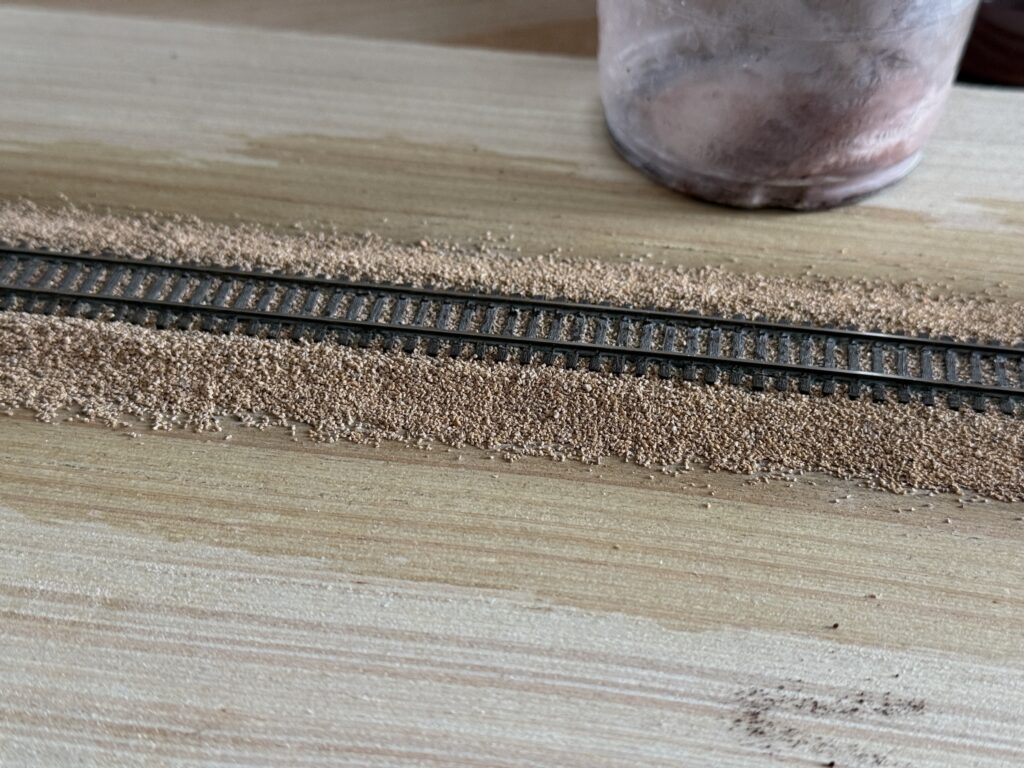
I removed the EVA foam and trimmed it to be slightly narrower. Then, I glued it back down and secured the flex track with white glue.
Glueing down the ballast
The track looks a lot better now. I mist the ballast with the same 50/50 water and alcohol mix, and let it soaked. This time I used another method for glueing the ballast, again thanks to an online model railroading forum member. They suggested to mist the ballast, instead of using a pipette or syringe. I used the same 50/50 water and matte medium mix.
Then, I let it dry for a day. It looks much better than the first attempt.
Weathering, Take two.
This time I used black powdered pigments, as brown blends better when mixed with yellow and it more suited for sidings or spurs. 50/50 mixed with plaster of Paris.
With the same technique, I distributed the pigments between the rails with a flat brush.
Then, I misted the diorama with water, allowing the Plaster of Paris in the pigment mix to bond and permanently fix the track weathering.
Here is the final result after the pigments dried and the rail heads were cleaned. Maybe I could have gone lighter with the soot and grease weathering between the rails or used a 30/70 pigment-to-plaster mix instead of 50/50.
We use cookies to ensure that we give you the best experience on our website. If you continue to use this site we will assume that you are happy with it.
You can revoke your consent any time using the Revoke consent button.