Category: Benchwork

Painting the backdrop sky blue

Using acrylic or latex paint with a soft roller is a quick way for painting the backdrop sky blue.

Painting the backdrop sky blue is a simple yet effective way to enhance the realism of a model railroad layout. The benchwork’s depth limits the world we can model; thus, the backdrop creates the illusion of extending the space.

There is a school of thought in model railroading that advocates for using a very light blue. The idea is that the backdrop should serve as a subtle foundation rather than a focal point.

This approach helps maintain realism and it enhances the illusion of depth without drawing unnecessary attention.

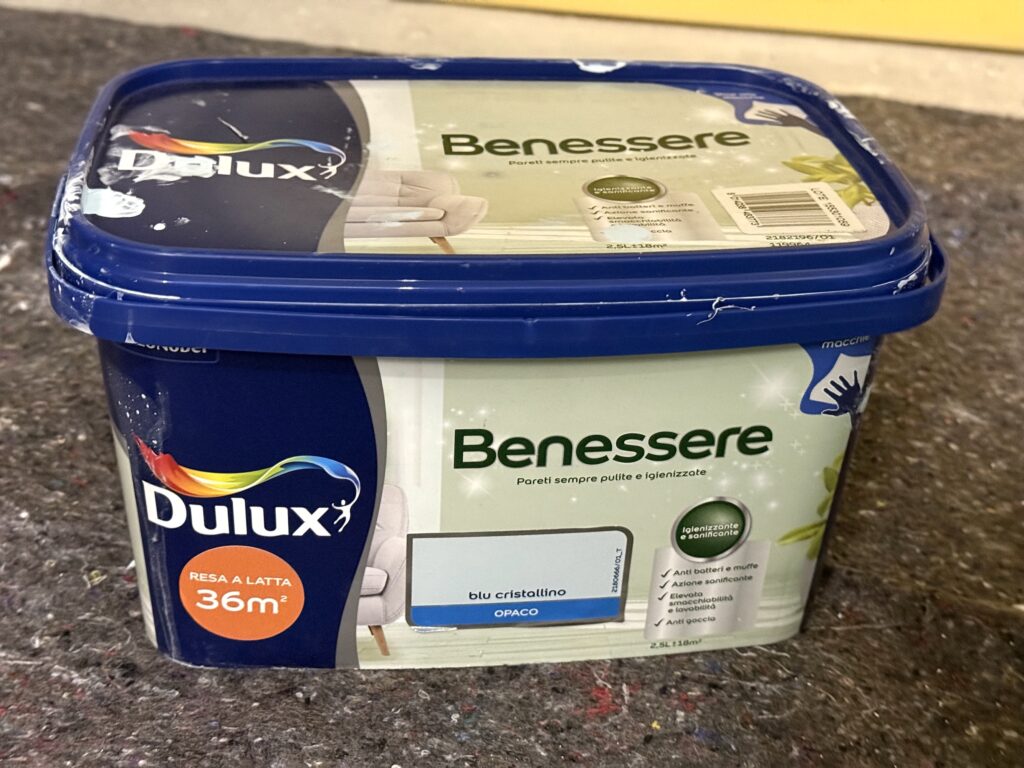
I used this particular brand of wall paint because it offers excellent coverage and a smooth, flat finish, perfect for creating a seamless backdrop. It’s made by Dulux, a British brand.

Acrylic light blue wall paint

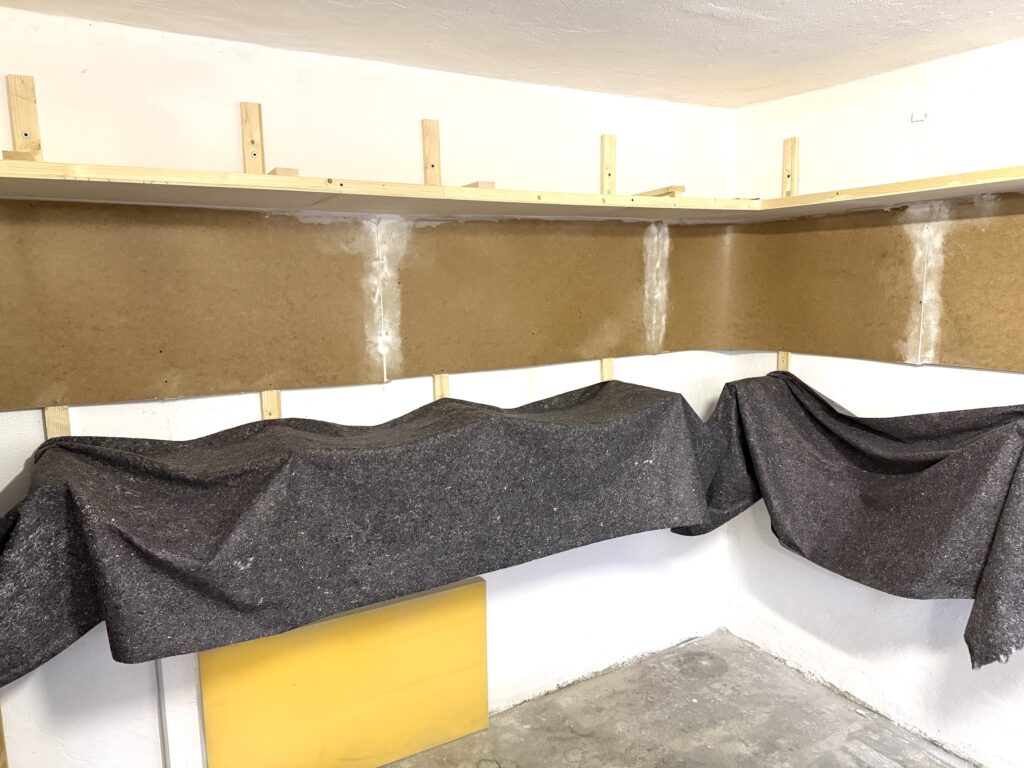
After sanding the backdrop panel joints, the backdrop is ready for a coat of paint.
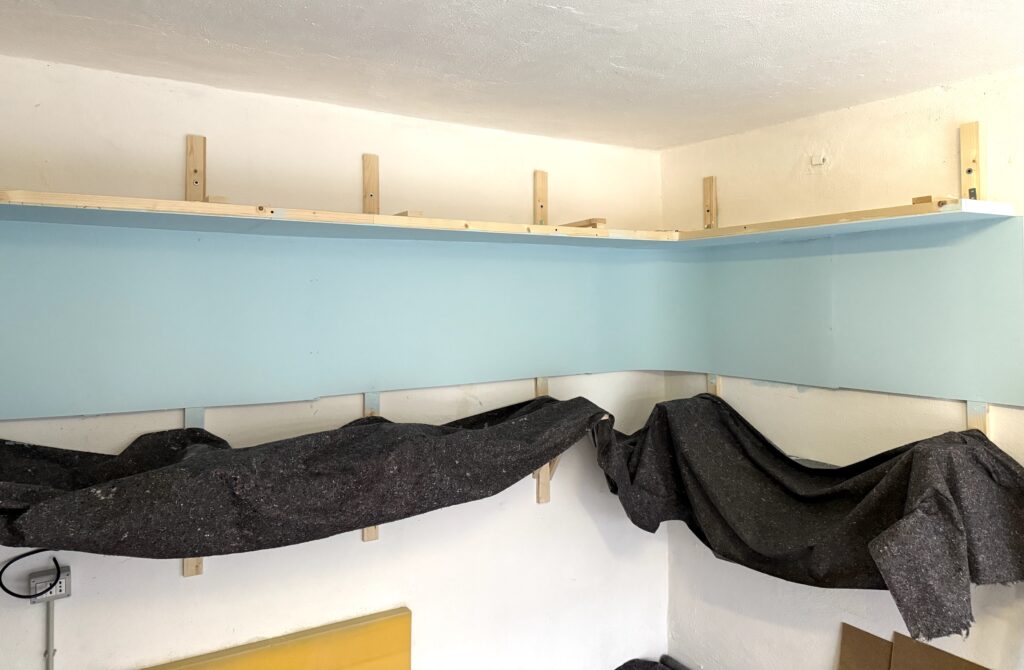
Backdrop joints smoothed out

First coat!

Painting the backdrop sky blue with a first coat of acrylic wall paint.

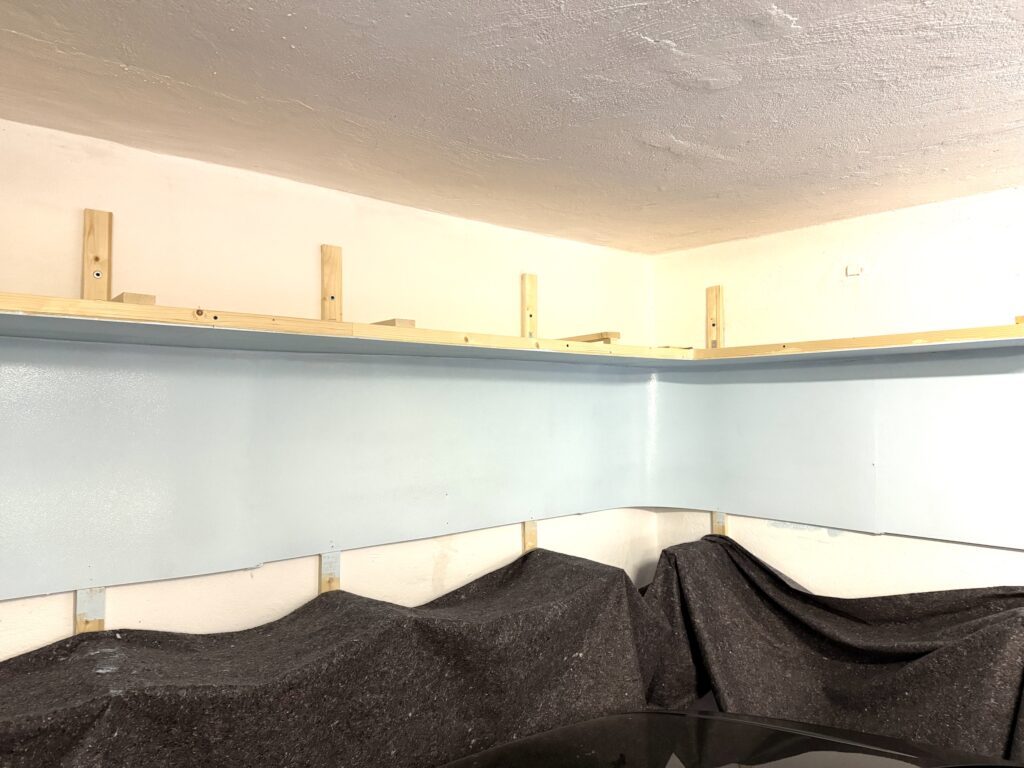
After the first coat of paint, I let it dry for about 24 hours before applying the second coat. I then waited another 24 hours before adding a third coat. Here is the backdrop after the paint has dried.

Backdrop painted, paint fully dry.

By using subtle colors and smooth transitions, the backdrop serves as a supporting element – complementing the scene rather than competing with it. In the end, the goal is not to create a detailed painting but to establish a convincing setting where the trains remain the focal point.

For added depth, distant mountains can be painted onto the backdrop, especially those characteristic of the San Fernando Valley, California. Soft, hazy outlines in muted earth tones can suggest the presence of the Santa Susana or Verdugo Mountains without overwhelming the scene.

Subtle atmospheric perspective – lighter tones and reduced detail – helps create a sense of distance. With careful shading and color transitions, the backdrop seamlessly integrates with the modeled environment, enhancing realism without distraction.

Backdrop

Installing the backdrop for the Burbank Branch in N scale model railroad layout

After building the basic benchwork I started installing the backdrop on the model railroad layout of the Burbank Branch in N scale, using masonite panels. I sealed the gaps with acrylic caulk and will smooth them out by sanding.

The next steps are:

  • smooth out all the joints
  • fill any gap between the backdrop and the ceiling
  • paint the ceiling white (helps in reflecting light)
  • paint the backdrop a light blue color

Valance Construction

Valance construction: building a valance for a clean, museum-quality layout lighting

I purchased more lumber and assembled the basic valance and lighting support. I also added vertical wood strips to secure the Masonite sheets for the backdrop.

Shopping cart loaded with lumber
Shopping cart loaded with lumber, valance construction begins!
Valance construction: Titebond wood glue
Using Titebond wood glue to assemble the valance support.

Titebond wood glue is a strong, reliable adhesive commonly used in woodworking and model railroad benchwork construction. It provides a durable bond, dries quickly, and remains flexible enough to withstand slight movements. Ideal for benchwork, it ensures a secure and long-lasting hold. Plus, it’s easy to apply and cleans up with water before drying.

View of the layout benchwork with valance support installed
Valance support installed. I need to install LED lighting and backdrop panels

Conclusion

A well-designed valance not only hides your lighting but also enhances the realism and presentation of your model railroad layout. By carefully planning and constructing a valance, you can achieve a museum-quality look while improving layout lighting for optimal visibility and atmosphere. Whether you’re using LED strips or other lighting solutions, a valance helps control glare and directs light precisely where it’s needed.

Building a model railroad valance is a rewarding project that adds a polished, professional touch to your display. With the right materials and techniques, you can create a seamless integration between lighting and scenery, elevating the overall aesthetic. Follow these steps to craft a valance that enhances your layout’s realism and visual appeal.

Model Railroad Layout Benchwork

Building the foundation of a model railroad layout. Benchwork key steps and materials

On a cold Sunday afternoon, I started preparing the main model railroad layout benchwork brackets that will be screwed to the wall. I’m using 55mm x 20mm lumber.

Below is a short (~30 sec) timelapse video of benchwork installation.

Brackets

The construction of the benchwork is a crucial step in the layout-building process. I’ve measured and cut the lumber to ensure proper alignment and support for the future layout. The brackets will be spaced along the wall, allowing for even weight distribution and access to all areas of the layout.

The wall-mounted design helps save valuable floor space while providing room for the layout to expand horizontally. Once the brackets are in place, I’ll add a layer of plywood. The plywood forms the base for the track and scenery, ensuring a smooth and level surface for the entire layout.

Model railroad benchwork brackets

I then added cantilevered brackets for increased support. Once finished I lined them up ready for installation.

Model railroad layout benchwork brackets ready to be screwed to the wall.

Securing the supports to the wall

Installation is done. The upper brackets will support the valance and layout lighting.

Model railroad layout benchwork secured to the wall.

In the photo above, you can see how the bracket on the far right revealed that the wall is not straight at all. I had to use a piece of scrap wood as a shim to mount the bracket correctly.

A very useful book on model railroad layout benchwork construction is How to Build Model Railroad Benchwork, Second Edition (Model Railroader).