Category: Lighting

Installing the valance

Using Faesite (Masonite) sheet, installing the valance is quick and easy.

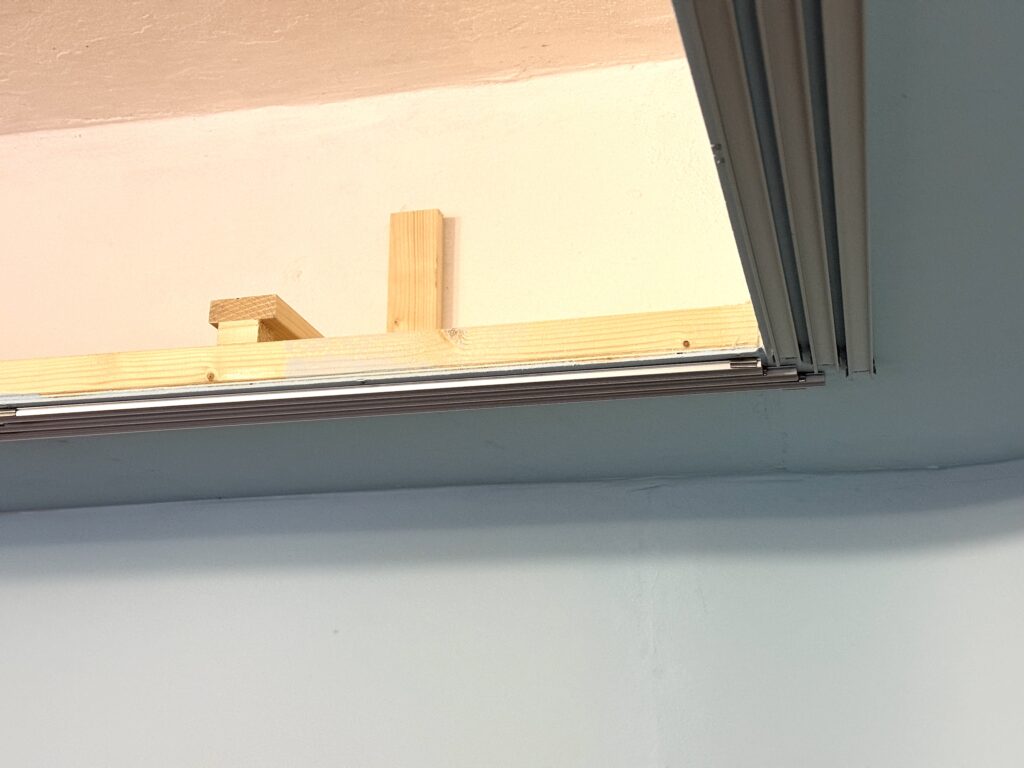
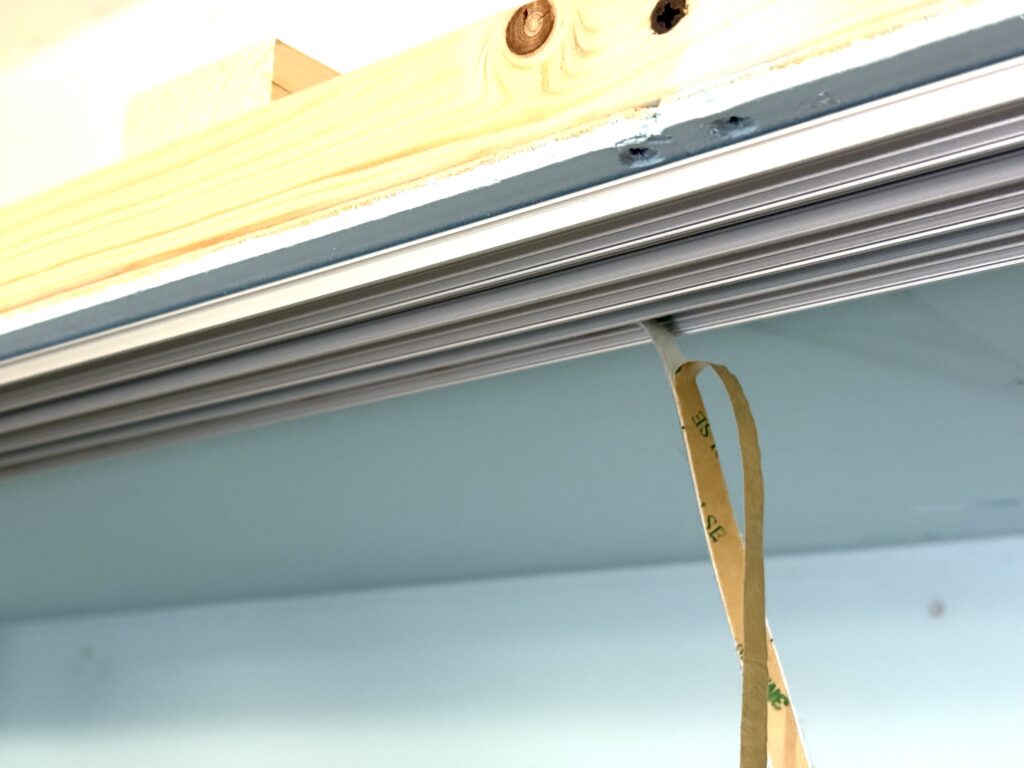
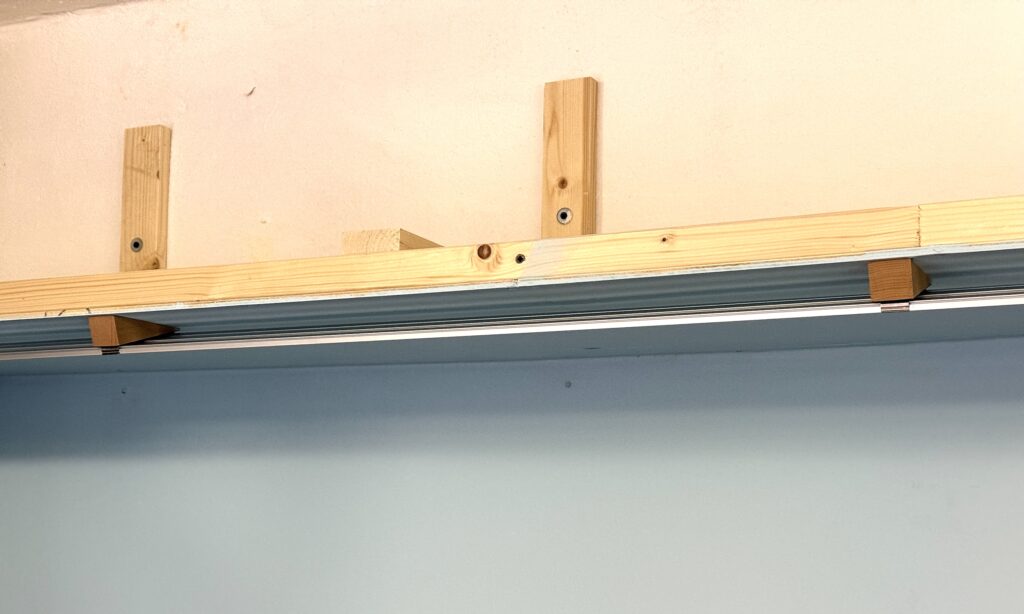
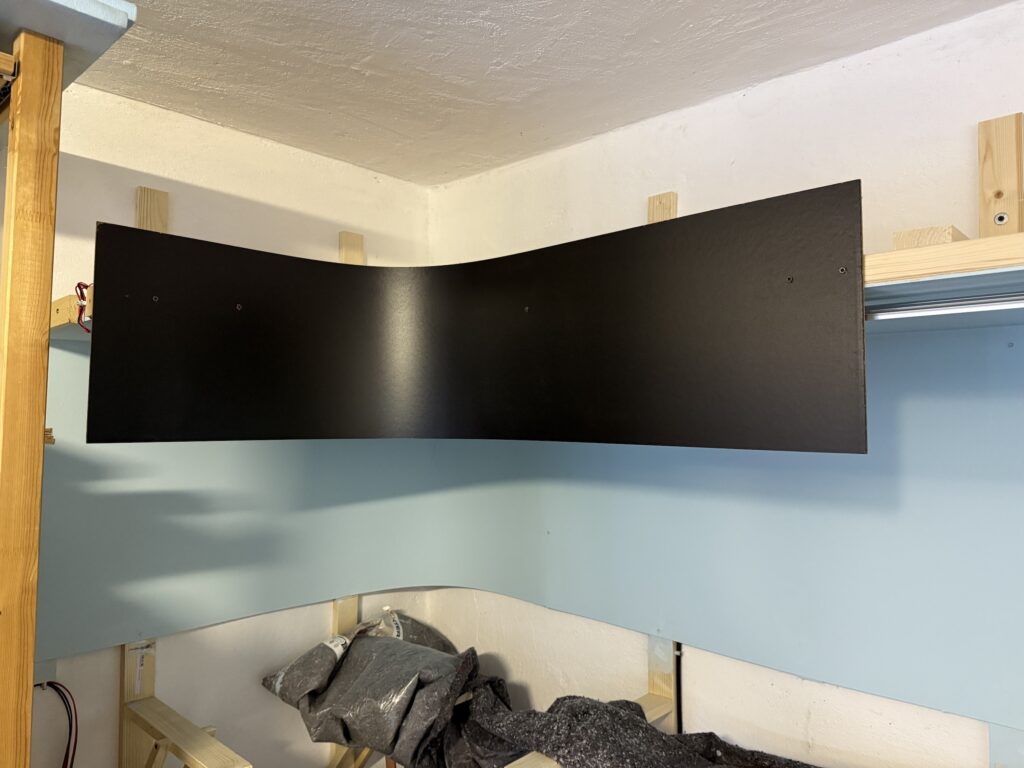
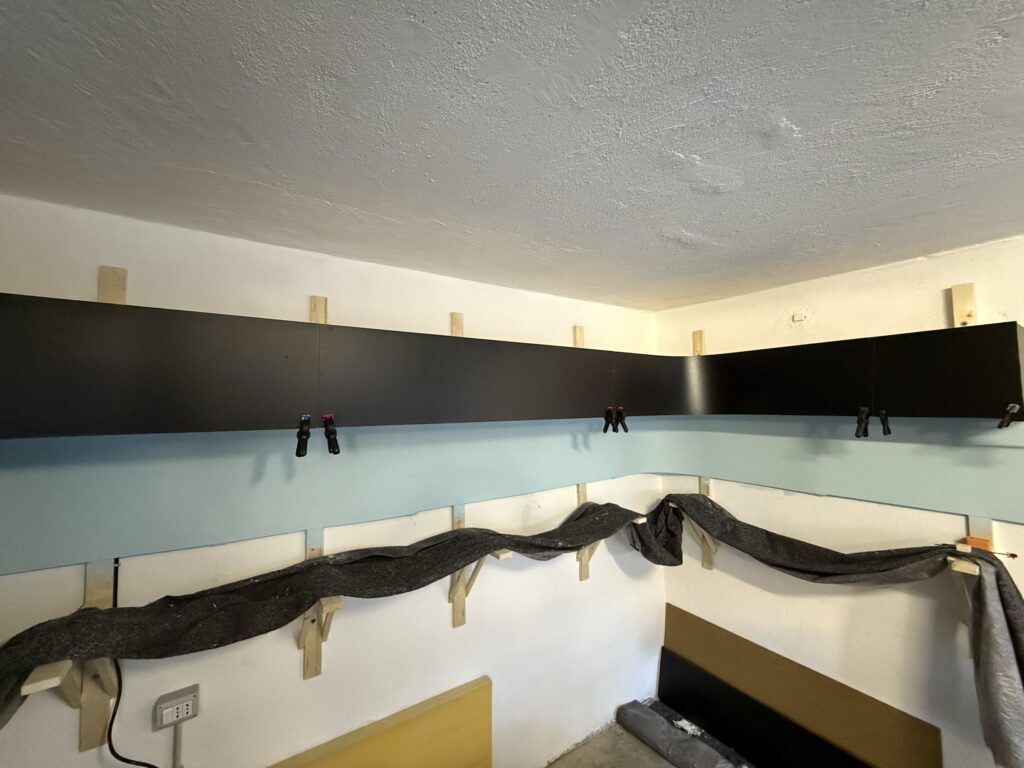
I purchased some black Faesite (Masonite) sheets, had them cut to length, and used them to install the valance. A valance helps direct and diffuse light onto the layout while preventing glare from LED strips or other light sources.

Below is a short video showing the final result with LED lighting on my N scale layout.

Valance Installation

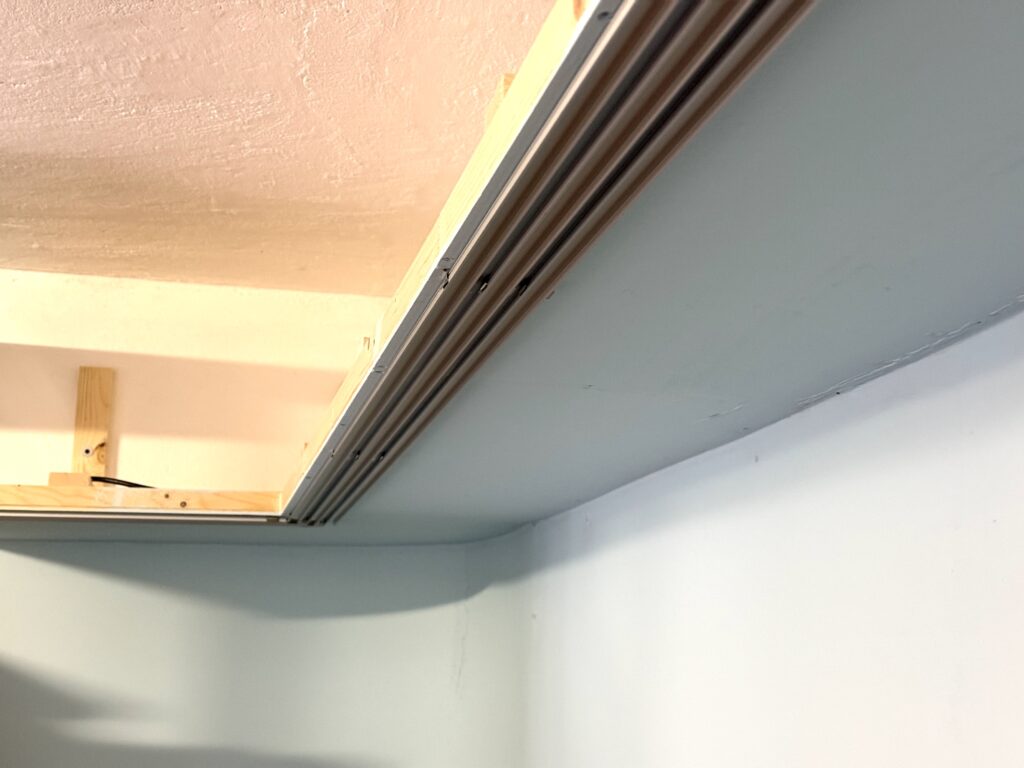
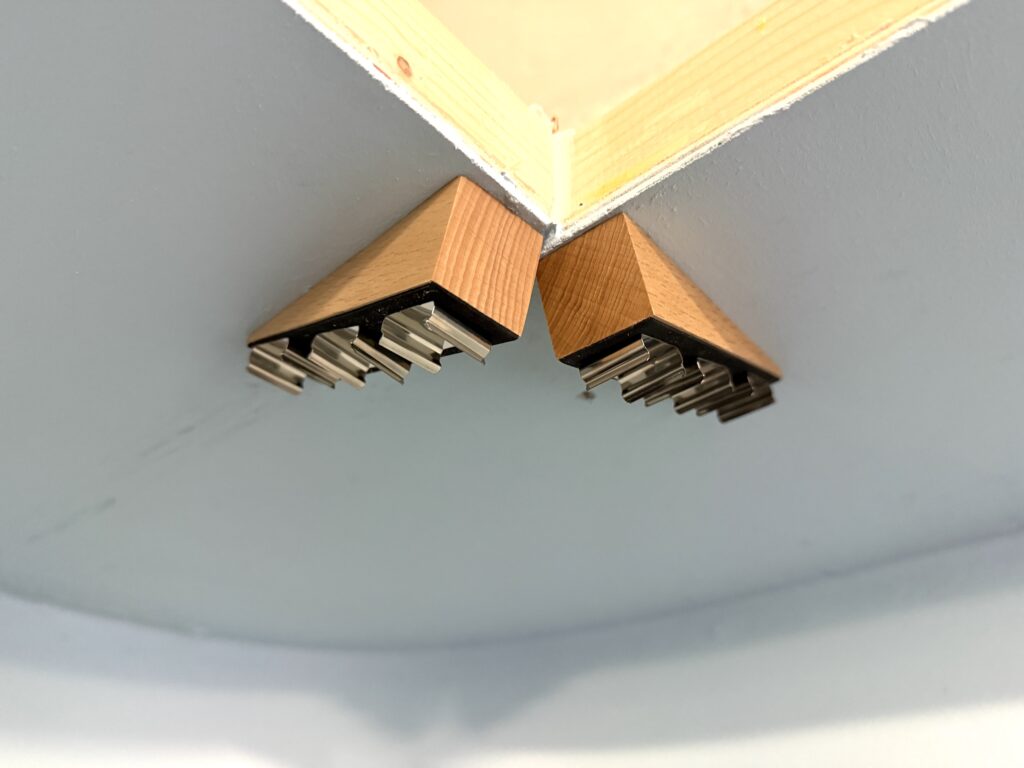
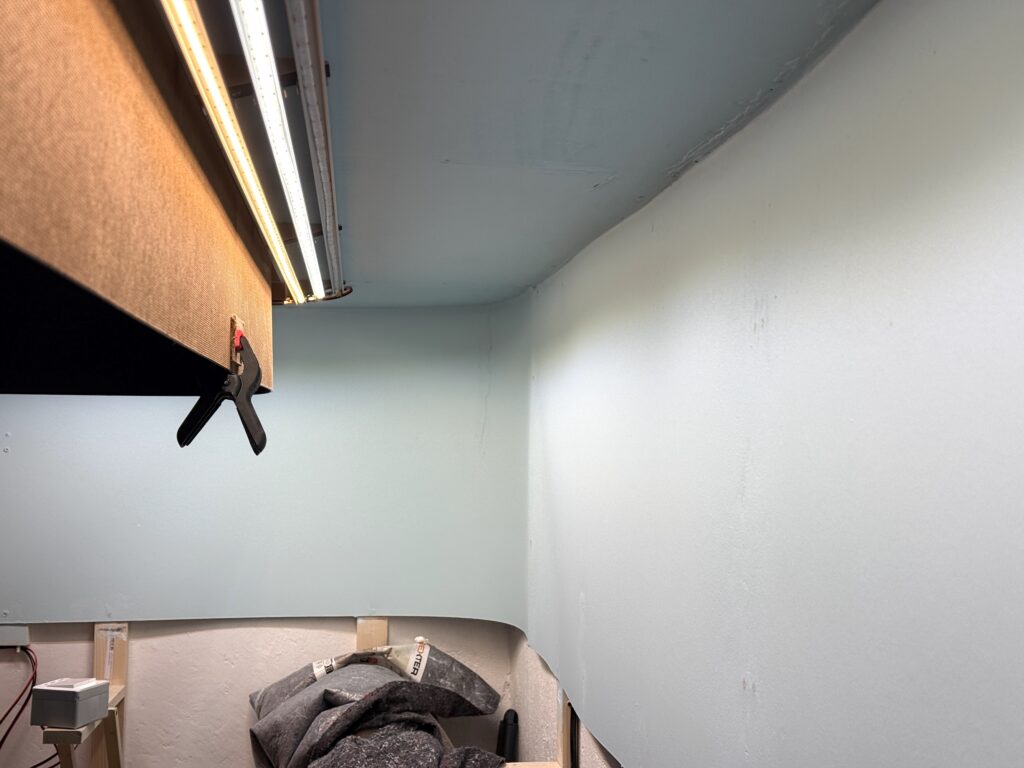
Just like with the backdrop, I bent the board to create a smooth, rounded corner.

Installing the valance
Valance installed on the layout

Enhanced Visual Framing

The LED strips are hidden behind the valance. Installing the valance creates a more immersive and finished look by framing the scene and keeping the viewer’s focus on the trains and scenery. The valance helps conceal ceiling lights, room clutter, and other distractions outside the layout.

LED strips hidden behind the valance

Depending on the height and depth of the valance, the valance may make the layout feel more enclosed or get in the way of taller operators. Also, installing a valance requires additional materials, cutting, mounting, and possibly bending for curved corners.

That said, a well-designed valance adds a professional touch, making the layout appear more polished and realistic.

Lighting

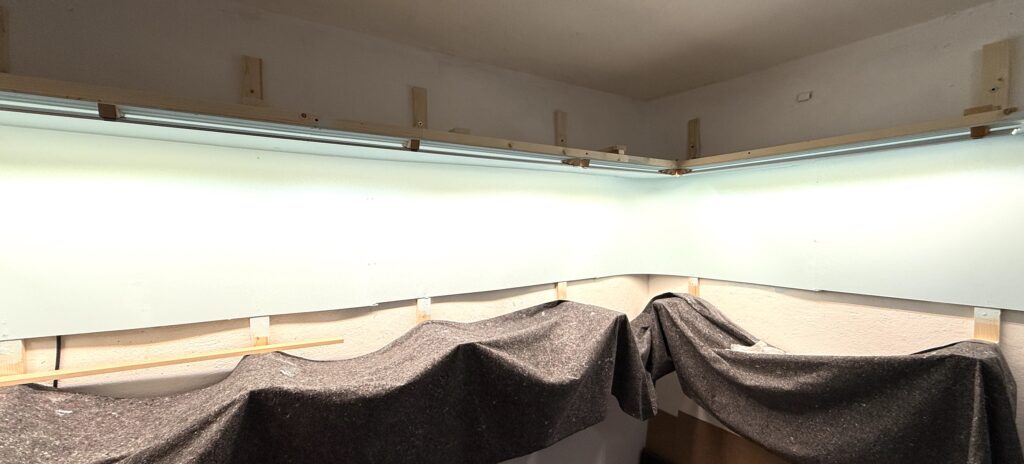
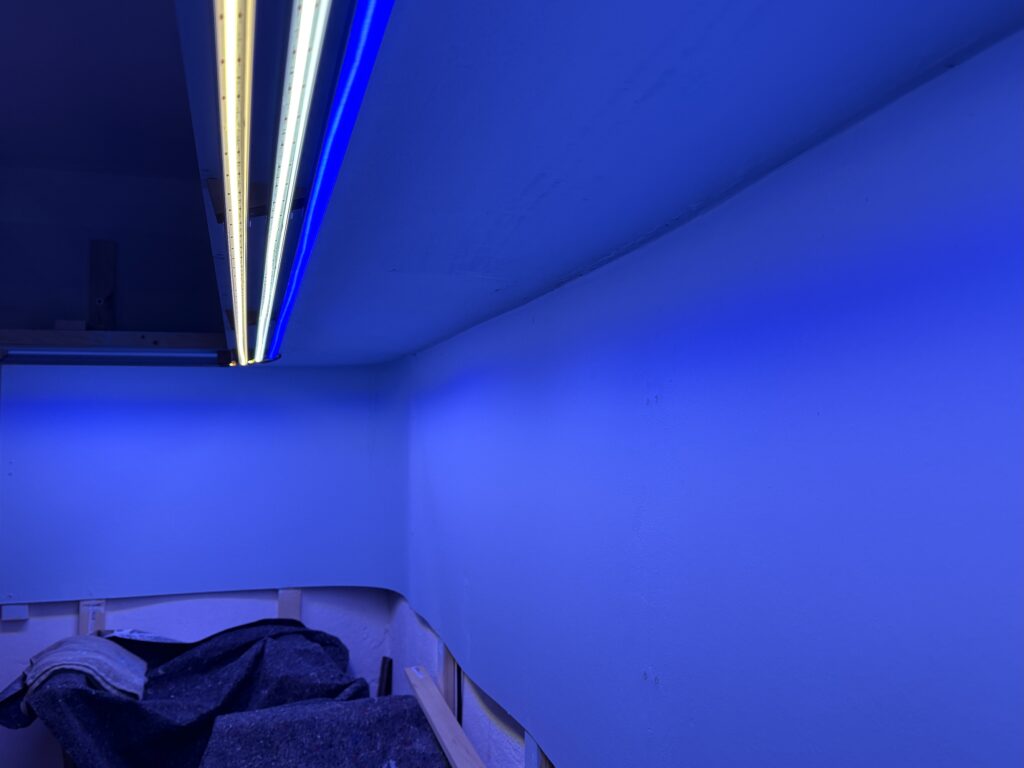
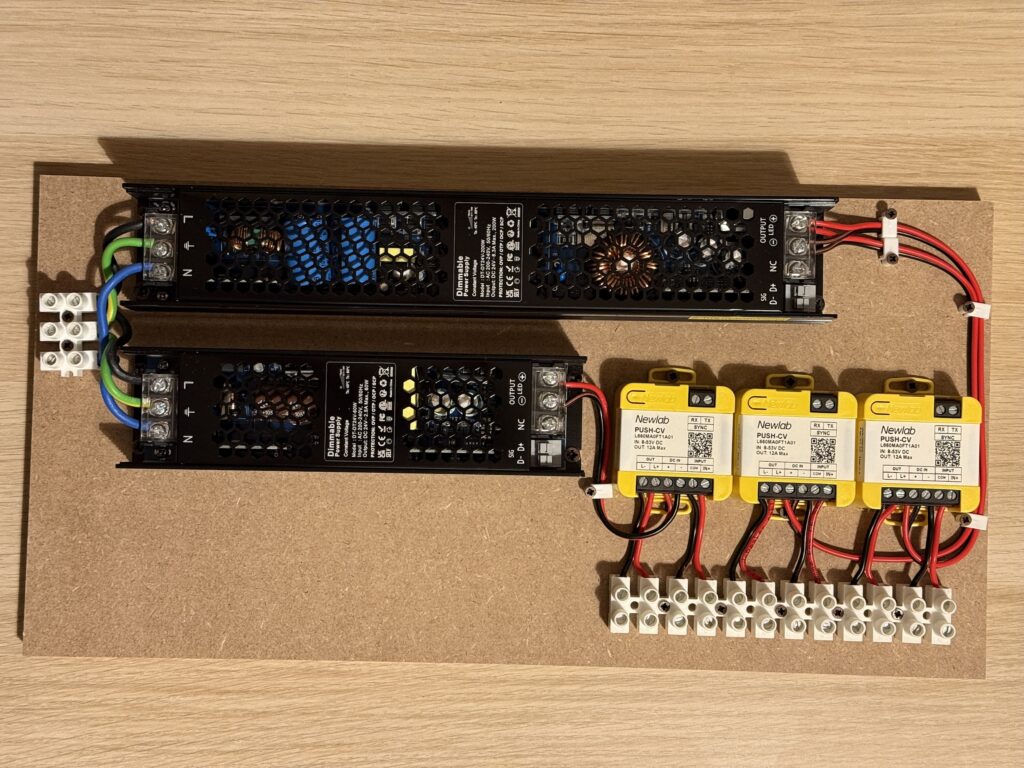
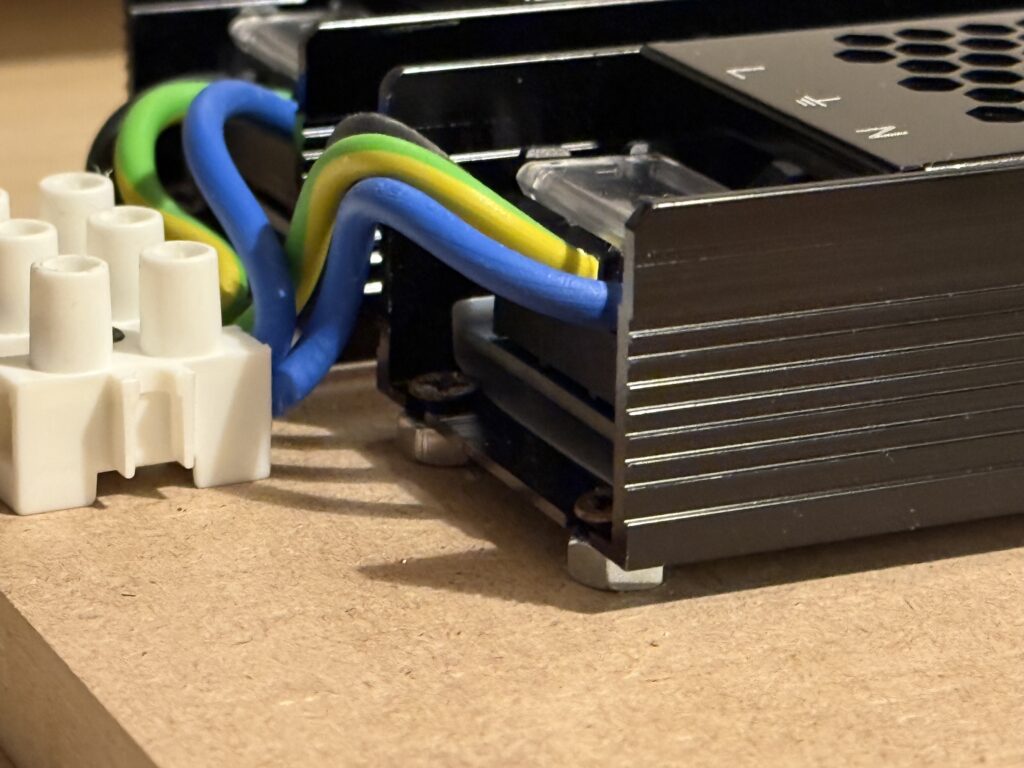
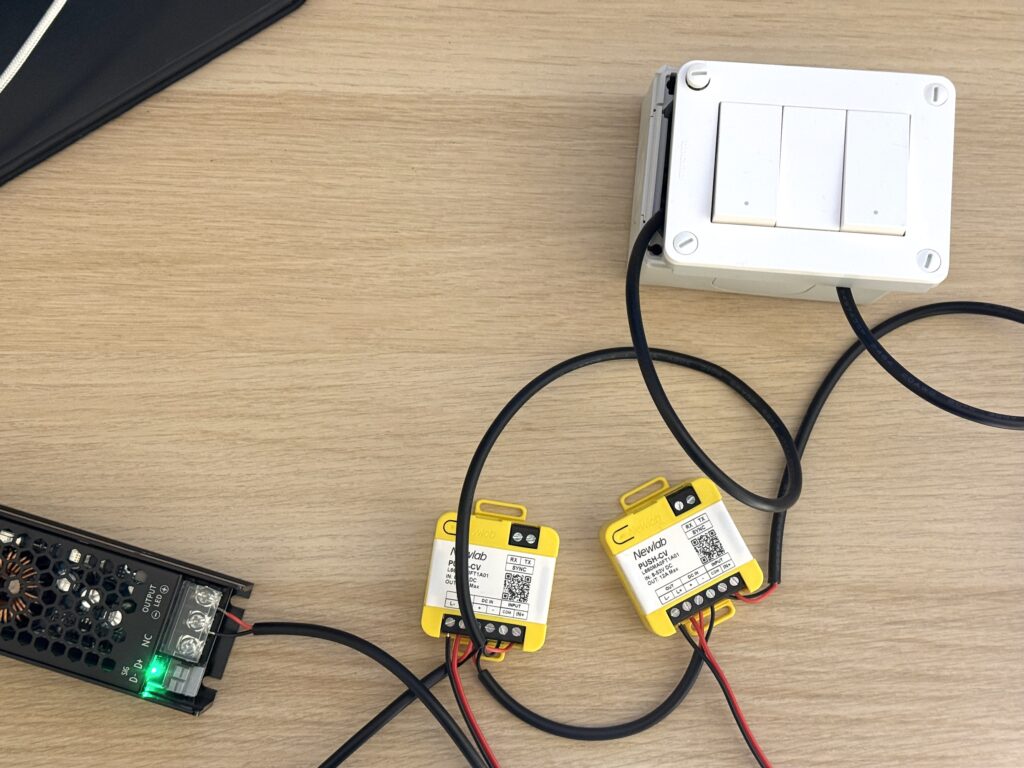
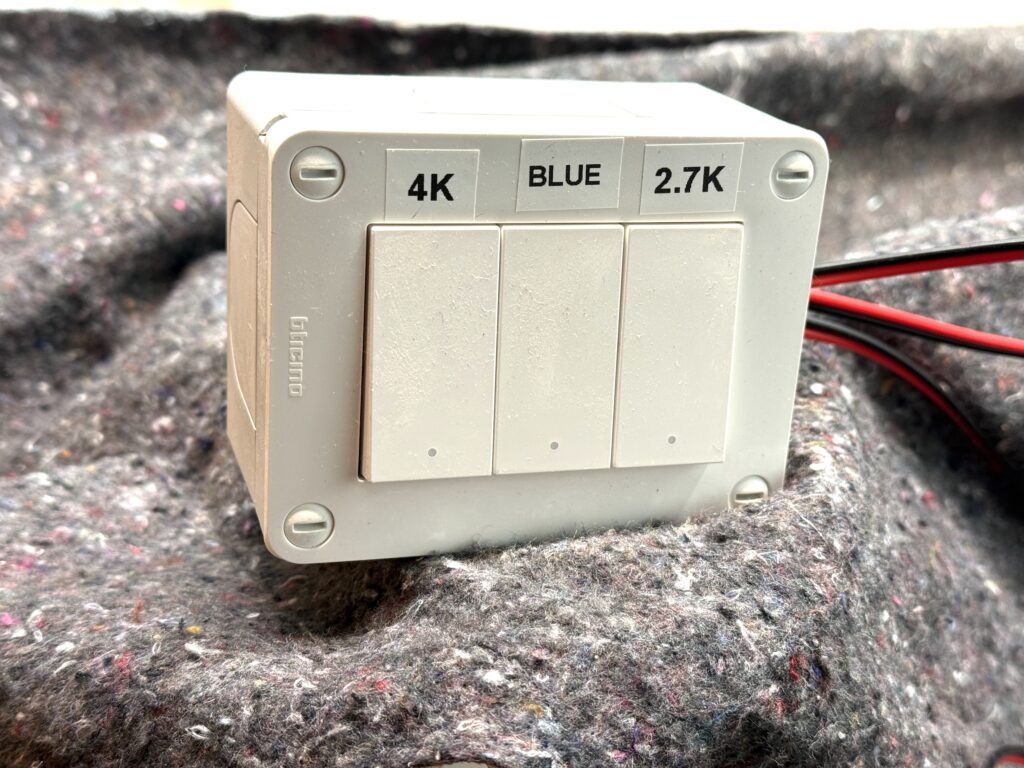
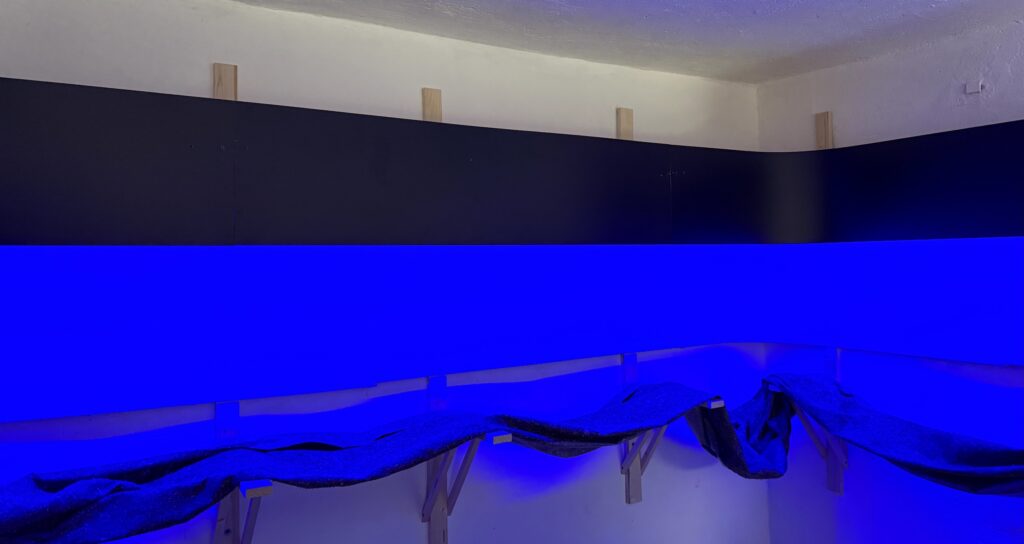
I use three LED strips of different colors: 2700K, 4000K and blue light. Each strip is wired to a dimmable power supplies and dimmers , allowing independent control. Remote push-buttons control the lights. I used Italian brand Bticino Matix Go push-buttons.

Push-buttons to control the LED strips

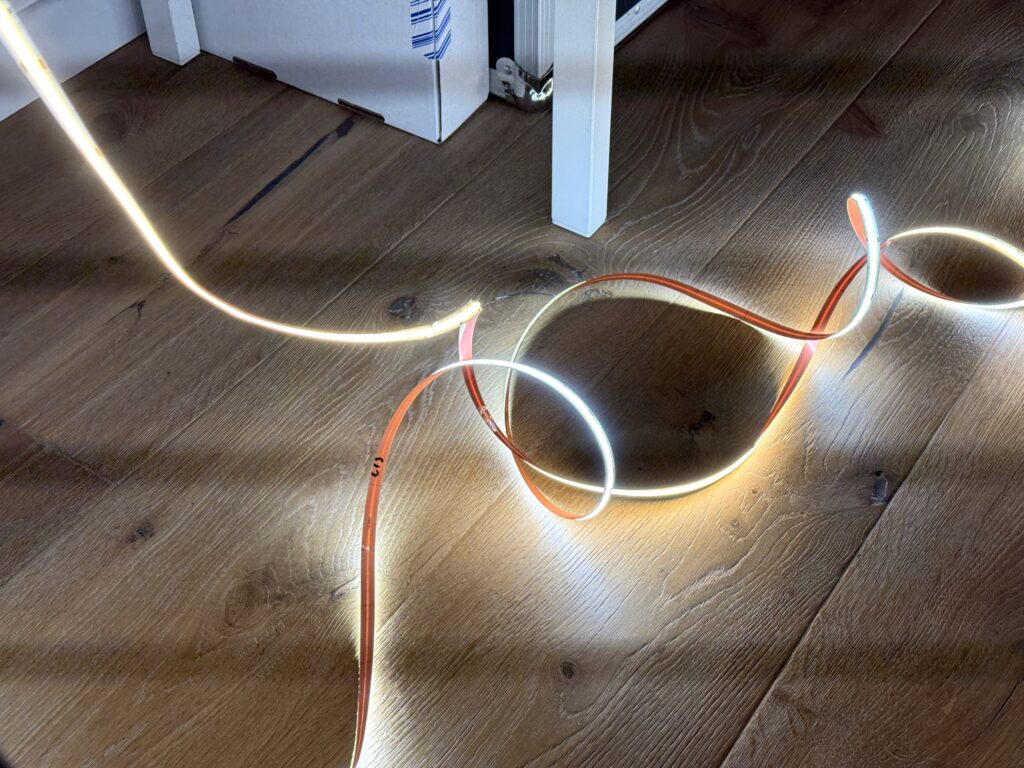
I usually use a combination of 4000K and 2700K for daylight, while the blue light is on for night operations. In the photo below, the blue appears more saturated than it does in person.

Installing the valance: 4000K + 2700K
Blue light for nighttime operations

A well-planned valance and lighting setup transforms the look and feel of a model railroad. By combining different LED color temperatures, it’s possible to replicate natural lighting transitions, enhancing realism without drawing attention away from the trains.

Adjustable dimming and remote controls add convenience, allowing for seamless shifts between day and night scenes. Thoughtful lighting makes a huge difference in bringing the layout to life while keeping the focus on the trains and scenery.

LED Strips Installation

LED strips installation behind the valance

I started the LED strips installation by fixing the aluminum profiles on the valance ceiling, to light my N scale layout. The profiles are great for holding the LED strips in place and dissipating the heat they generate.

I initially planned to use only two LED strips – one 4000K and one 2700K – with dimmers to adjust the lighting color combination. Then, I decided to add a third blue LED strip for night operations. I’m not sure if I’ll use the blue LED strip, but I figured it would be easier to install it now rather than add it later.

LED Strips Installation: aluminum profiles

I cut the aluminum profiles to length and screwed them into the valance ceiling.

I cut the aluminum profiles to length

I then measured and cut the LED strips, soldering short wires to connect the corners. The LED strips are self-adhesive, so I proceeded securing them to the aluminum profiles.

Securing the LED strips with self-adhesive tape.

Illumination

After installing the LED strips I quickly realized they mainly illuminated the area directly beneath them. Part of the backdrop was clearly left in shadow. I needed to mount the LED strips at an angle to minimize the shadow effect.

LED strips illuminating the layout area.

Door wedges to the rescue! I purchased some wooden door wedges and I used them to mount the LED profile holders at an angle.

Wooden door wedges used to mount the LED strips at an angle
LED strip installation at an angle

The LEDs installed at an angle provide better illumination for the entire area. Below, you can see the three strips turned on: 2700K, 4000K, and Blue light.

All three LED strips are turned on: 2700K, 4000K and Blue light.

The next step is installing the valance using Faesite (Masonite) board. The valance helps frame the layout and masks the LED lights, preventing them from shining directly into the operators’ eyes.

LED layout lighting power supply and dimmer

Preparing LED layout lighting power supply and dimmer on the Burbank Branch in N scale

Lighting is a key factor on a model railroad layout. Good lighting ensures the layout is well-illuminated and visually appealing. Nowadays, COB LED strips provide an excellent source of evenly distributed light (with no dark spots) and are more energy-efficient compared to fluorescent or traditional light bulbs.

LED strips are also dimmable, provided they are powered through dimmable power supplies and connected to a dimmer.

Before installing the LED strips, I built a power and dimming station on a piece of 15mm-thick MDF to ensure clean and organized wiring.

LED layout lighting: power supplies and dimmers

In the photo above, there are two power supplies:

Dimmers

The three yellow square devices are dimmers. They are powered by the power supplies and provide dimmed current to the LED strips. Each dimmer is connected to a normally open pushbutton, which controls both the on/off function and dimming.

Initially, I planned to light the layout using only the combined 2700K and 4000K LED strips, with the dimmer allowing for a custom balance between the two color temperatures. However, I later decided to include a blue LED strip as well to illuminate the layout for night scenes.

Cooling

To improve cooling, I attached the power supply to the MDF baseboard using small nuts, which keep the power supplies elevated and allow air to flow underneath.

Raised power supply detail

The dimmers will be connected to pushbuttons, as shown in a previous post. The pushbuttons enable custom combinations of the three LED strips (4000K, 2700K, and blue) to create various lighting scenes beyond the traditional bright daylight.

Conclusion

Proper LED layout lighting significantly enhances the realism and visual appeal of a model railroad layout. By using COB LED strips, modelers can achieve evenly distributed light without dark spots, creating an optimal viewing experience. Pairing dimmable LED strips with a dimmable power supply and a dimmer switch allows for customizable lighting scenarios, from bright daylight to subtle nighttime effects.

For a clean and organized installation, mounting a power and dimming station on an MDF board helps manage wiring efficiently. Investing in a well-planned model railroad lighting system not only improves aesthetics but also ensures reliable, long-term performance.

Layout lighting with LED strips

Using dimmable LED strips for layout lighting

Every model railroad layout needs proper lighting and COB LED strips are relatively inexpensive. They can be easily hidden behind the valance to illuminate the whole layout with no dark spots.

I purchased a 200W dimmable power supply, two dimmers, and two COB LED strips (one 2700K and one 4000K). The plan is to wire the strips so they can be controlled and dimmed separately, allowing for the creation of the exact color temperature or varying light intensity to simulate early morning or late evening scenes.

Here is the test wiring and light effect. The dimmers are controlled using standard 230V buttons.

Dimmable LED strip power supply with dimmers
Bright COB LED strips, laid of the floor for testing

COD LED strips are certainly more expensive than traditional LED strips, but provide a consistent and continuous light with no dark spots. The strips can be cut and are quite flexible. A perfect solution for layout lighting is using LED strips.

New blue layout lighting LED strip for night scenes!

An updated version of the lighting power supplies and dimmers (including a blue LED strips for night scenes) is available.

Adding blue LED strips to the layout creates a subtle nighttime effect, simulating moonlight and low-light conditions for evening scenes. This blue lighting enhances the realism during nighttime operations, adding atmosphere.

By using different color temperature LED strips, such as 2700K for warm daylight, 4000K for neutral daylight, and blue strips for nighttime, I can effectively recreate realistic sunrise, sunset, and day-to-night transitions, enhancing the visual depth and atmosphere of the layout.

COB LED strips are ideal for creating a uniform lighting effect, making them perfect for model railroads where every detail needs to be visible without shadows or uneven lighting.

With the ability to customize brightness and color temperature, these strips help replicate realistic lighting conditions, from bright midday sun to soft evening glow, enhancing the layout’s realism.