Trackwork fine tuning: adding both visual and operational details to N scale code 55 tracks.
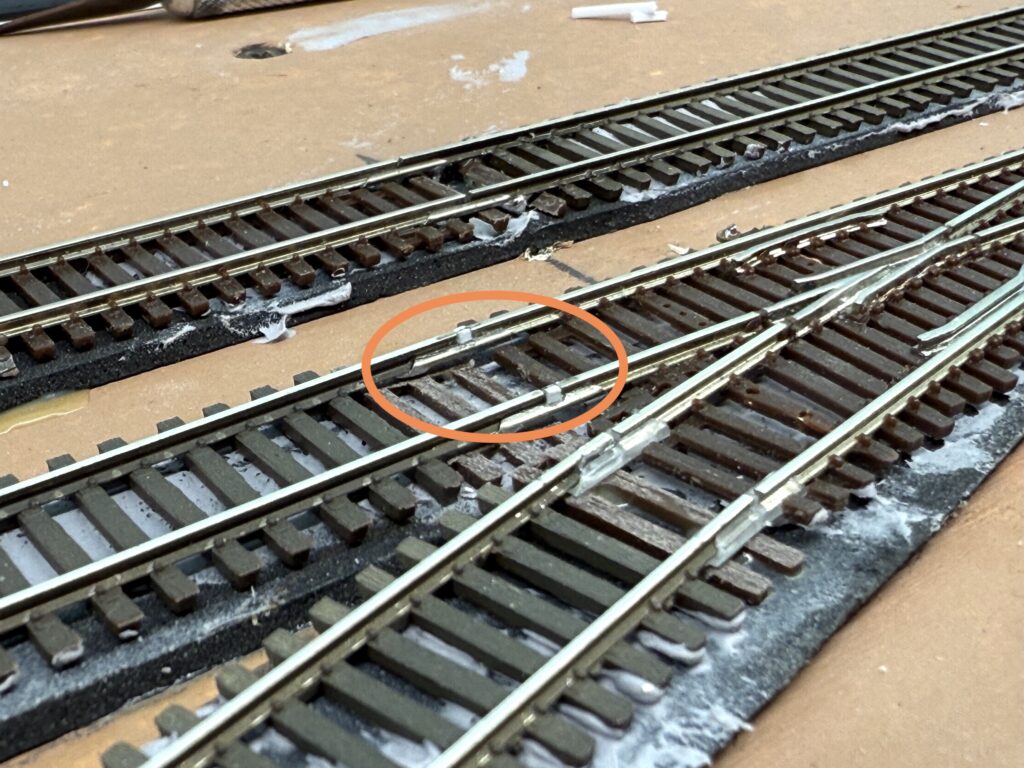
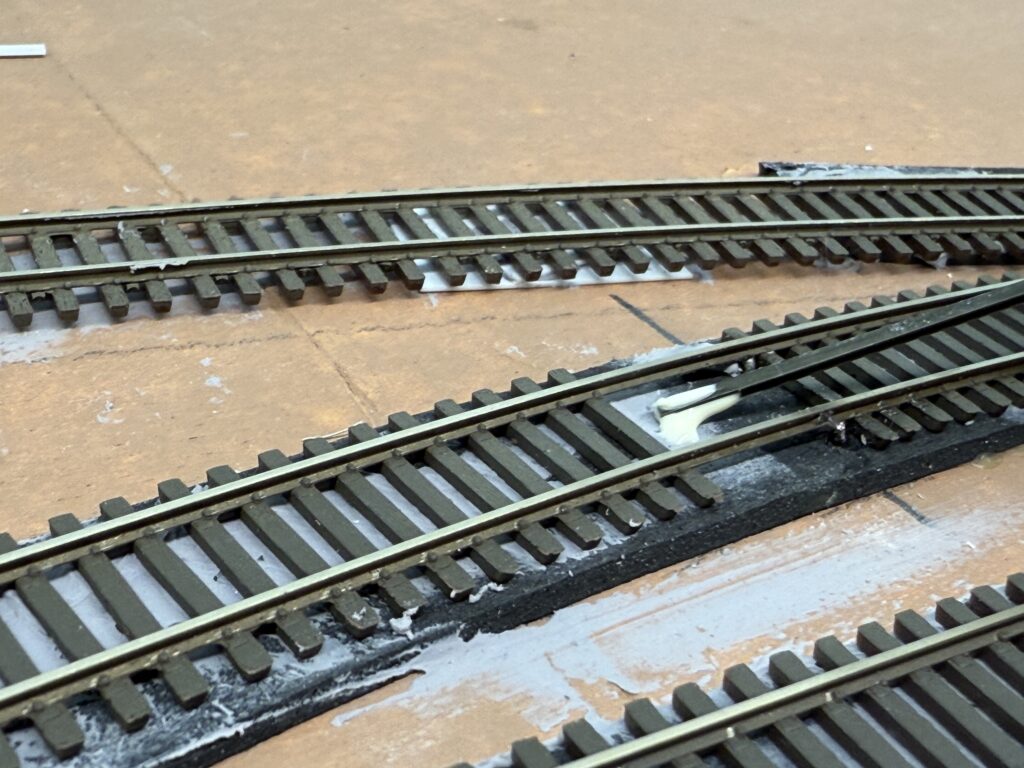
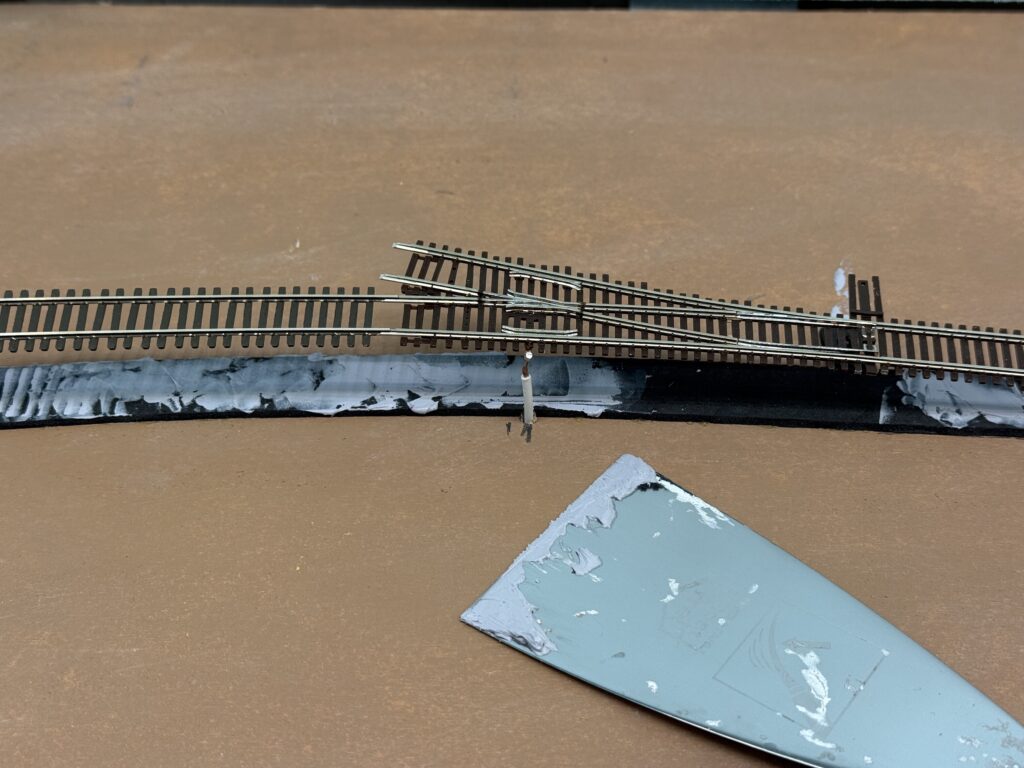
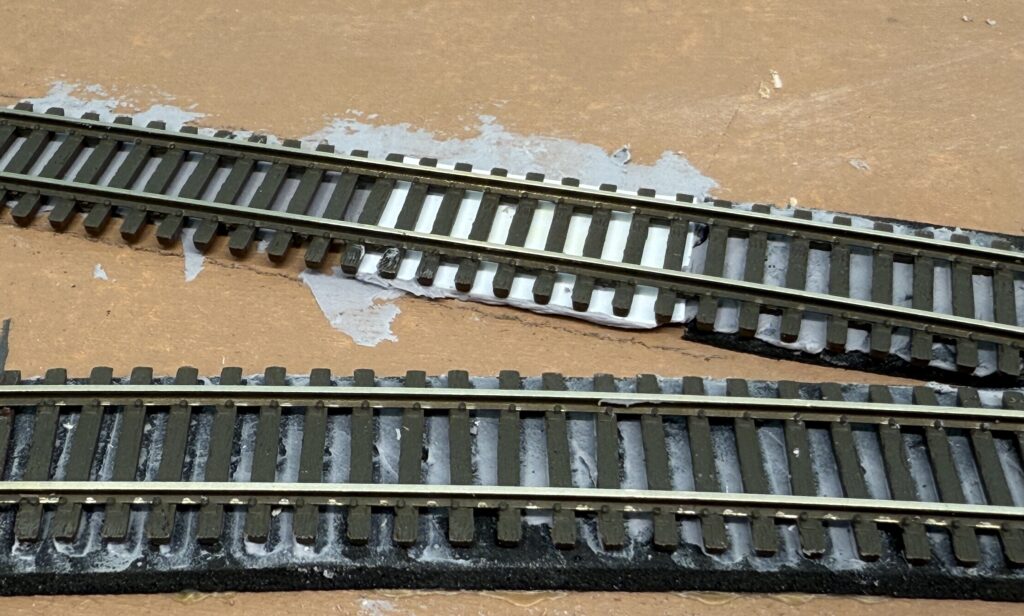
Trackwork fine tuning is crucial for reliable operations. This is especially true in N scale. I added small pieces of styrene to fill gaps at rail joints, helping wheels roll smoothly. The styrene is fixed in place with CA glue, then carefully carved to shape with a sharp hobby knife.
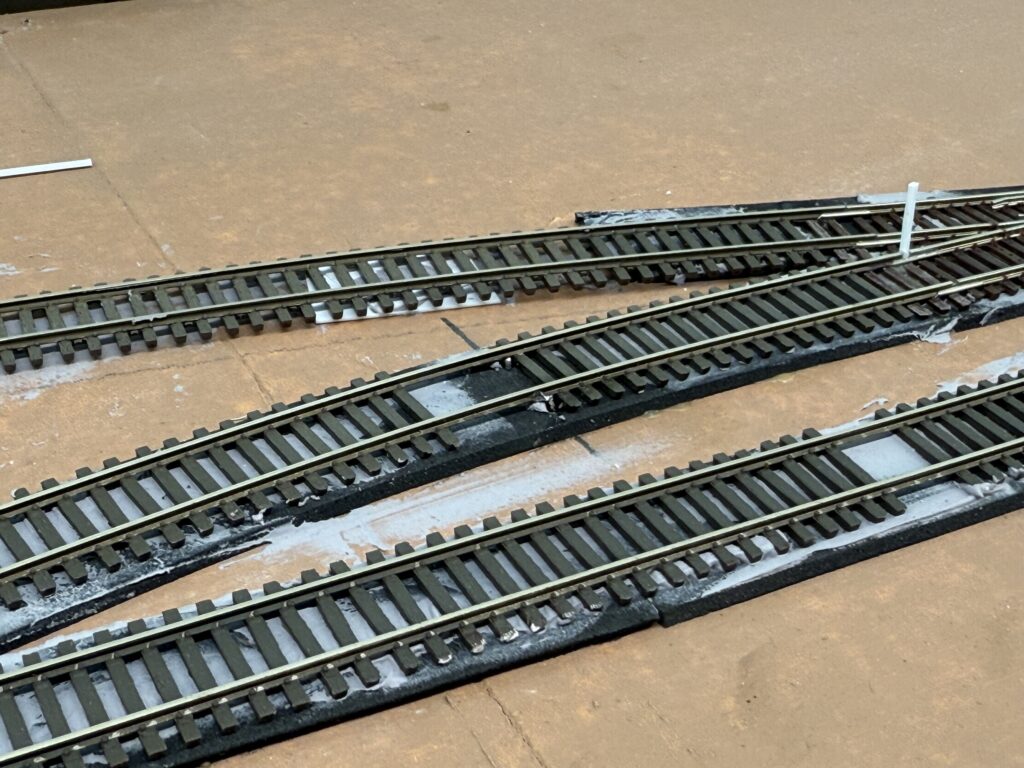
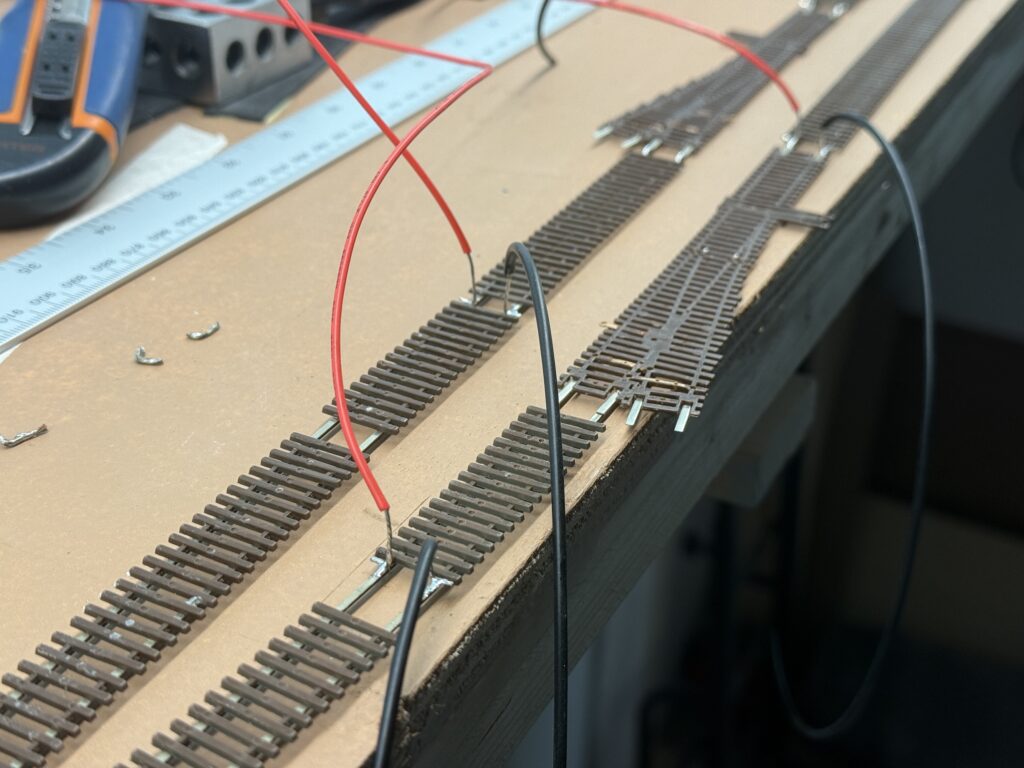
I also replaced the ties I had removed when soldering feeders to the underside of the rails. In the photo, you can see sections where ties were temporarily removed for easier soldering.
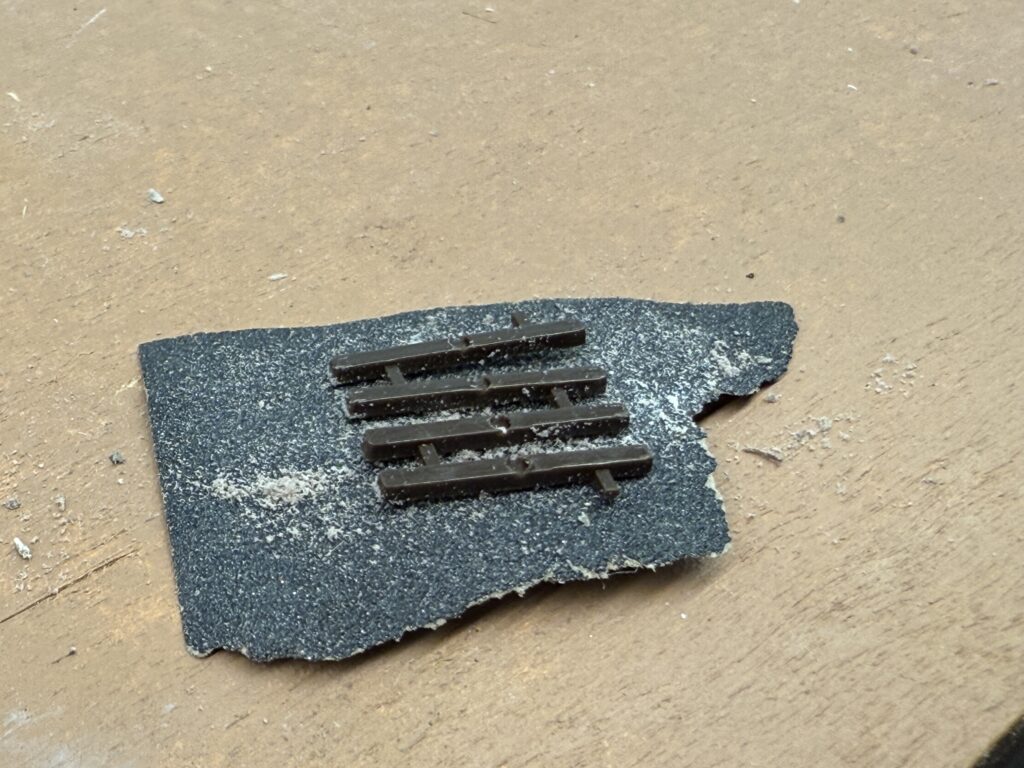
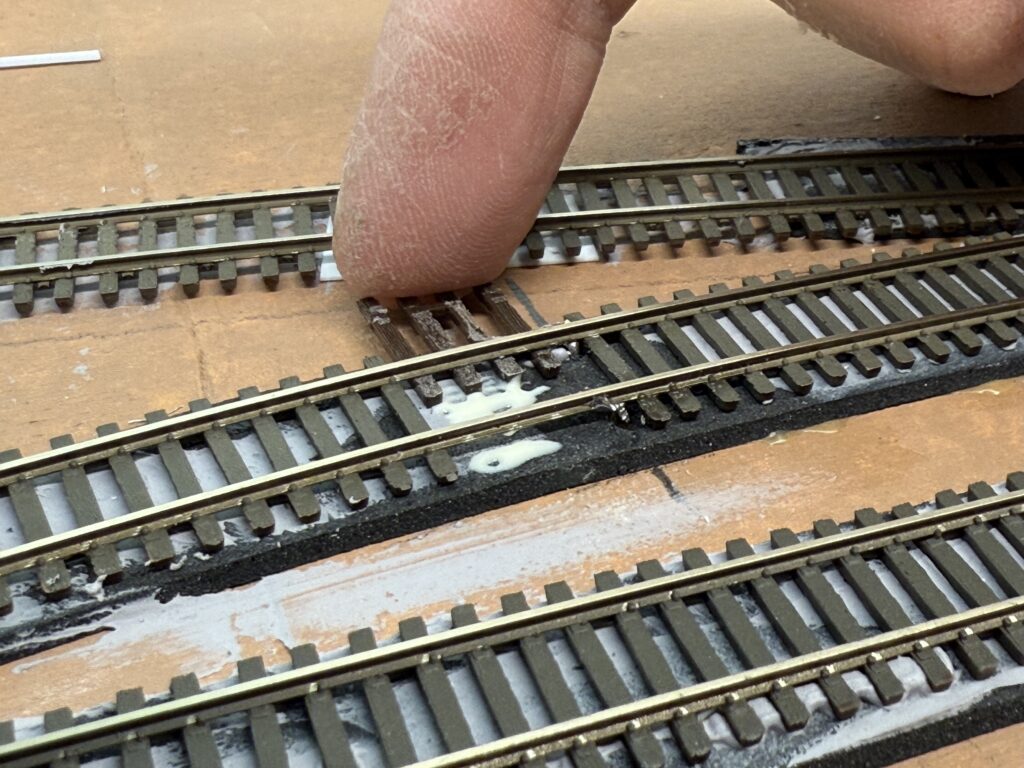
First, I sanded the ties to remove the molded spike details. I laid a sheet of sandpaper on a flat surface and rubbed the ties across it.
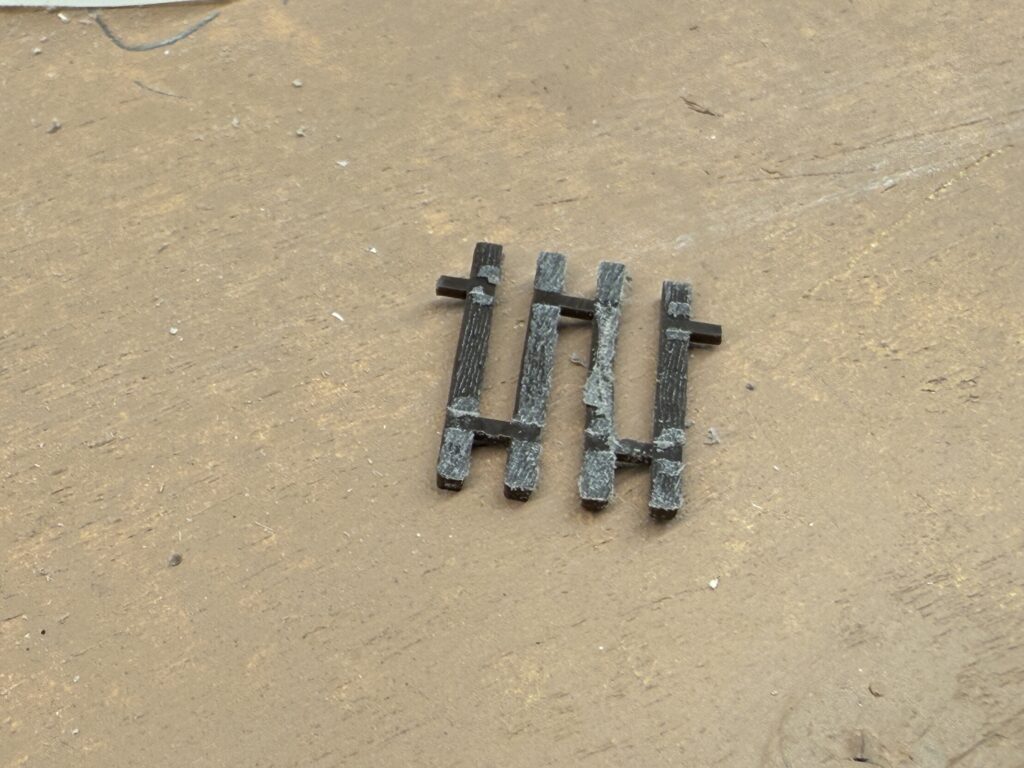
Once the spikes were gone, I test-fitted the ties under the rails.
Then I applied a few drops of Titebond glue and slid the ties into place, adjusting the position as needed.
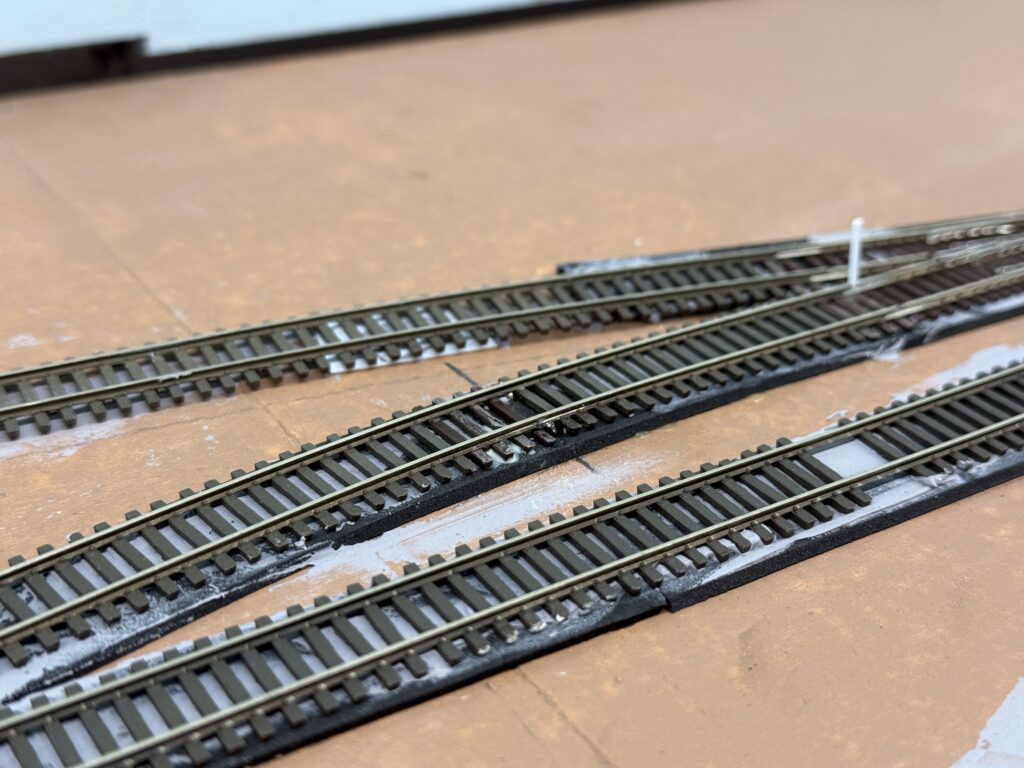
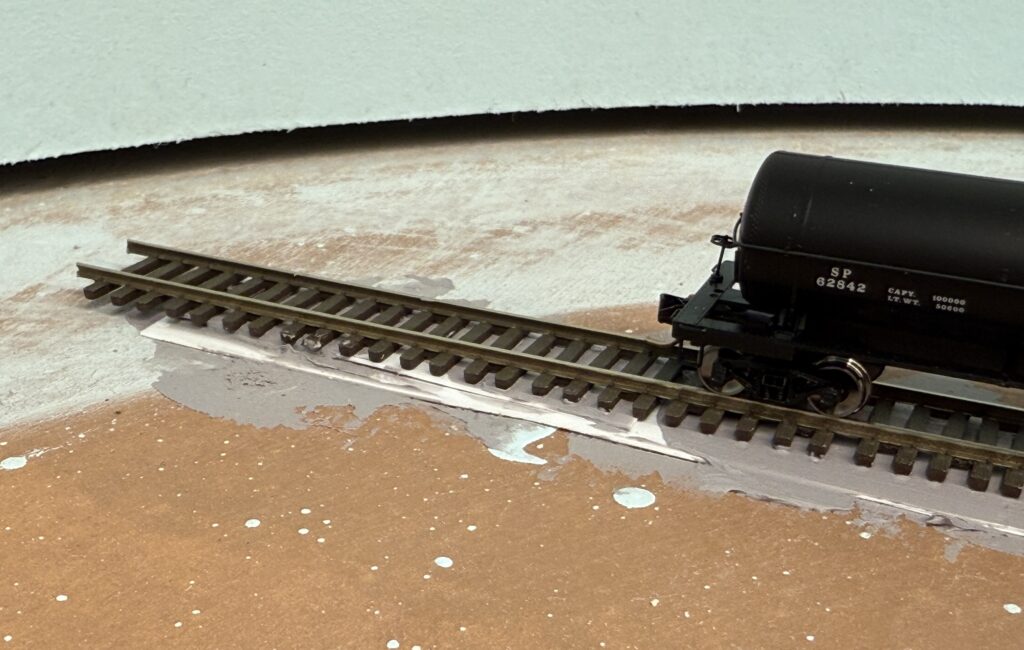
Once painted and ballasted, these small fixes will be barely noticeable.
These small improvements may seem minor, but they make a big difference in how smooth trains run. On an N scale switching layout, reliable operations depend on well-prepared trackwork and solid electrical connections.
Nothing ruins the flow of a session like derailments or stalling at a poorly aligned joint. Paying attention to these details brings your layout closer to realistic railroad performance.
Clean solder joints and neatly replaced ties also enhance the visual appeal of your track. Each detail you refine adds to the overall reliability and realism of your scene.
Good trackwork is the backbone of stress-free operations. Investing time early pays off later when the layout runs smoothly without surprises. For N scale, especially, precision matters – both for looks and reliable running.
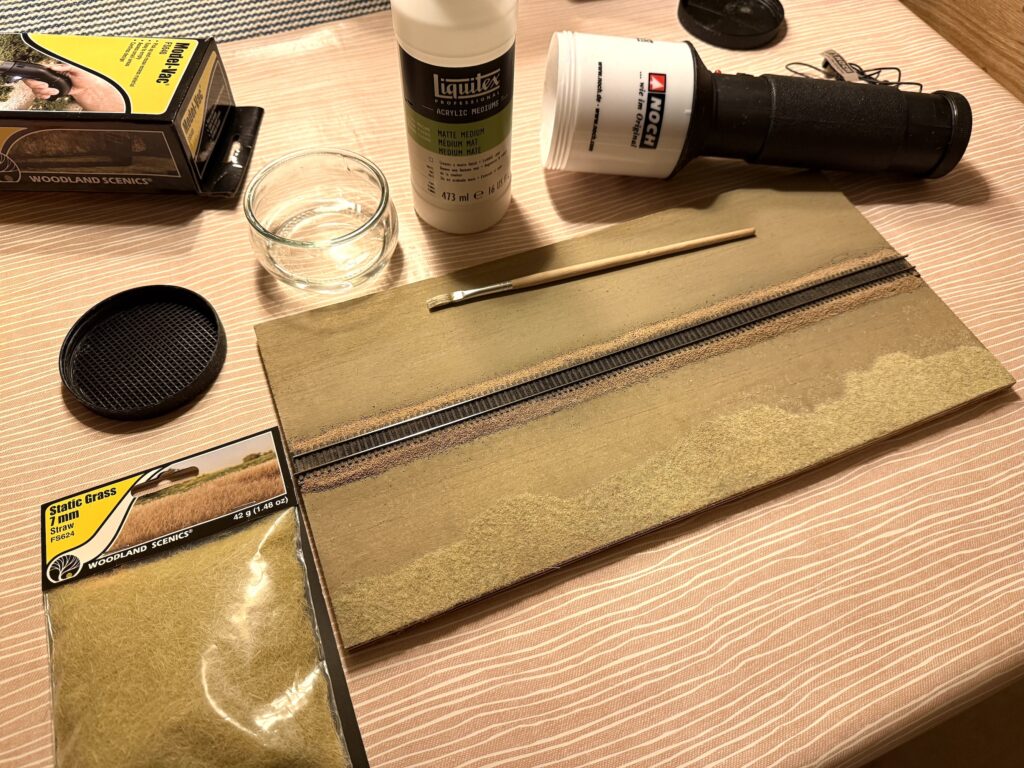
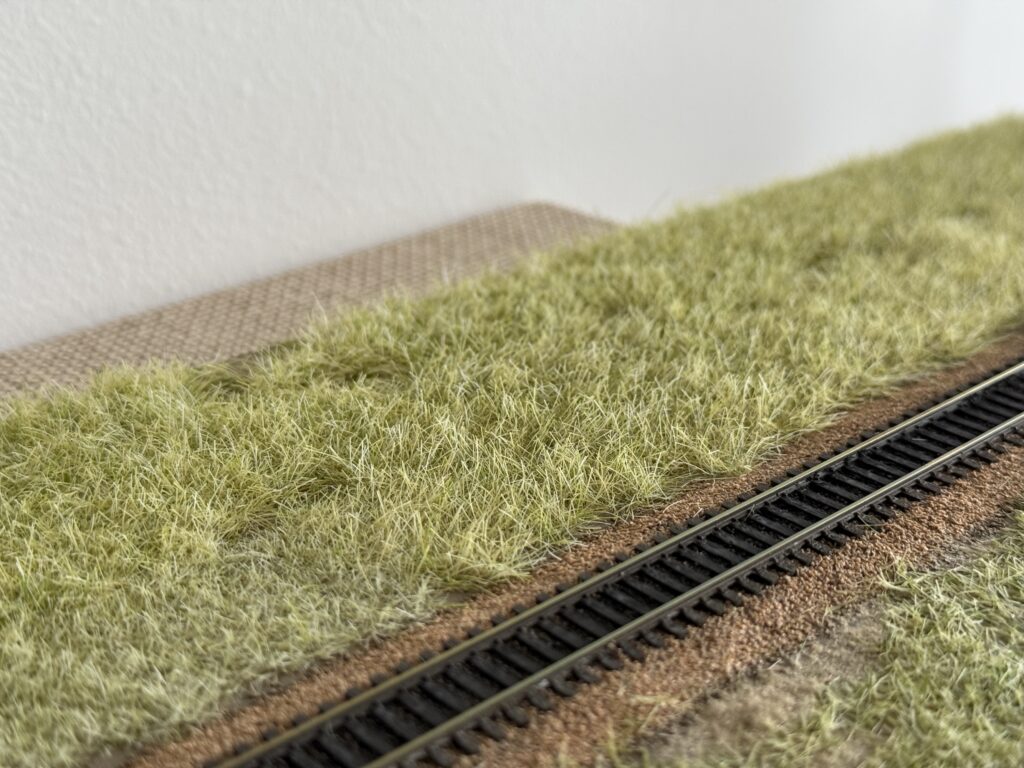
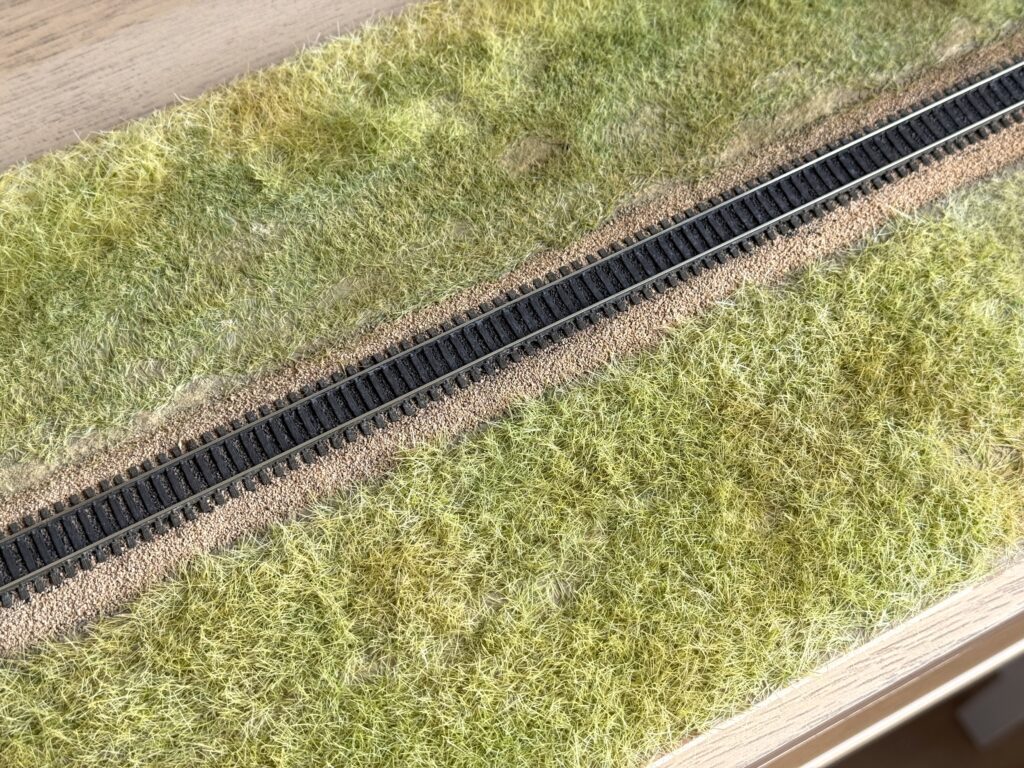
On this second part we’ll focus on applying static grass with a Noch Gras-Master 3.0 applicator.
I applied a first layer of 2 mm Woodland Scenics Straw static grass mixed with some Noch 2 mm green static grass, using Liquitex Matte Medium to glue it in place. I brushed on a random patch of glue, then loaded the Gras-Master with static grass and applied it over the glued area.
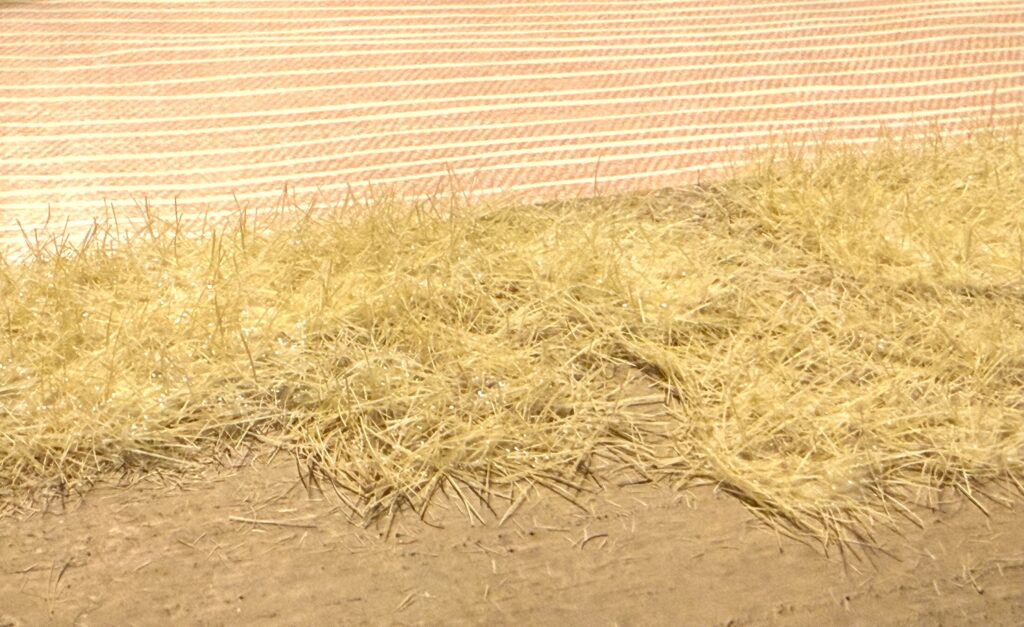
After the glue had dried, I applied a second layer of matte medium in a random patchwork and added 7 mm Woodland Scenics Straw static grass.
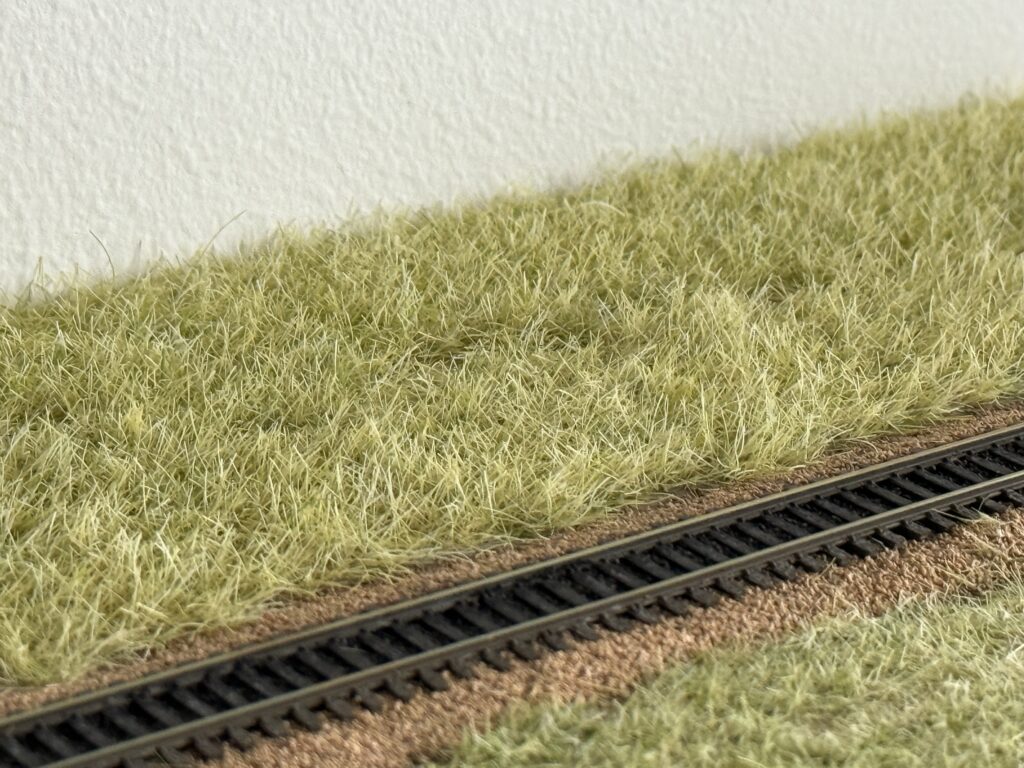
To create some variety, I mixed Light Green and Straw Woodland Scenics static grass. I applied both 7mm and 4mm layers.
Honestly, the result wasn’t as good as I’d hoped. I had better outcomes on previous layouts. The problem seems to be the sieve filters I used for the 7mm grass – the finest one isn’t ideal. I also switched to a 9V DC external power supply instead of using a battery.
Alternative Sieves and External Power Supply
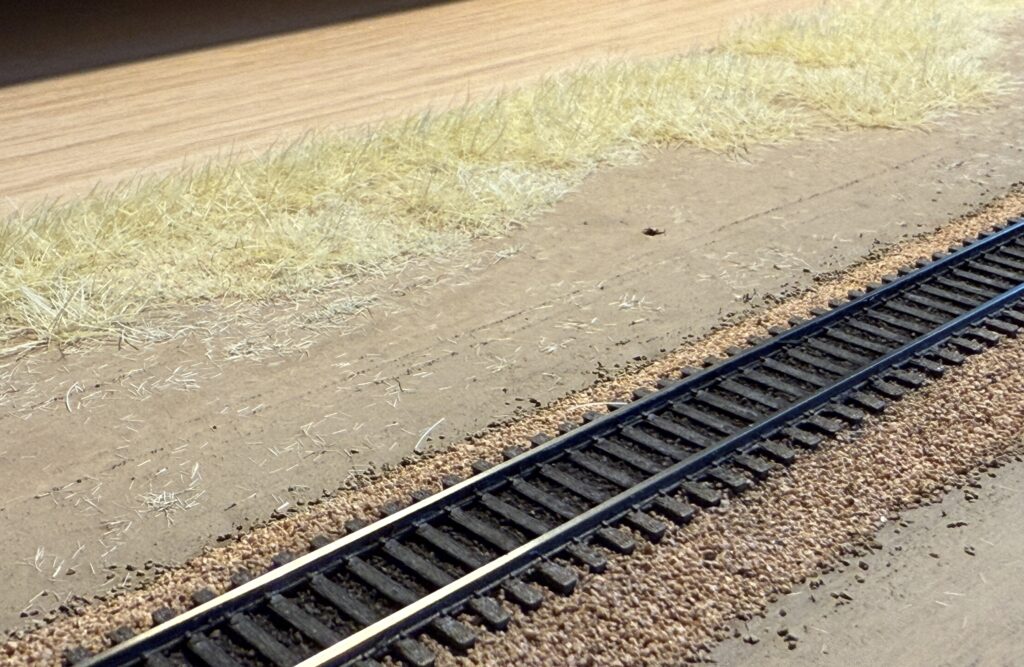
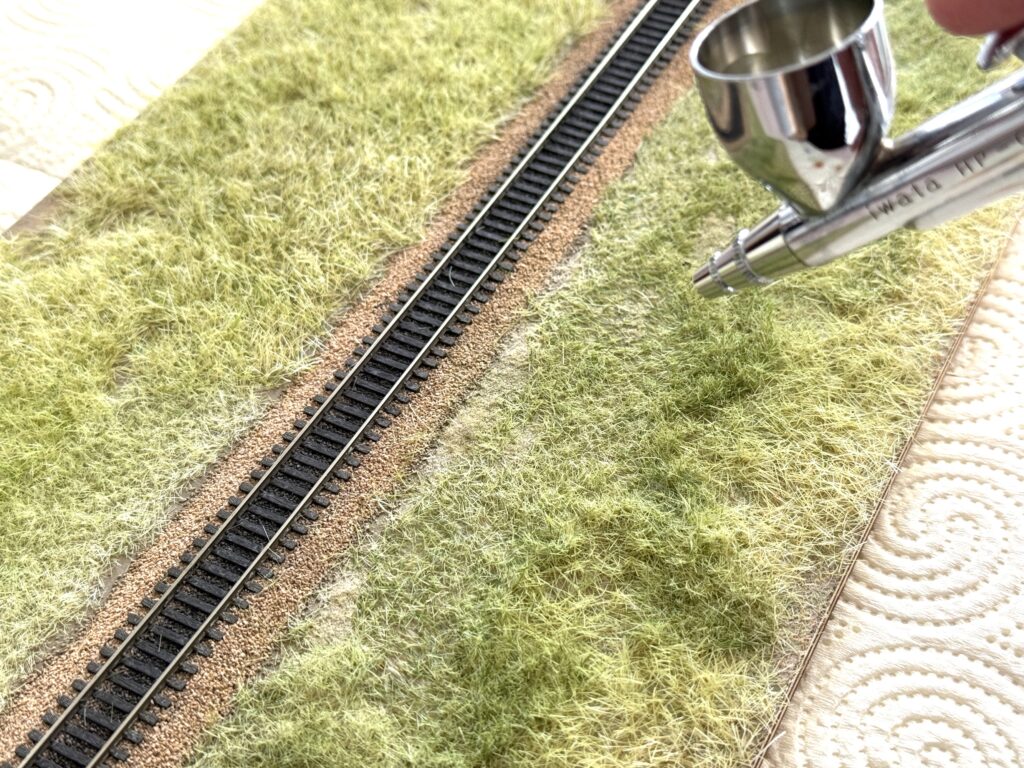
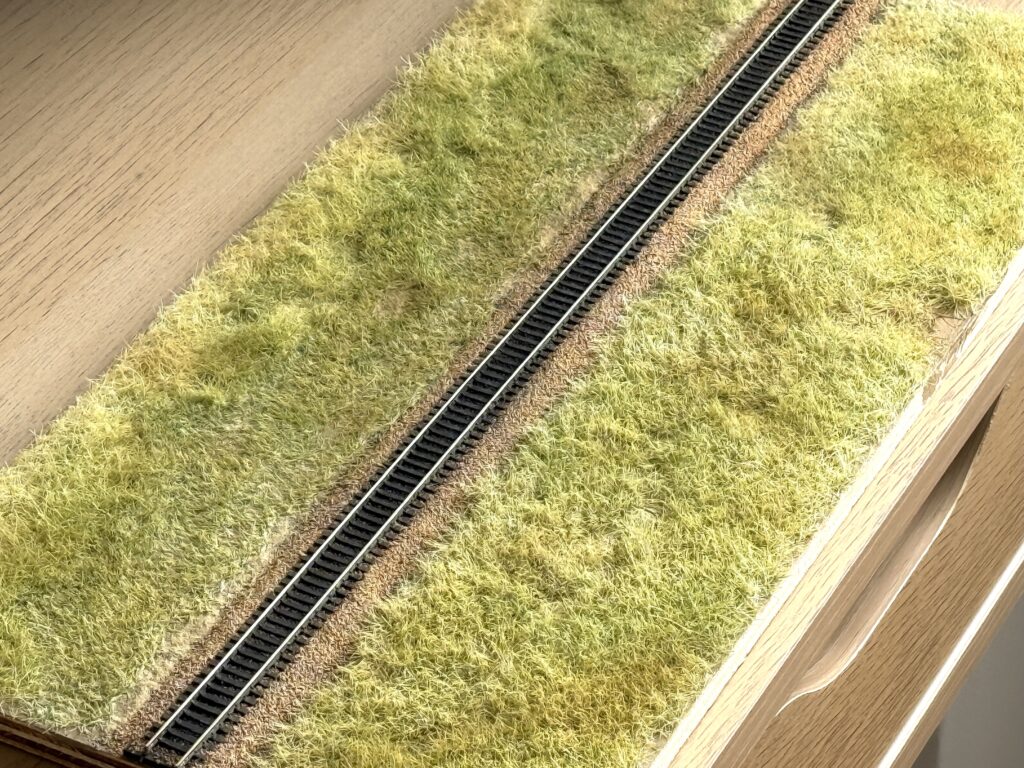
Here’s the result of applying a mix of Light Green, Medium Green, and Straw static grass in roughly random proportions. I applied separate layers of 7mm and 4mm grass in different spots. I also kept the ground clip close to the applicator and moved it along during application.
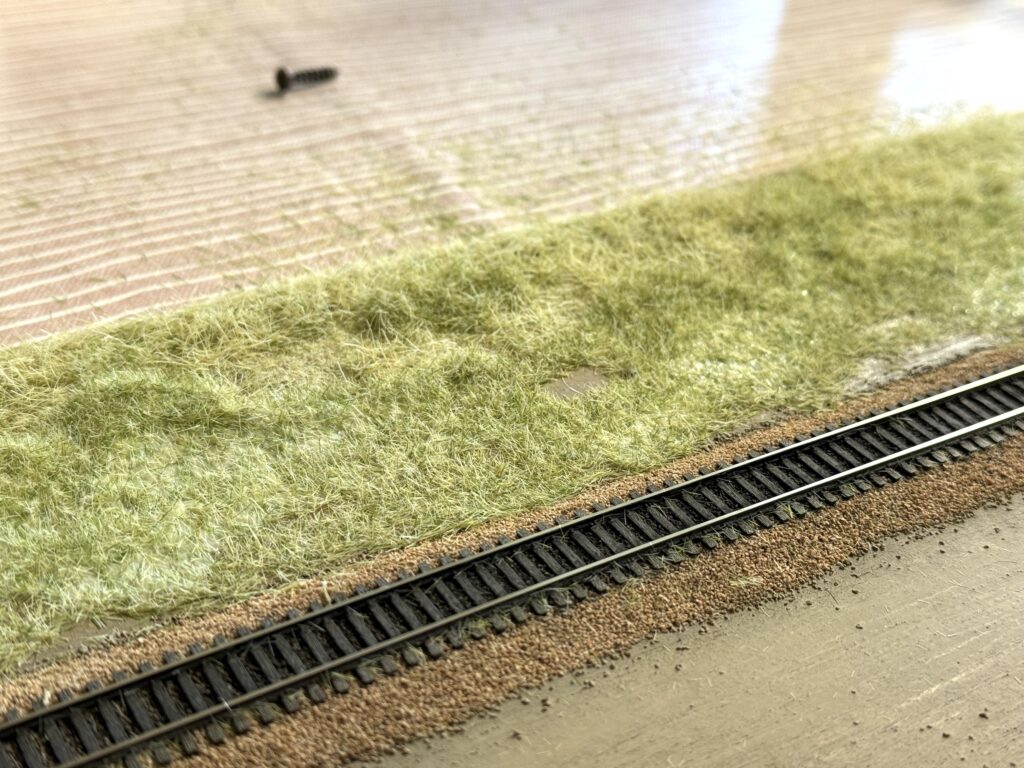
Overall I am quite satisfied, but I wanted to add more variety to the grass. A few touch ups were necessary.
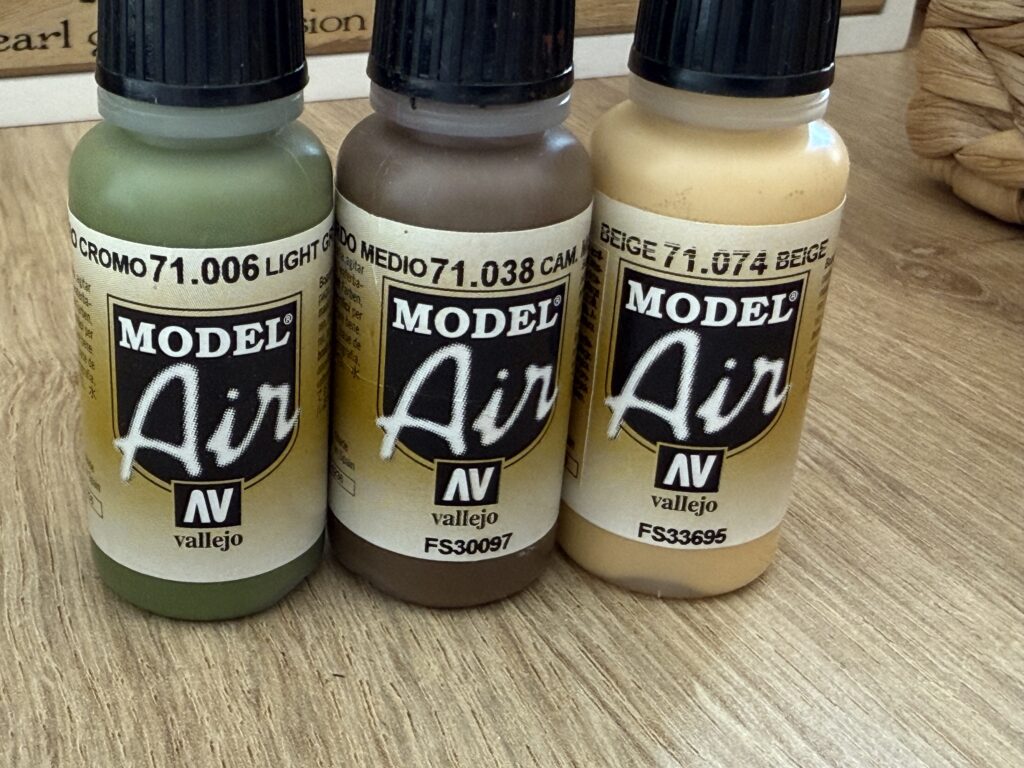
I started with the green, then added beige, followed by brown. I sprayed a light, diluted coat in a random pattern to highlight a few spots here and there.
N Scale Diorama: Grass / Conclusions
I like the result. The final airbrush touch-ups helped break up the uniform color and add more variation and more realism.
Once again, working on an N Scale diorama proved to be a smart choice for experimenting with static grass. Before committing to applying grass on the full SP Burbank Branch in N scale layout, I fine-tuned the technique on a disposable base.
Final steps with laying tracks on the SP Burbank Branch N scale layout
The final steps of laying tracks is one of my favorite aspect of the hobby. It’s when the layout starts to take shape, and the first test operations can take place. At this point all trackwork is done, but the staging and the LA River bridge.
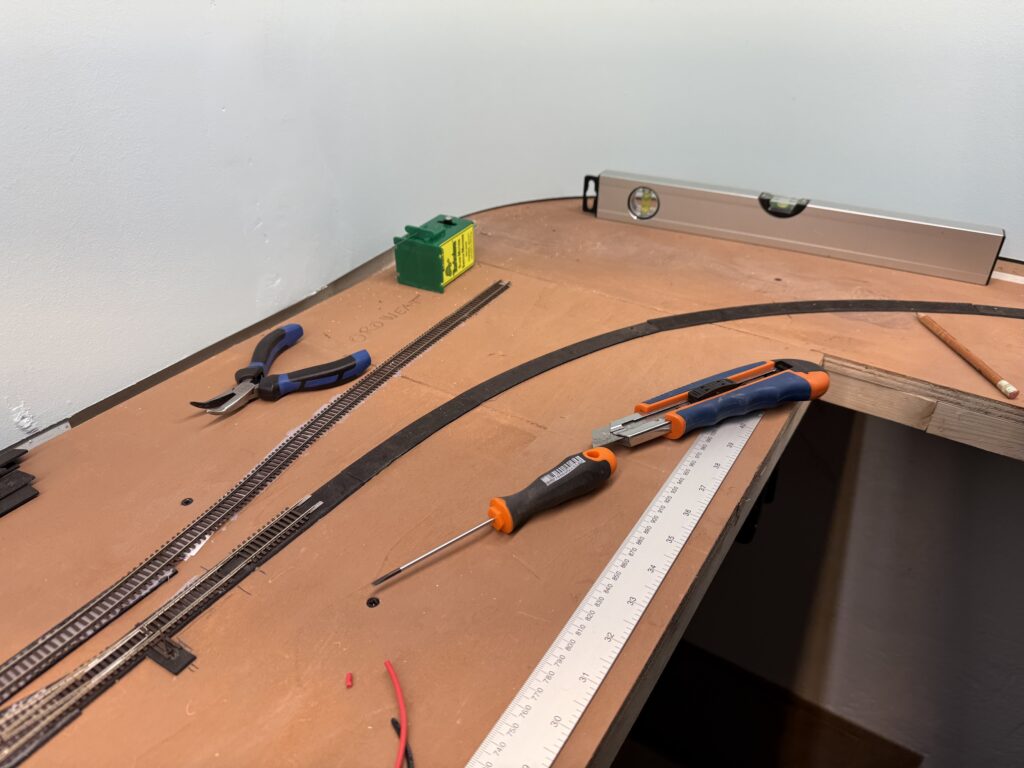
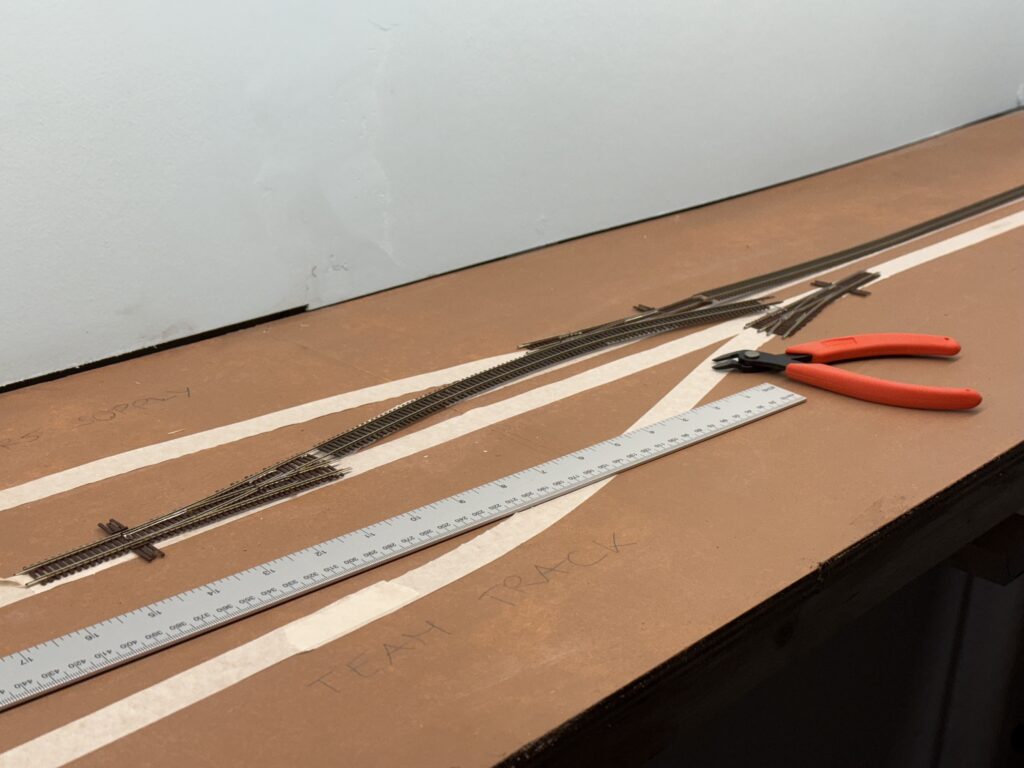
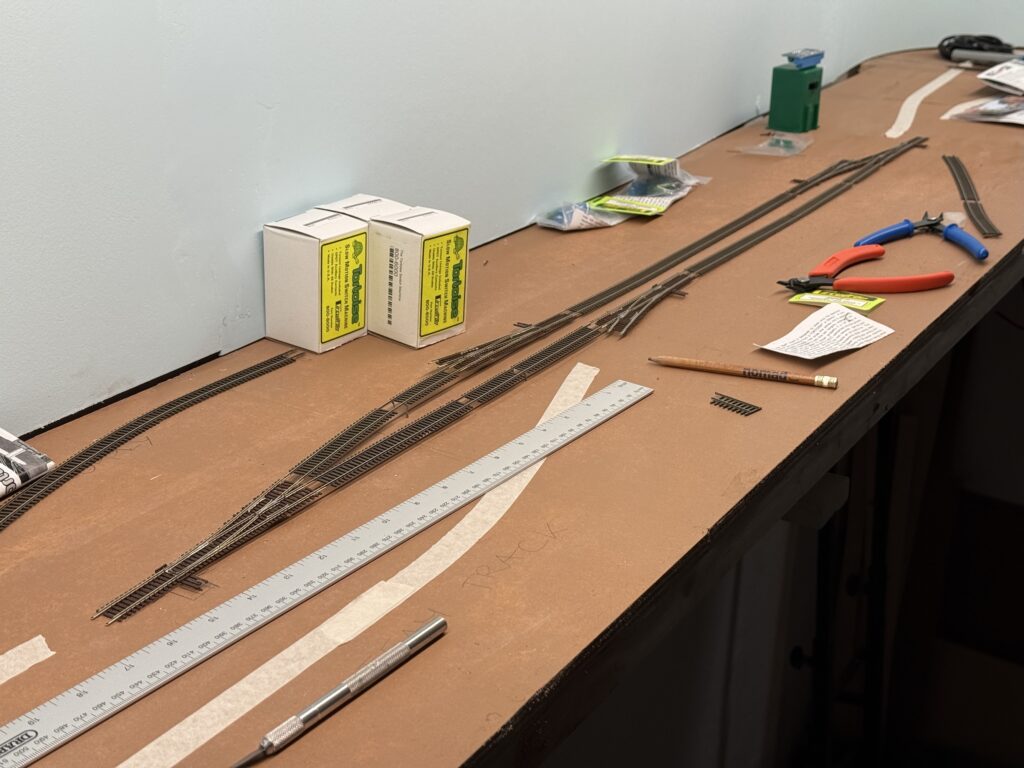
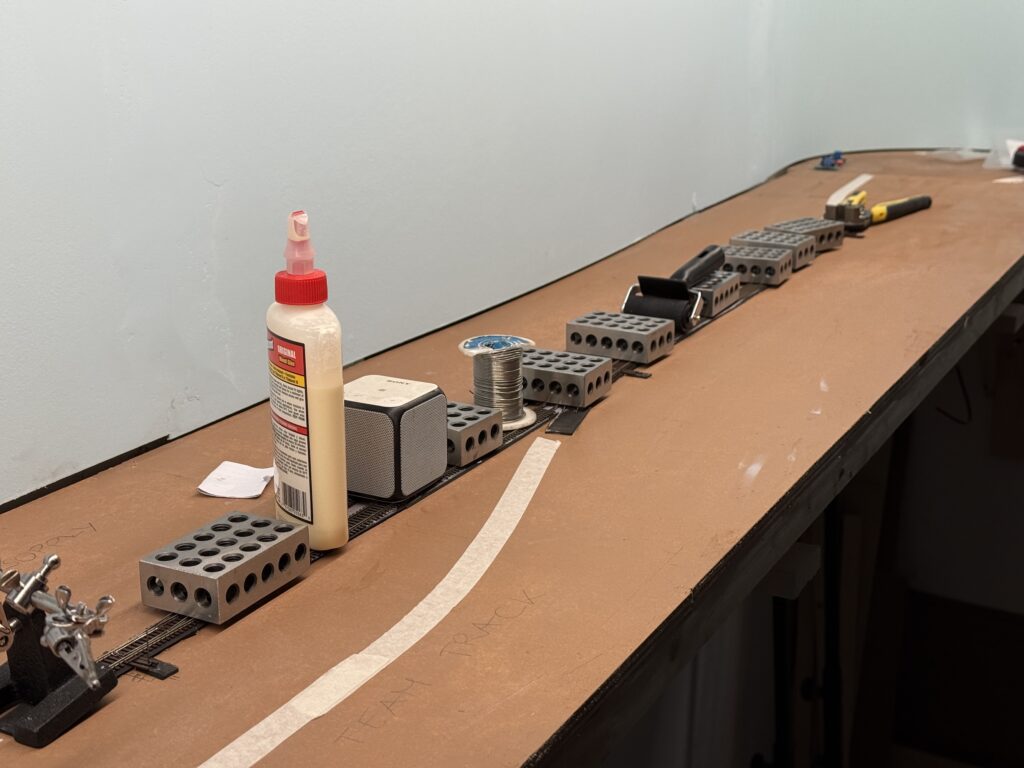
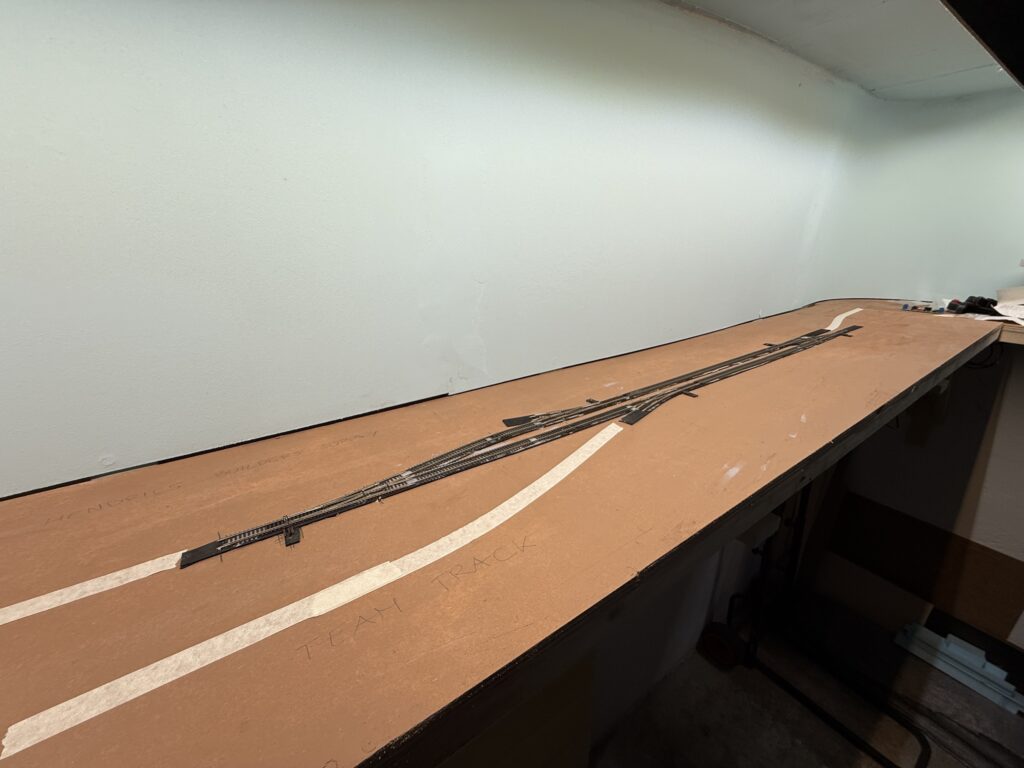
I finished laying track for the spurs, here pictured are the Team Track and Hendrick’s Builders Supply.
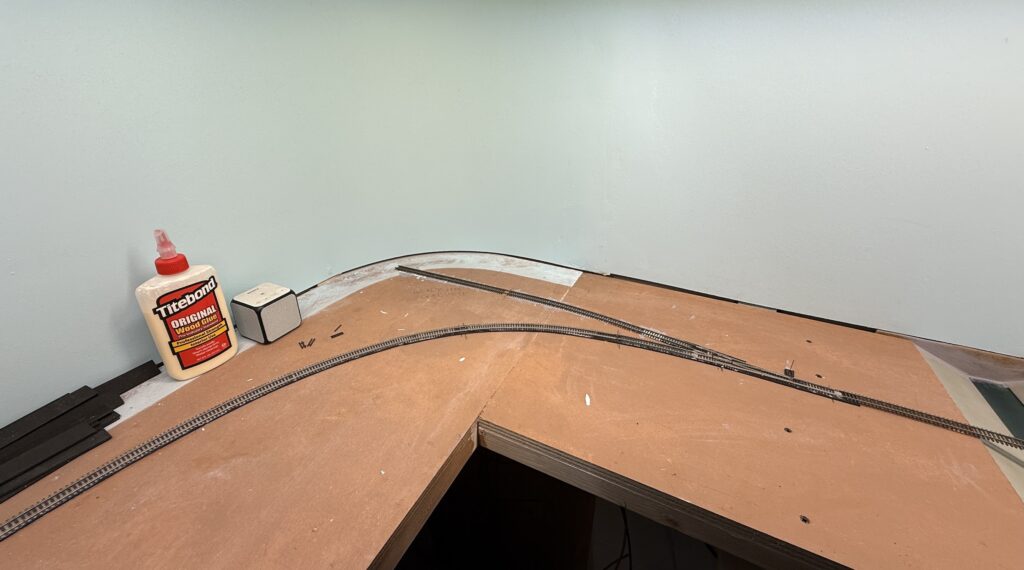
Then, I laid the curve on the west end of the layout – near the Oroweat Bakery and Terry Lumber spurs. First I test-fit the curve.
Then I laid EVA foam roadbed.
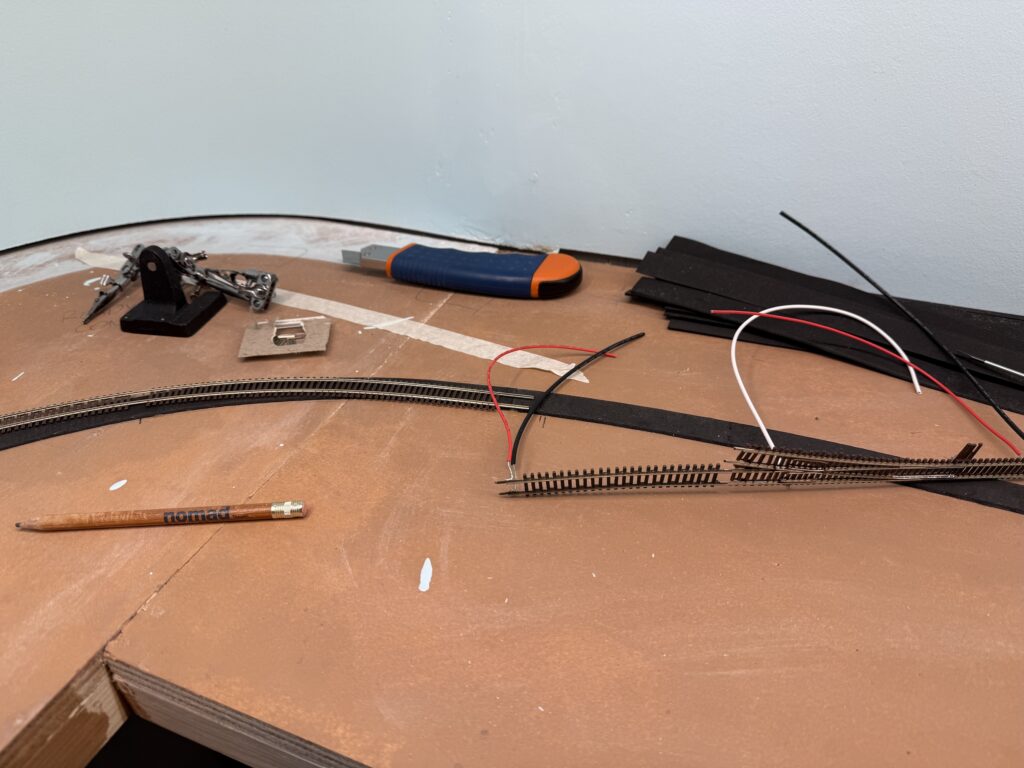
Then I laid track and connected the feeders, soldered under the rails.
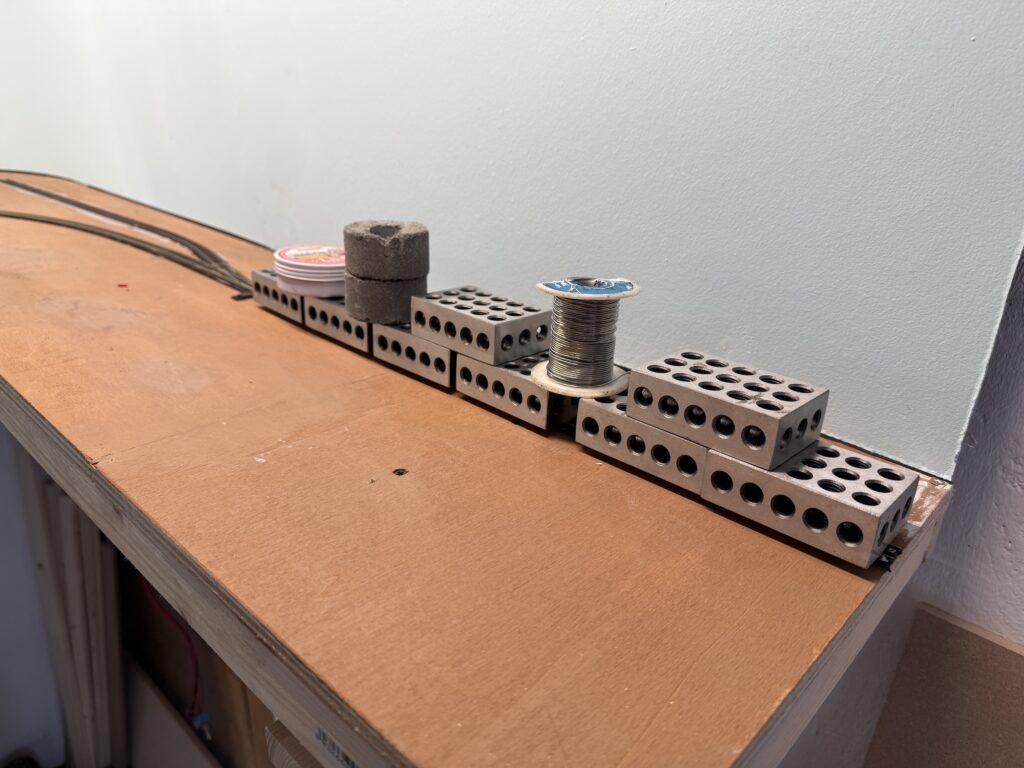
I used metal weights to hold the track firmly in place while the glue dried.
Staging
While the removable (foldable) staging isn’t ready yet, I started figuring out the mechanical connection. I screwed two brass screws into the roadbed and plywood subroadbed, then soldered the rails right on top of them.
This should keep the track from shifting and create a solid connection between the layout and the foldable staging yard.
Power Breakers
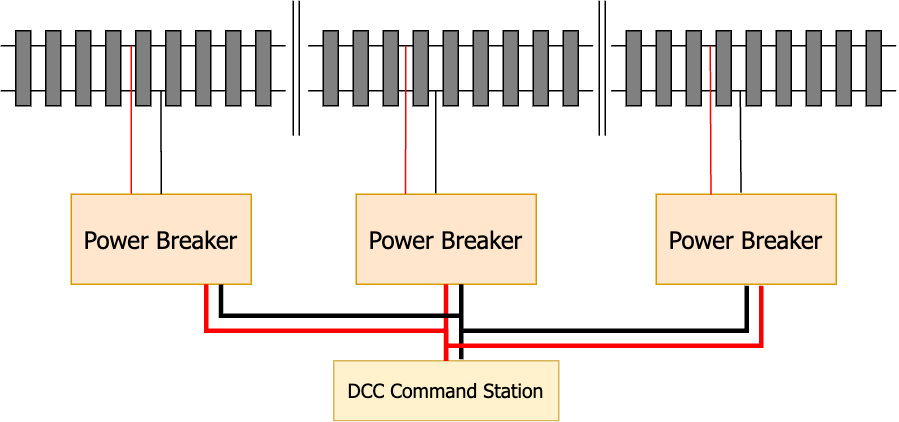
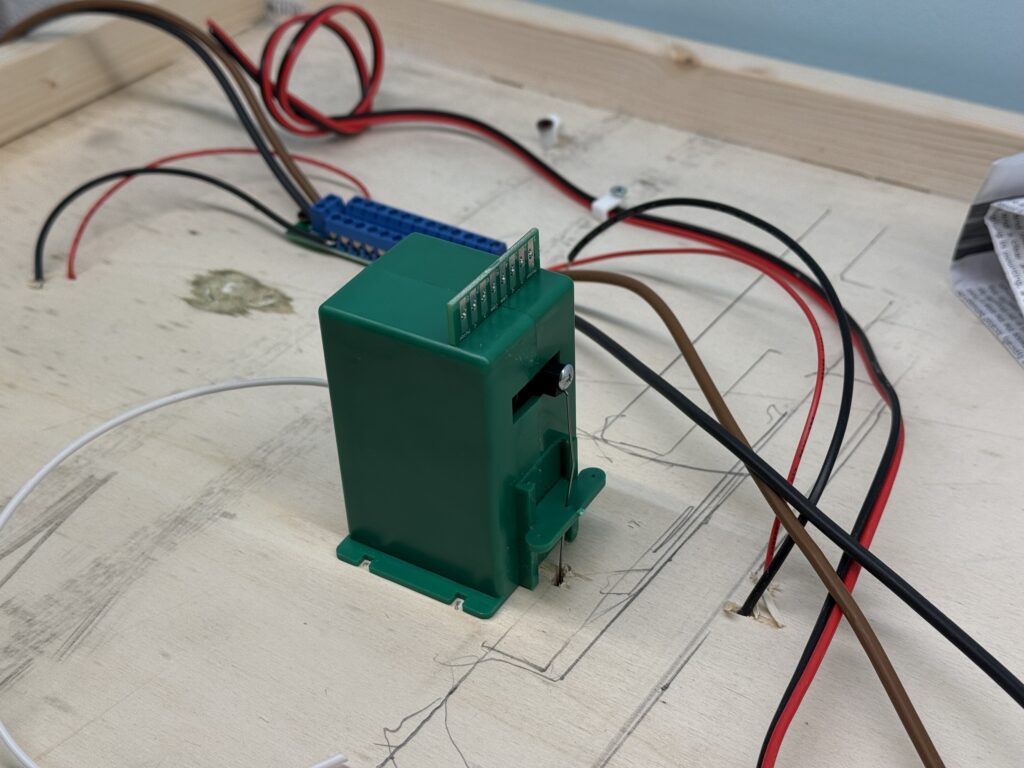
Each section of flextrack and each turnout have their own feeders. I also divided the layout into three separate DCC districts, each managed by an NCE EB-1 Electronic Breaker.
Should a short circuit occur in one power district, its dedicated power breaker would cut power to that district, while the other two would remain operational
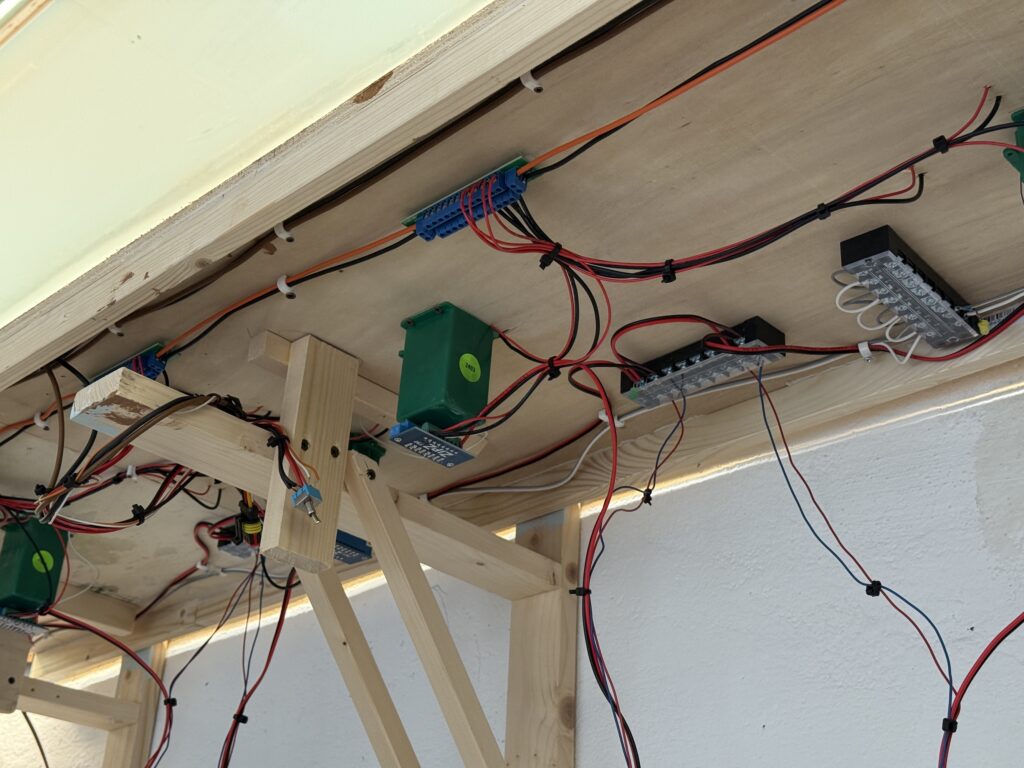
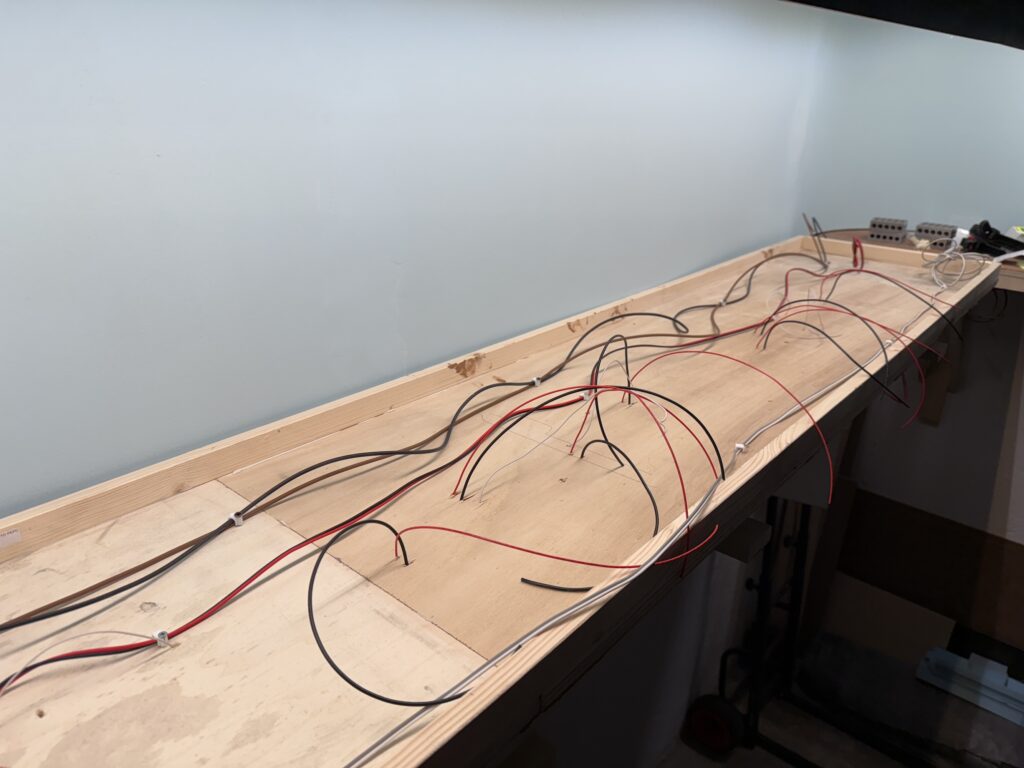
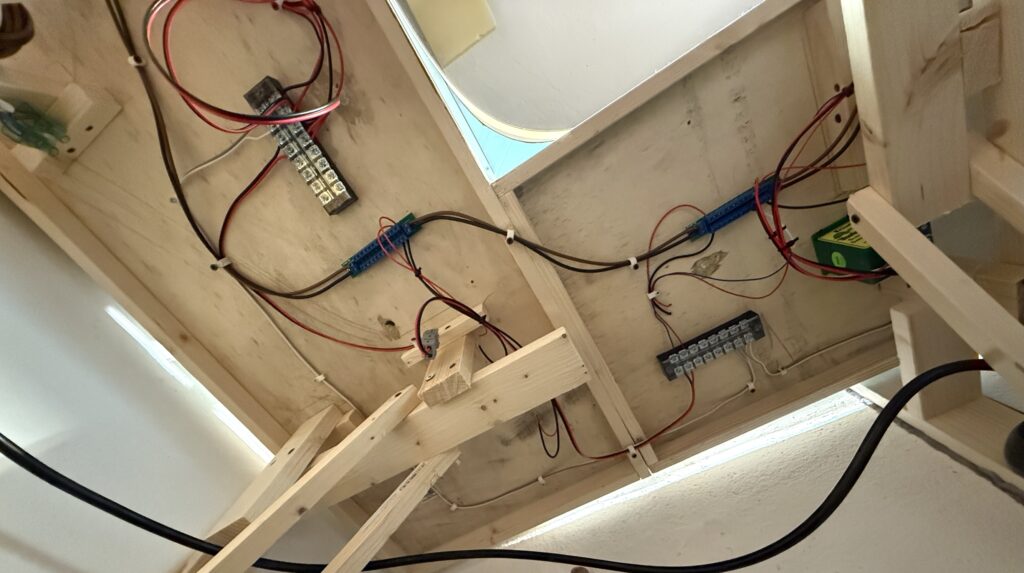
Wiring
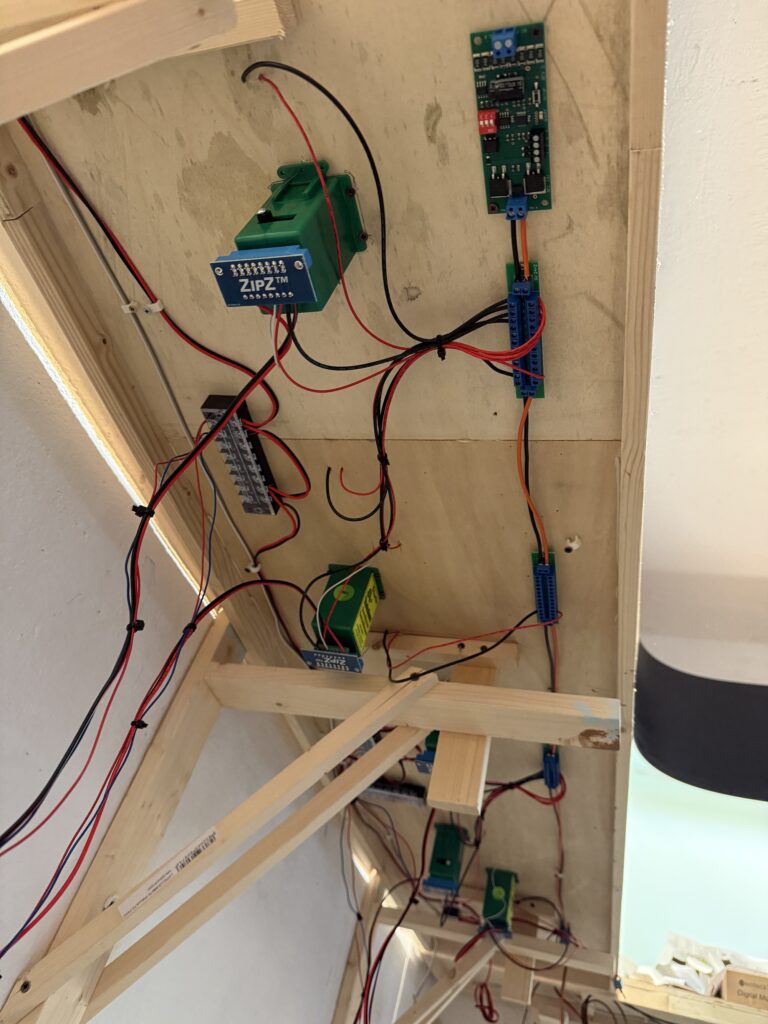
Keeping wiring tidy and well-organized is crucial for troubleshooting. I’ve connected LEDs to each power line – for the Tortoise switch machines and the layout lights – by screwing them onto the terminal connectors. This allows me to instantly see if a section loses power.
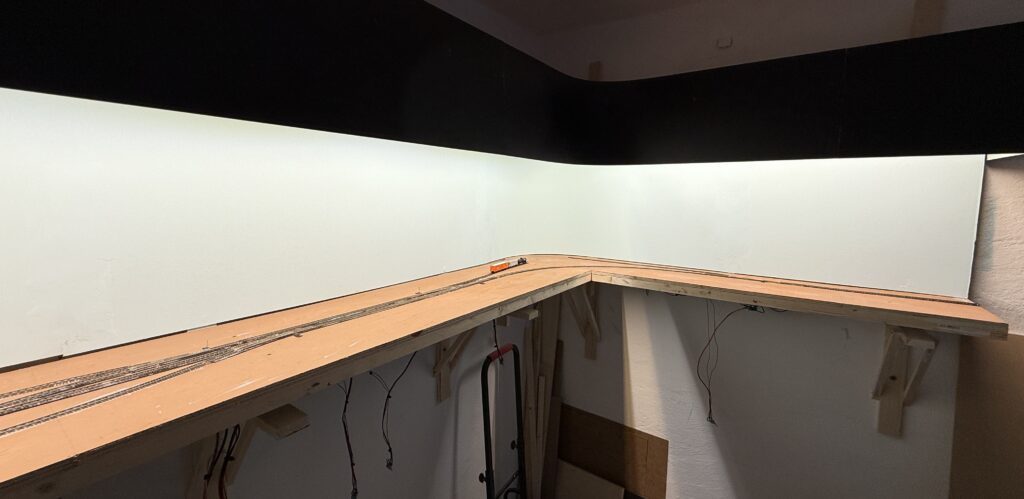
Laying Tracks Final Steps
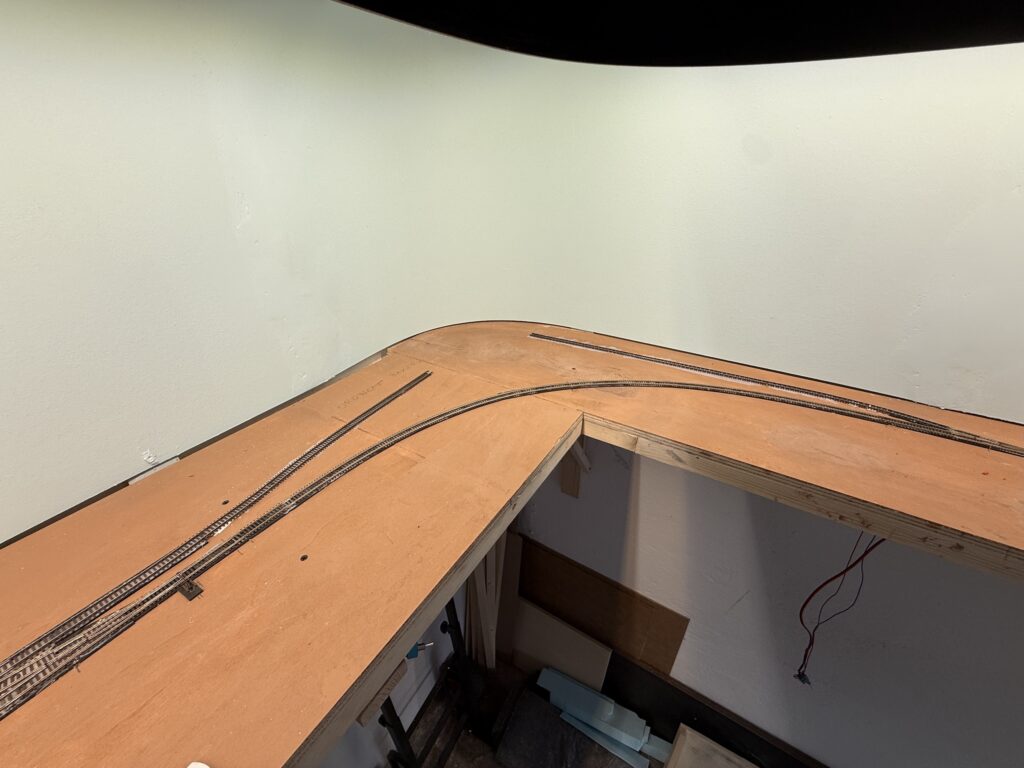
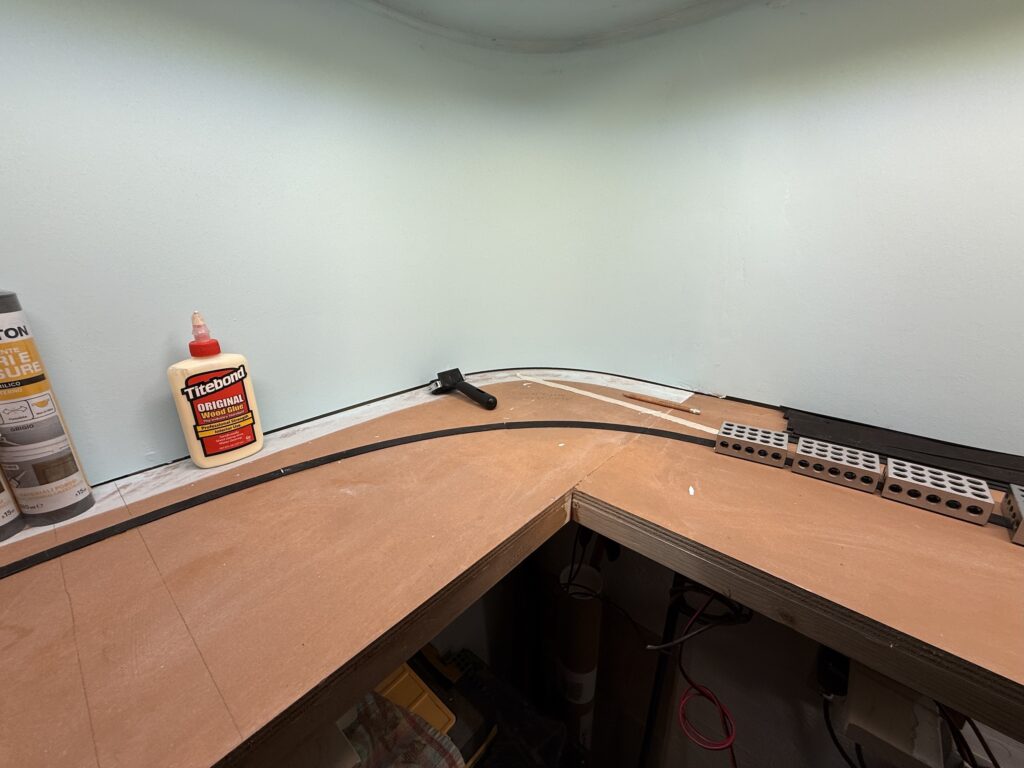
Here’s a panoramic view of my N scale switching layout with the track laid so far. Next step is to install the LA River section with its bridge and connect the missing piece of flextrack.
West-end of the layout.
East-end of the layout.
After that, I’ll assemble and install the foldable staging yard.
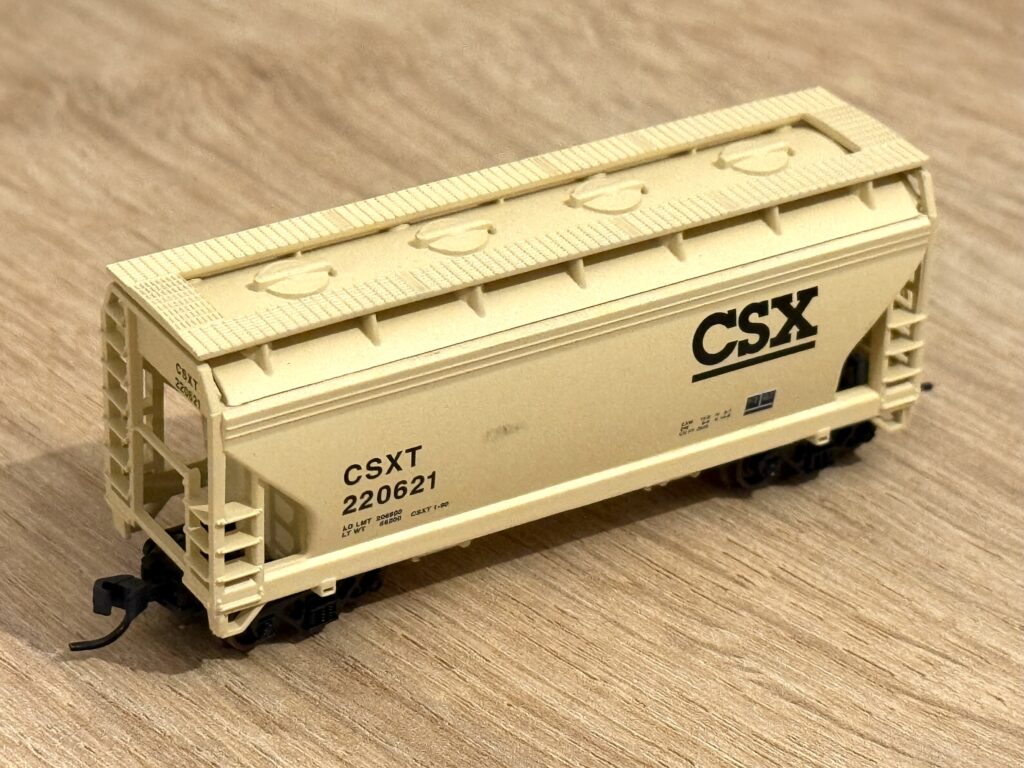
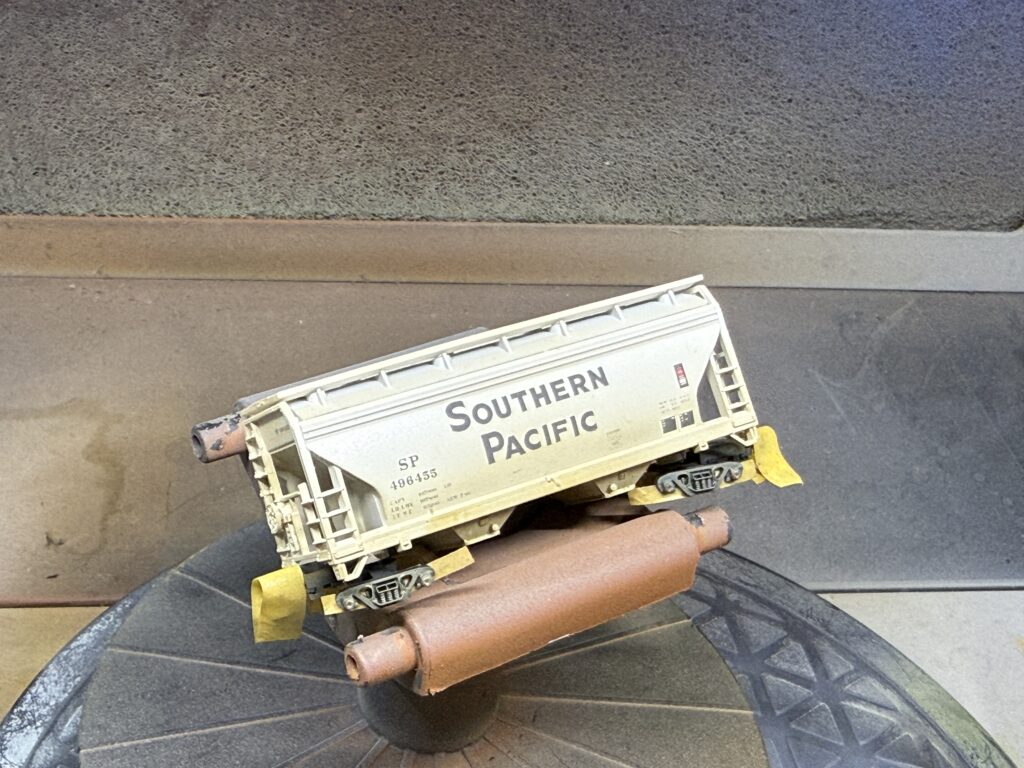
Follow along the process of repainting and weathering a covered hopper in N scale.
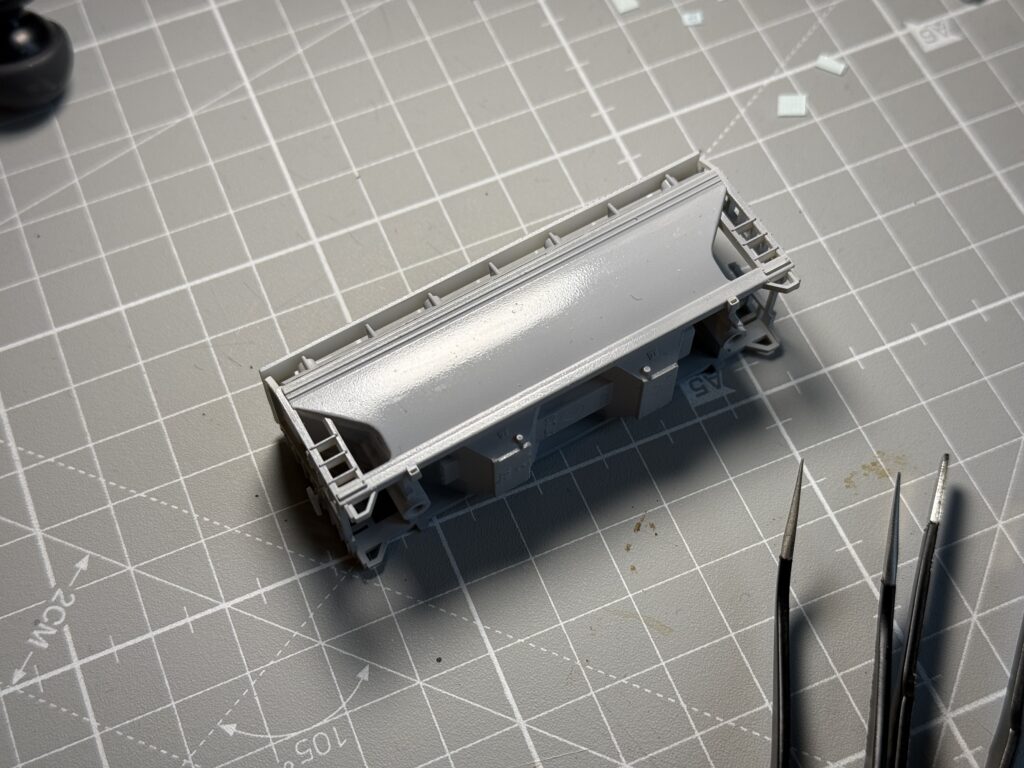
I purchased an Atlas CSX ACF 2-bay covered hopper car on eBay at a good price. The car type suits my era and prototype, but the road name (CSX) is too modern for the 1970s. A covered hopper painted and lettered for the Southern Pacific will be a much better match, to use on my N scale layout.
I also replaced the trucks with Micro-Trains trucks with couplers.
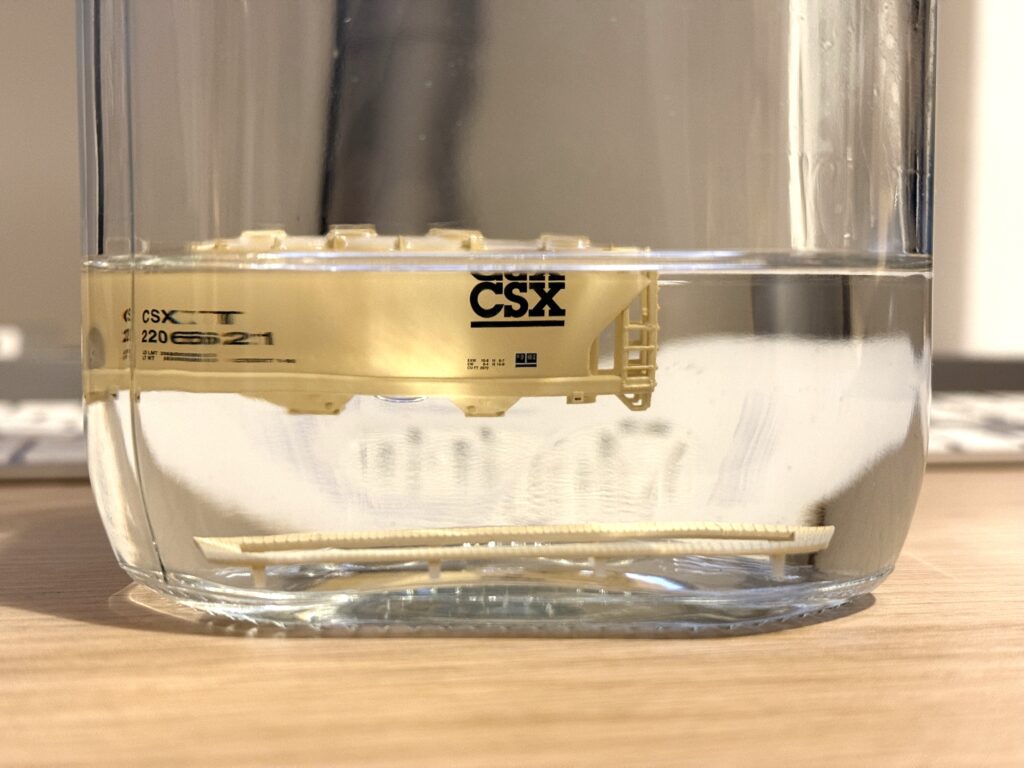
Paint stripping
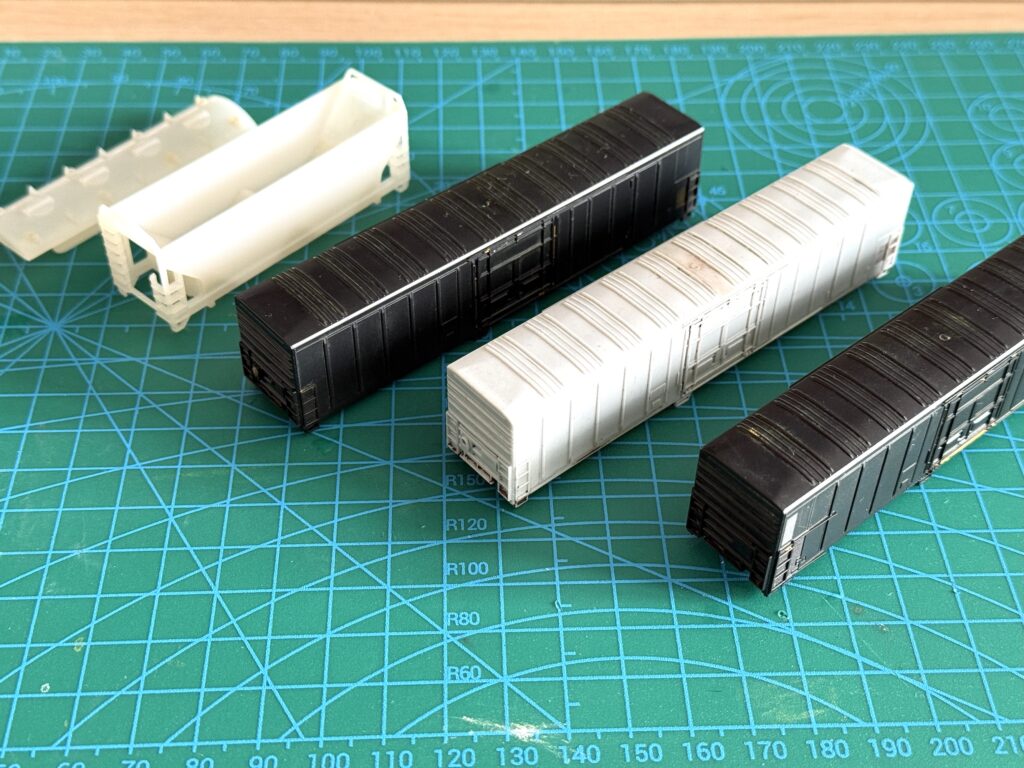
The first step is to strip the paint from the car. Before soaking it in 99% isopropyl alcohol for about 24 hours, I disassembled the trucks and removed the roof walkways for better results. I used a glass jar with a rubber-sealed lid.
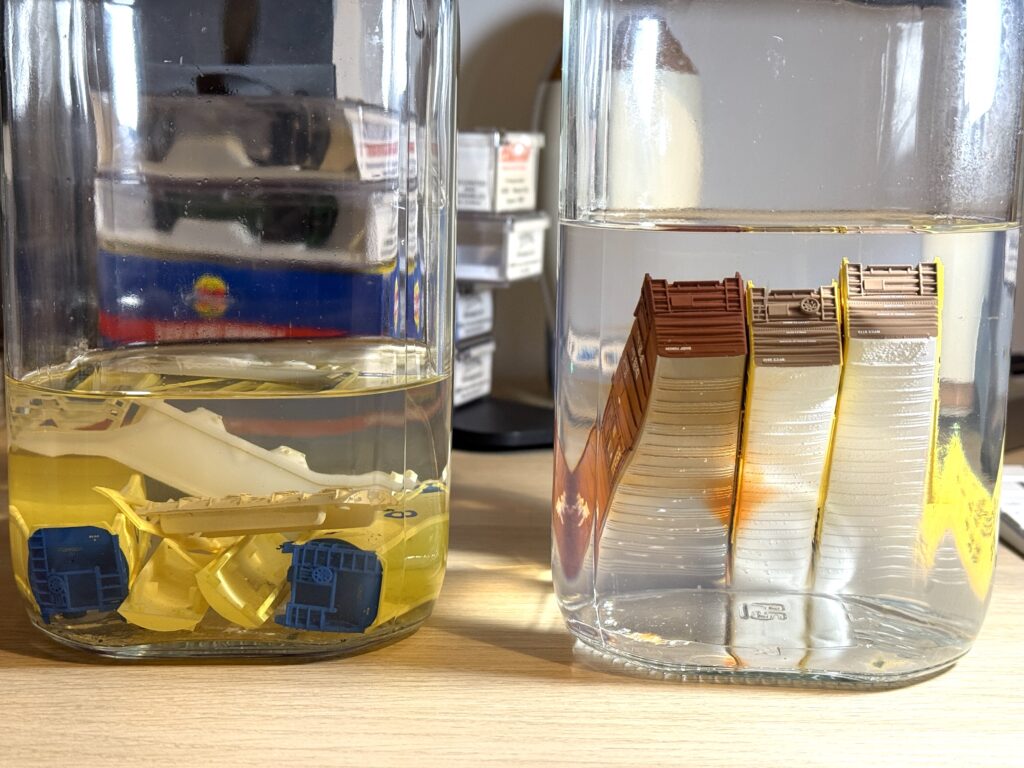
To streamline the repainting process, I soaked multiple car shells in alcohol to work on them simultaneously. As shown below, there are three ACF 2-bay covered hoppers to be repainted and lettered for SP, along with three 57′ mechanical reefers destined for Southern Pacific Fruit Express.
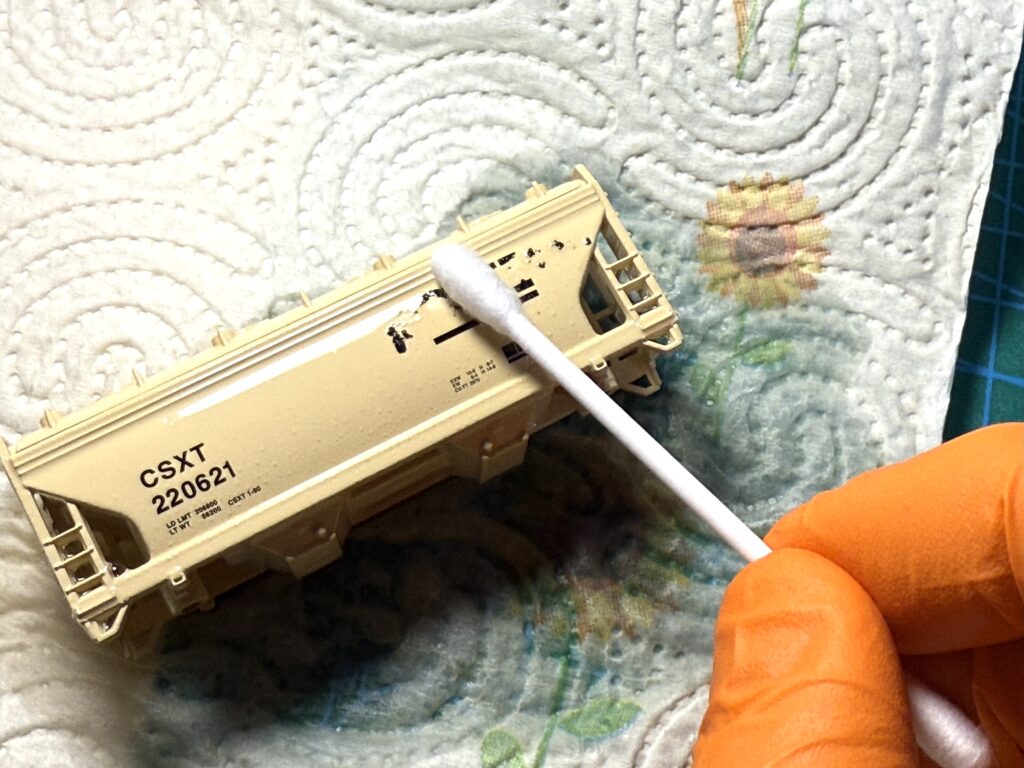
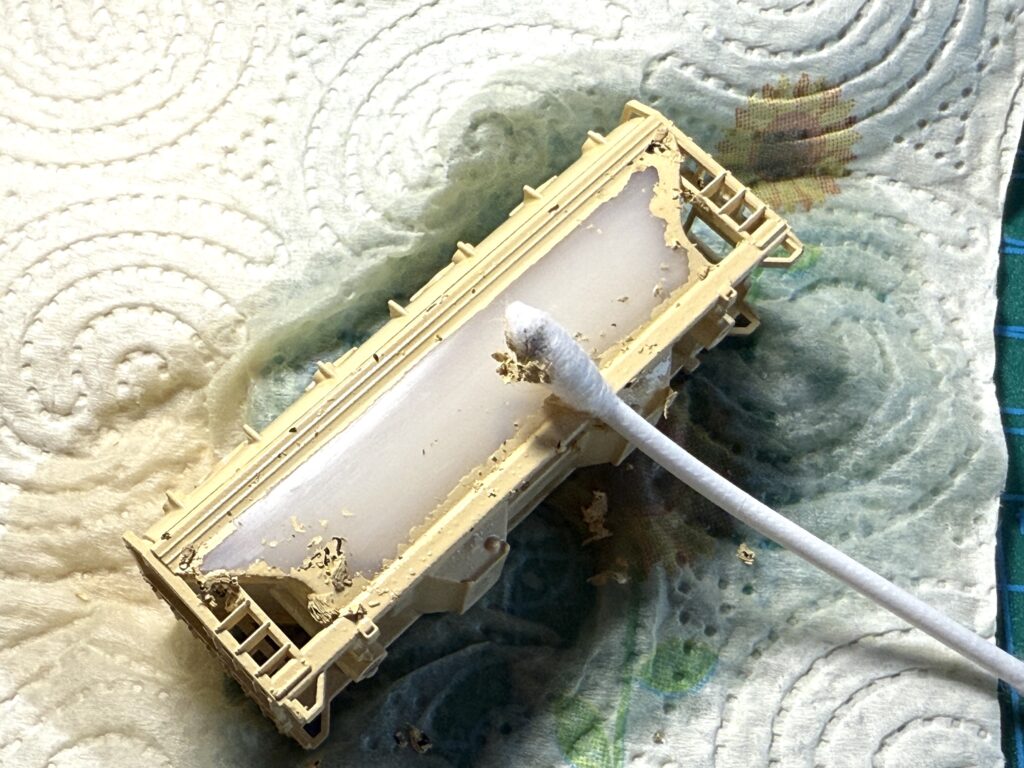
Removing the paint
After soaking the car, I carefully removed all the paint using a cotton swab and more isopropyl alcohol.
Repainting and weathering a covered hopper: preparation
Paint stripping doesn’t need to be flawless, but it’s important to remove as much paint as possible, especially from the recessed areas of the shell. The ladders on the covered hoppers proved challenging, but with patience, I managed to get the job done.
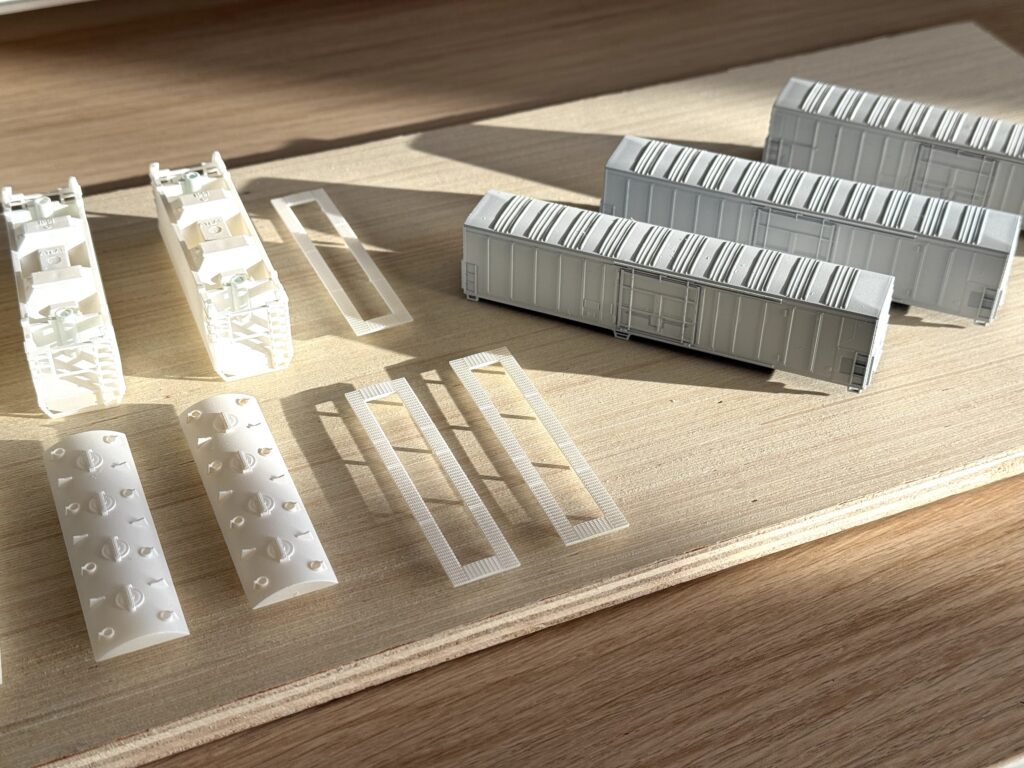
Once completely dry, I sprayed a coat of Vallejo acrylic White Primer using an airbrush. From my experience, Vallejo primers clog the airbrush, even with added thinner. However, adding too much thinner compromises the primer’s coverage on the plastic.
I had to clean the airbrush a couple of times while painting the six cars’ shells to get a smooth result. Next time I’ll try with a few drops of the Vallejo Flow Improver.
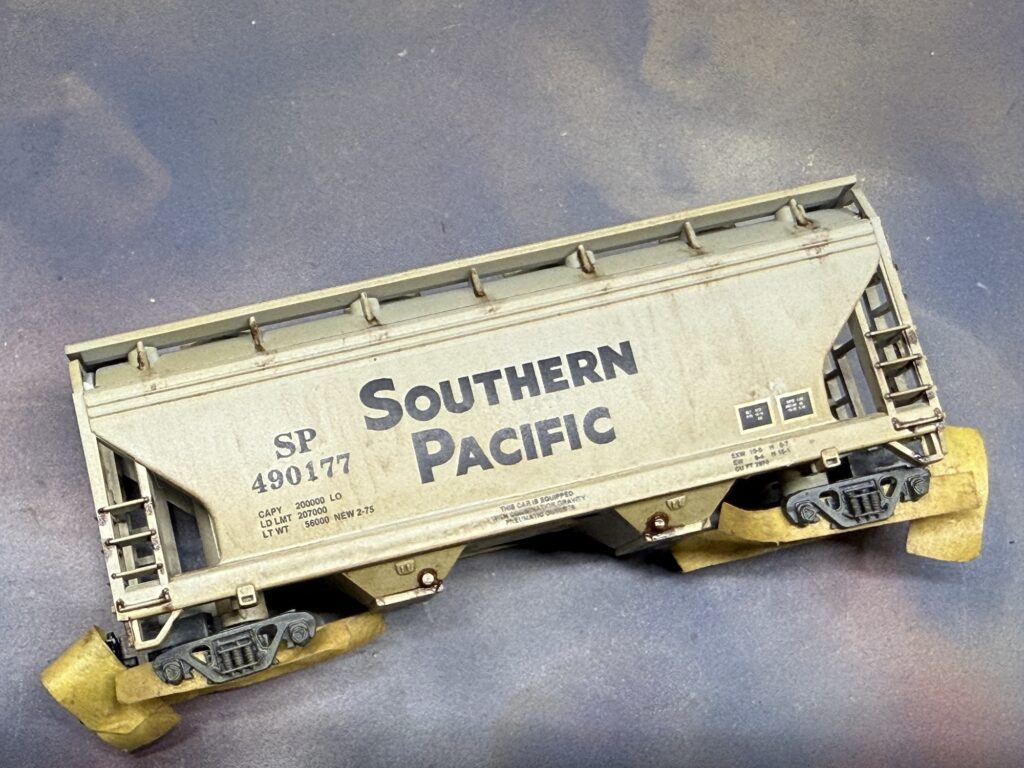
Repainting and weathering a covered hopper with the proper color
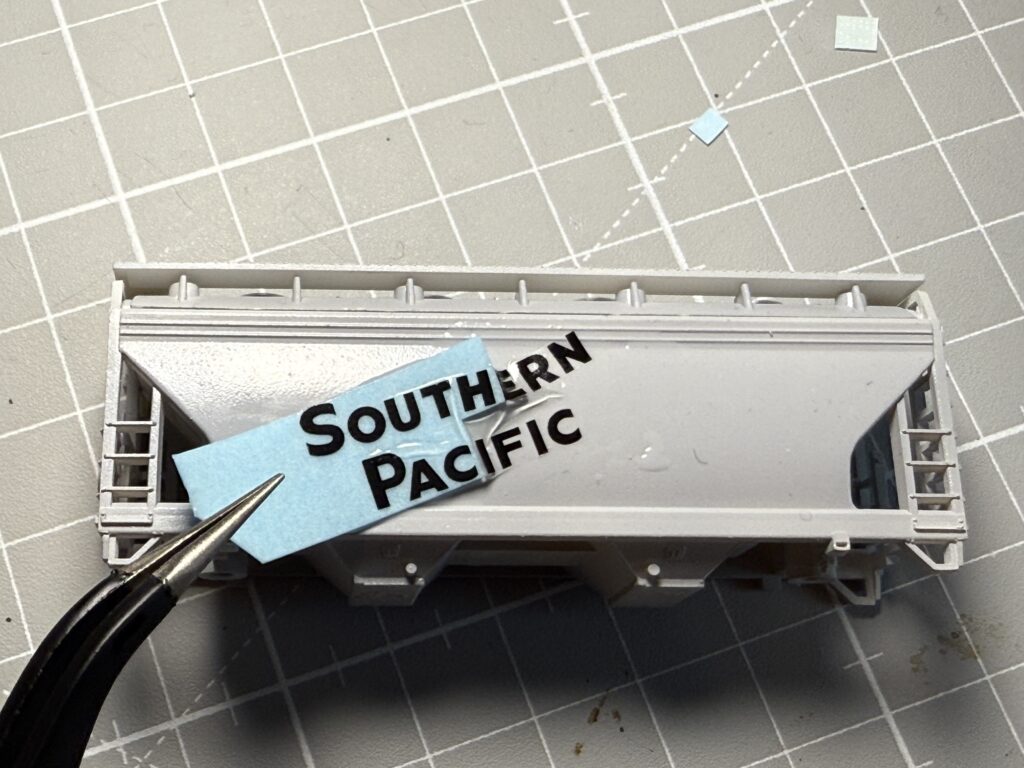
Applying waterslide decals starts with a coat of gloss clear paint.
This ensures the decals adhere smoothly to the surface, reducing the risk of air bubbles or silvering. To apply the decals, first cut them out carefully, staying close to the printed edges for a clean finish.
Soak the decals in warm water for 10–15 seconds, just enough to loosen them from the backing paper without over-soaking. Gently slide the decal onto the car, positioning it with a soft brush or tweezers. For tricky areas, use a decal-setting solution to help the decal conform to surface details like rivets or panel lines. I typically use Microscale Micro Set, while Microscale Micro Sol is invaluable for applying decals to irregular surfaces, creating a seamless painted-on appearance.
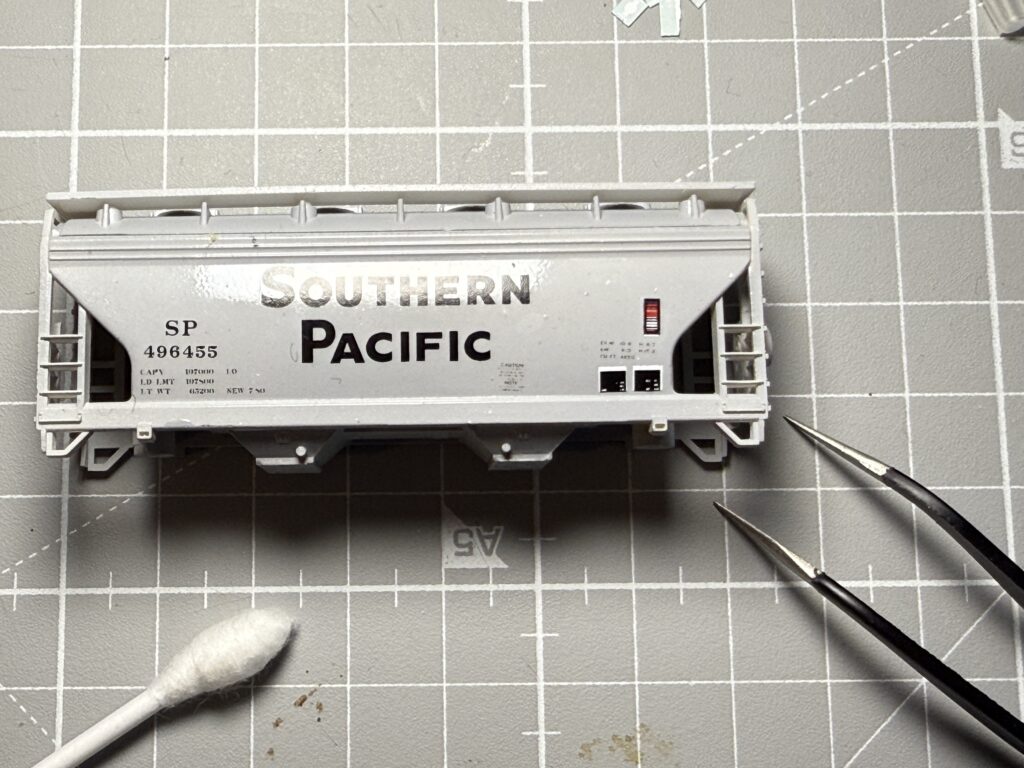
Once positioned, lightly dab with a cotton swab to remove excess water and make sure the decal sits flush. Allow the decals to dry completely before applying a final coat of clear matte to seal and protect them.
Once the decals dried, I sealed them with Tamiya XF-86 Flat Clear.
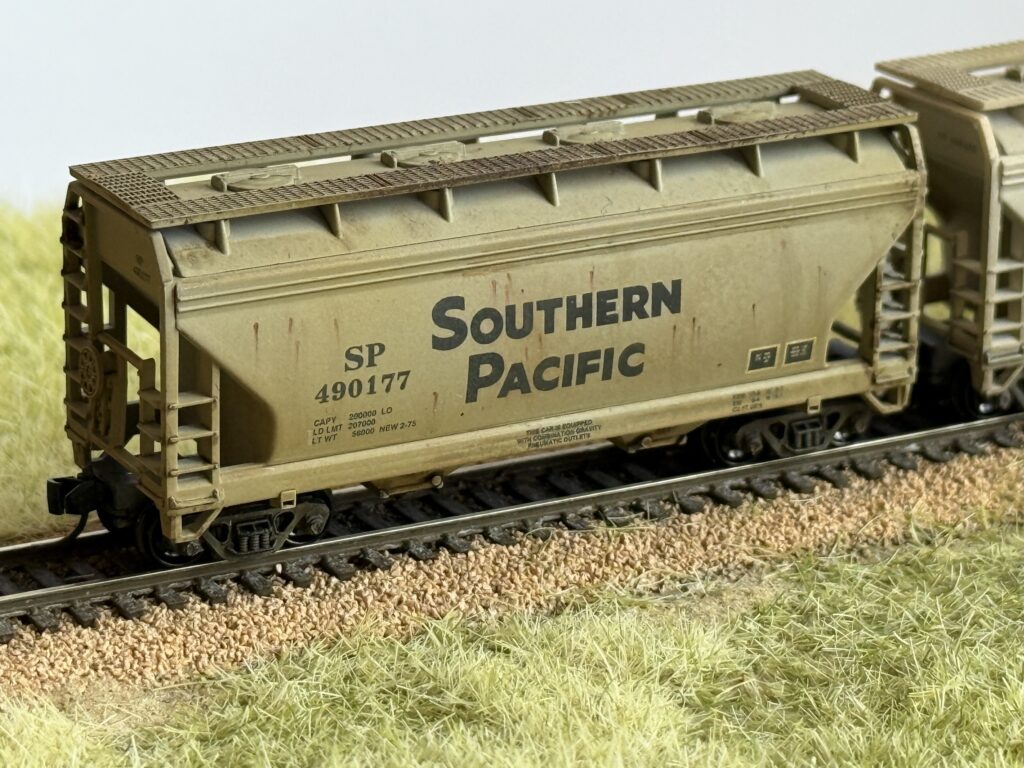
Weathering
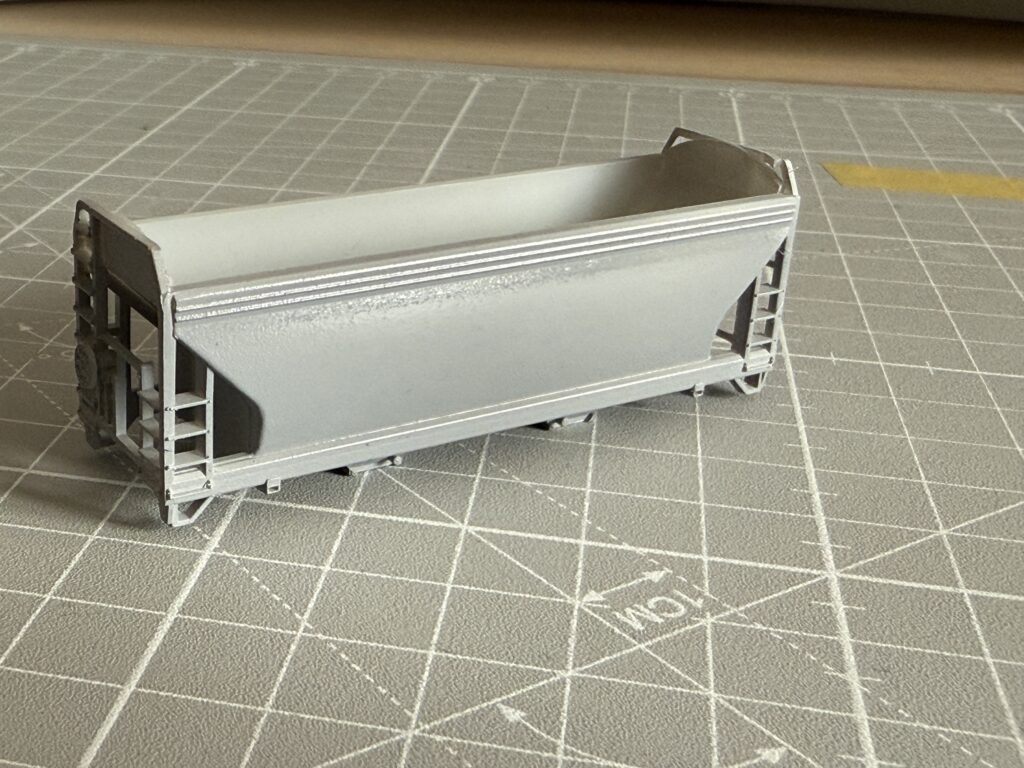
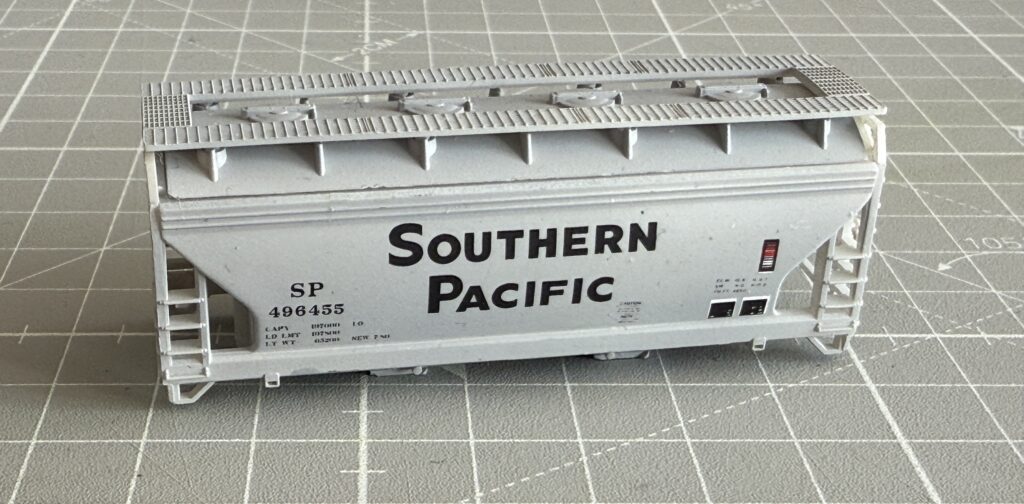
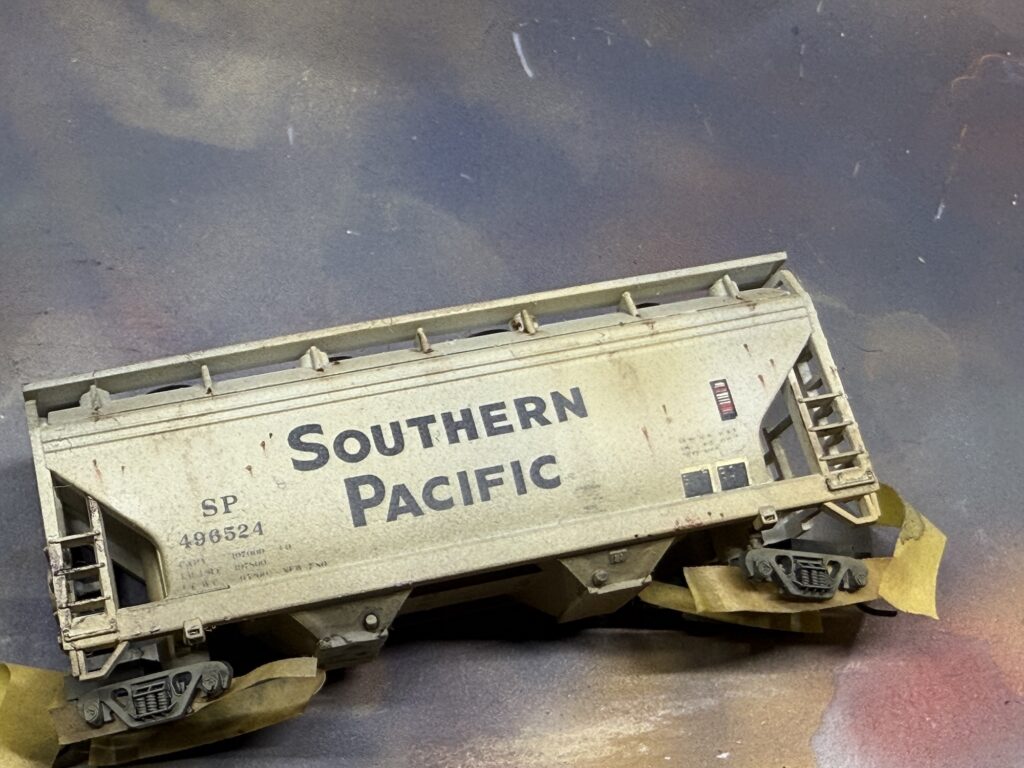
I used a combination of techniques to weather the covered hoppers. The first light layer of grey / tan has been applied with an airbrush.
I removed the wheels and masked the Micro-Trains couplers and the inner panels of the trucks to protect the wheel pin areas.
I used a fine brush and oil paints to add rust dots and streaks. Then I sealed the weathering with Tamiya XF-86 Flat Clear paint.
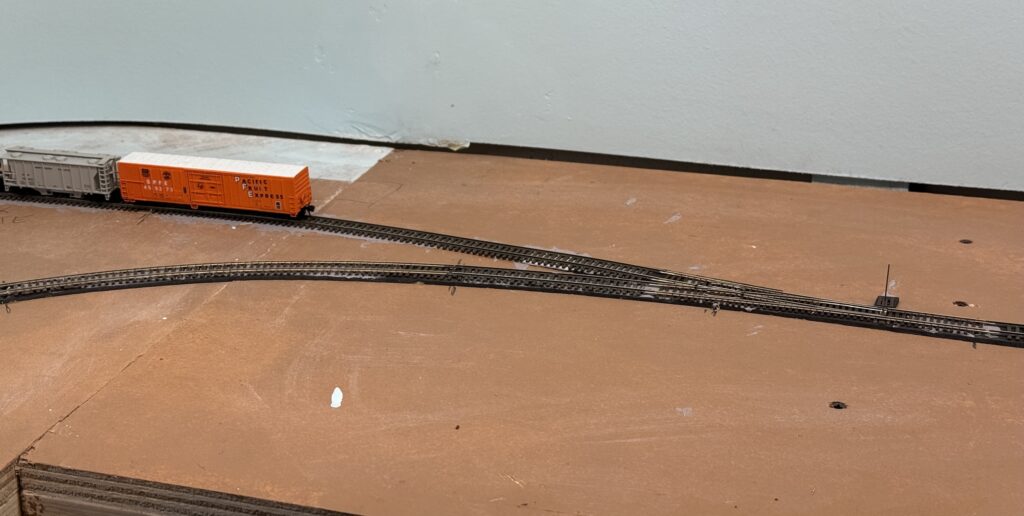
I started test-fitting Atlas Code 55 turnouts and Micro Engineering Code 55 flextrack. I had used this combination on a larger N scale SP layout, and it worked well.
Unlike previous projects, I bought a Xuron cutter this time – specifically the 2175B model, which also suits N scale track.
I used to cut rail with a Dremel and cutting disk, but the Xuron cutter feels much more comfortable.
While waiting for the EVA foam roadbed glue to cure, I soldered feeders to the rails using a 15W soldering iron and rosin core flux.
To make wiring easier, I flipped the base upside down. It isn’t screwed to the benchwork yet, so this was simple.
Next, I glued the track to the roadbed using a thin layer of acrylic caulk.
The main line and sidings are now in place. I’ll lay the spurs for Hendrick’s Supply Builders, Oroweat Bakery, and the Team Track next.
The team track will be wired through a DPDT switch, so it can also serve as a DCC programming track.
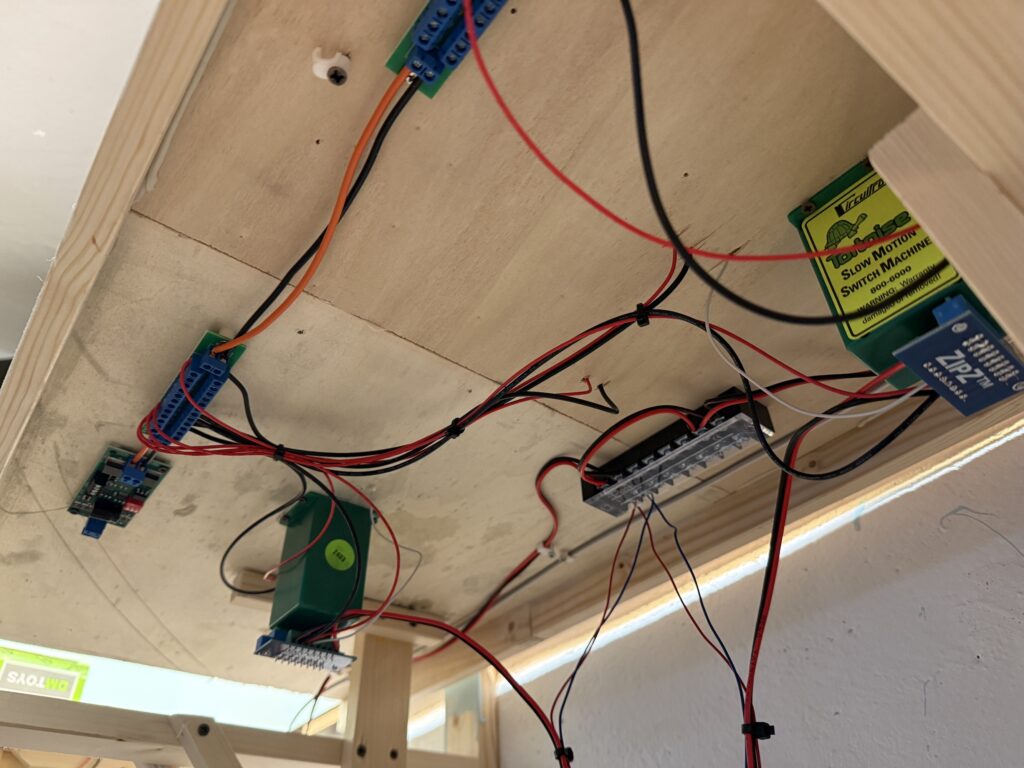
I used terminal strips and cable ties to organize the wiring. The wires hanging under the layout connect to the DPDT switches that control the Tortoise switch machines.
Then, these switches will be mounted on the fascia.
Wiring and laying tracks on a small switching layout requires planning, patience, and flexibility. Each step builds the foundation for smooth operations later on.
Using the right tools and techniques helps avoid frustration and saves time. As the layout grows, keeping things neat and modular makes future changes much easier.
With the basics in place, I’m excited to shift focus to detailing and fine-tuning operations.
I started laying tracks across most of my N scale layout. When needed, I flipped the plywood base upside down to handle wiring and install the Tortoise switch machines more comfortably.
Roadbed
To start, I used 2mm EVA foam strips for the roadbed. I glued them down with Titebond Original Wood Glue. For simplicity and a prototypical look, I laid the roadbed only under the mainline. Sidings and spurs will go directly onto the plywood.
Laying Tracks and Wiring
Next, I soldered 24AWG feeders to the underside of the rails. I drilled holes through the roadbed to connect the feeders to the DCC bus.
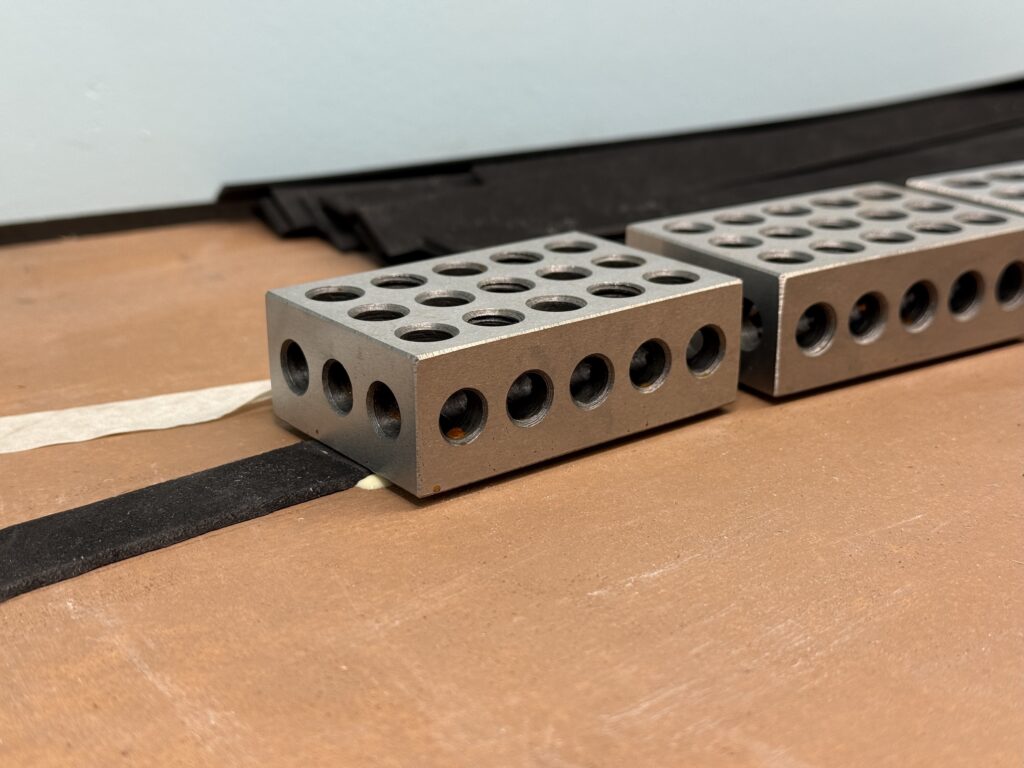
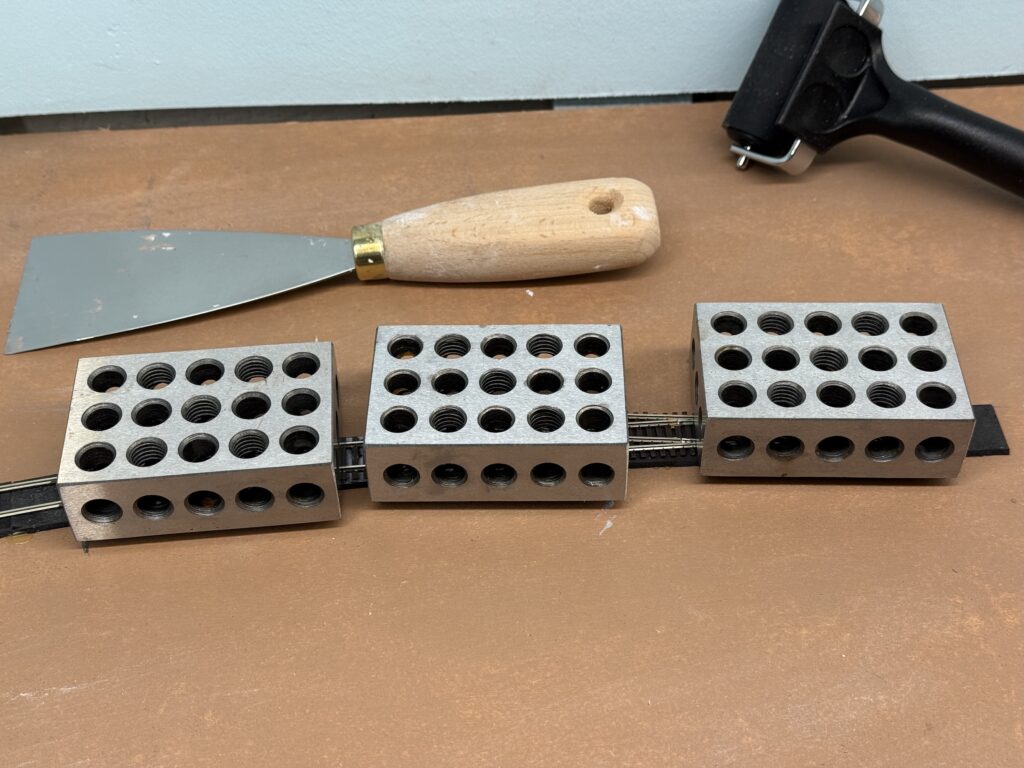
To secure the track, I applied a thin layer of acrylic caulk using a putty knife. I then placed metal blocks on top to hold the rails in position as the caulk dried.
Switch Machines
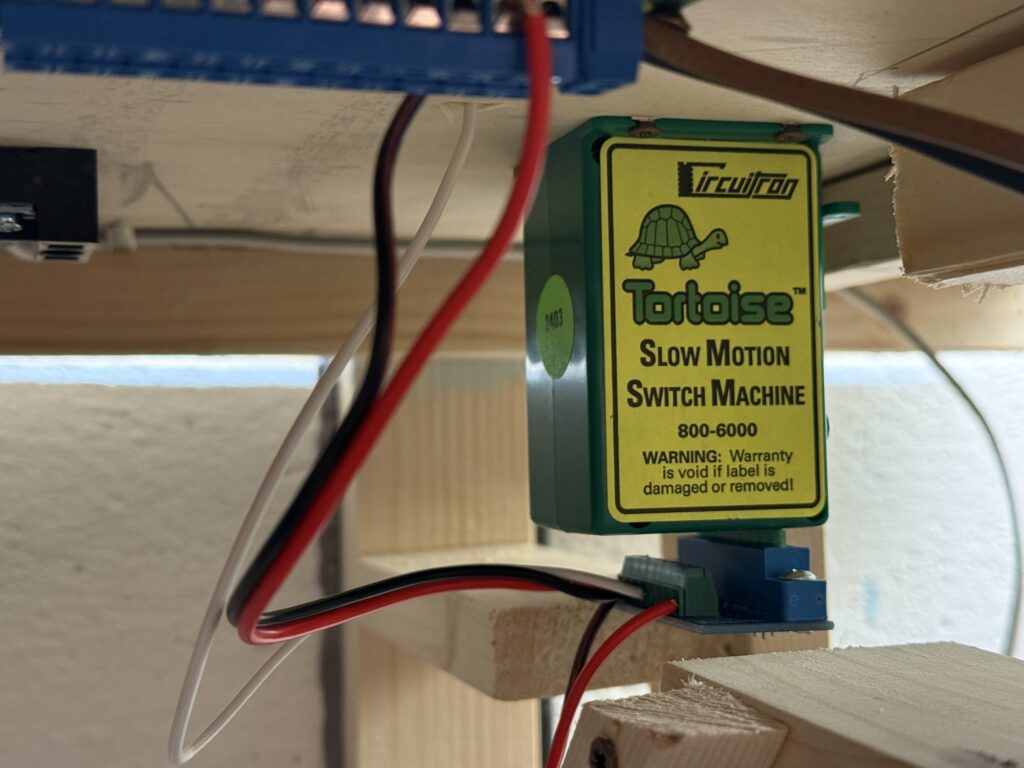
Once the track was down, I flipped the base again to install the Tortoise switch machines. I also connected the feeders and ran the DCC bus wires.
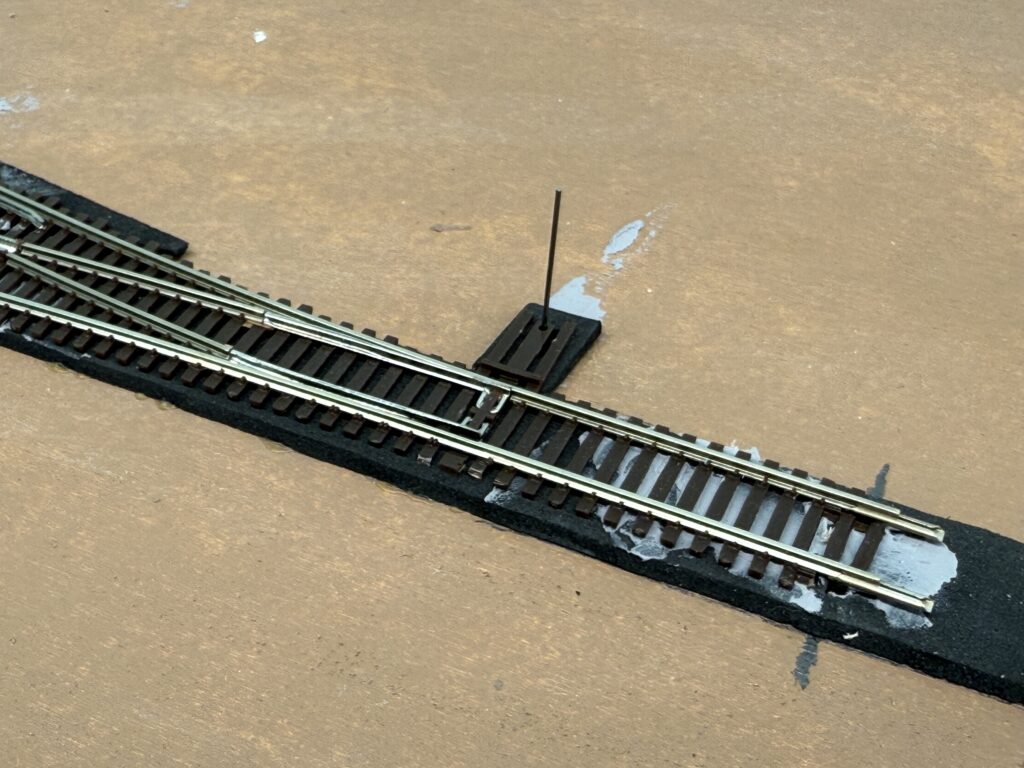
Afterward, I inserted the piano wire into the hole in the turnout’s throwbar.
I then screwed the switch machine to the plywood base and connected it using ZipZ solderless connectors.
Each Tortoise is controlled by a DPDT toggle switch and powered by a 12V DC supply
Power Supply
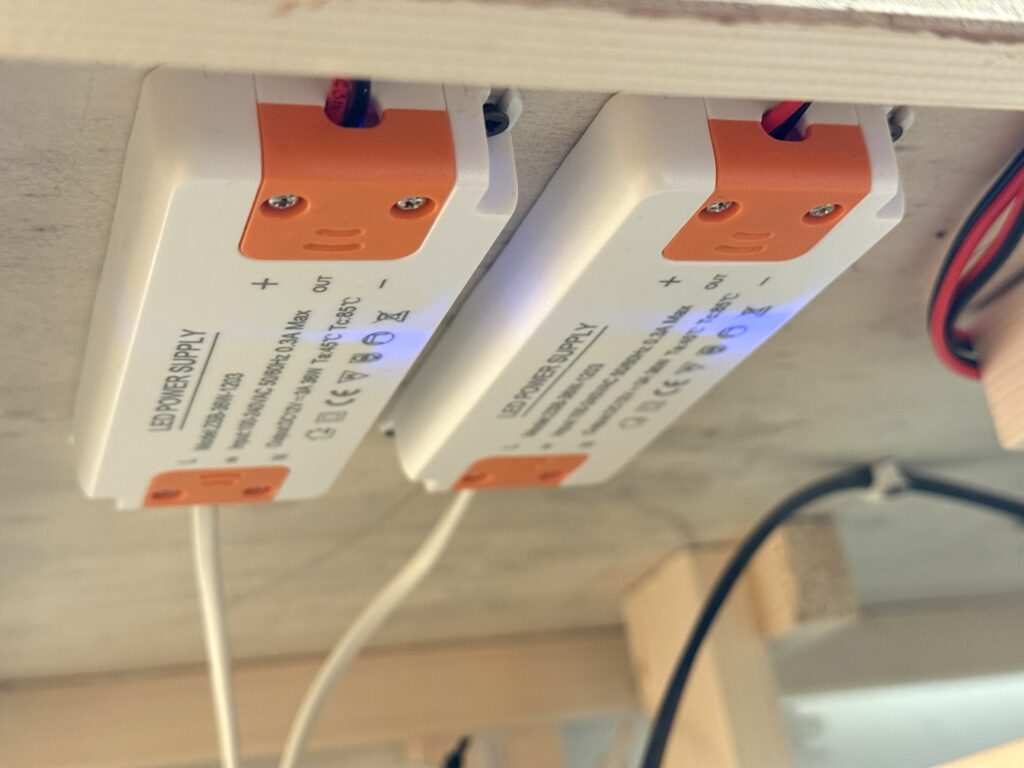
I installed two 3A 12V DC power supplies under the layout – one for the switch machines, and the other for layout lighting. This includes LEDs in buildings, vehicles, and streetlights.
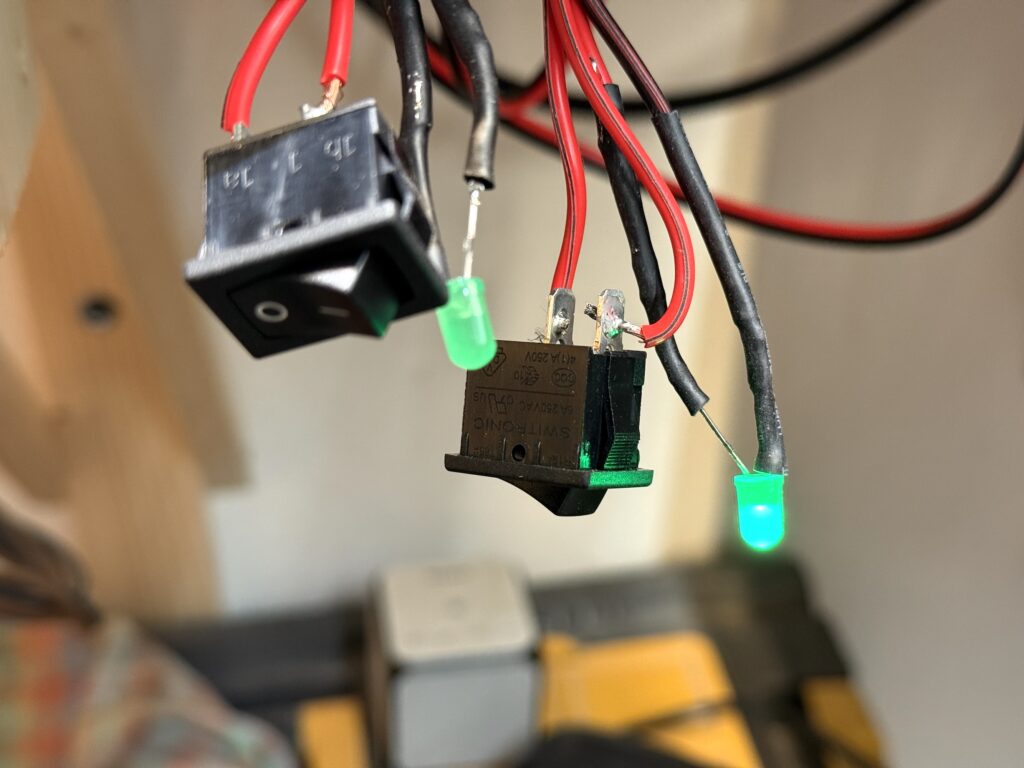
To monitor power delivery, I added a main switch to each 12V output. These switches illuminate an LED when active. I’ll mount both switches and LEDs on the fascia for easy access.
Trackwork Fine Tuning
The first section of tracks on my N scale layout is complete. Track has been laid, wiring is done and the first turnout is controlled by a properly installed Tortoise switch machine.
Here is the Conrock and Skyline ready-mix concrete spur.
I used thin pieces of styrene to shim tracks. One for the transition in track height from mainline (photo below, bottom) to the Conrock spur (photo below, top), and another one at the end of the same spur to keep the track level.
Wiring should be neat and well-organized to make troubleshooting easier if problems occur. Here is how I managed wiring on the Burbank Branch in N scale.
The trackwork phase marks a major milestone in building the layout, which is now coming together with solid progress.
Careful planning now will ensure smoother operations and fewer issues later and sets the foundation for future scenery and detailing.
Backdrop reboot. Long story short: don’t be afraid of starting over.
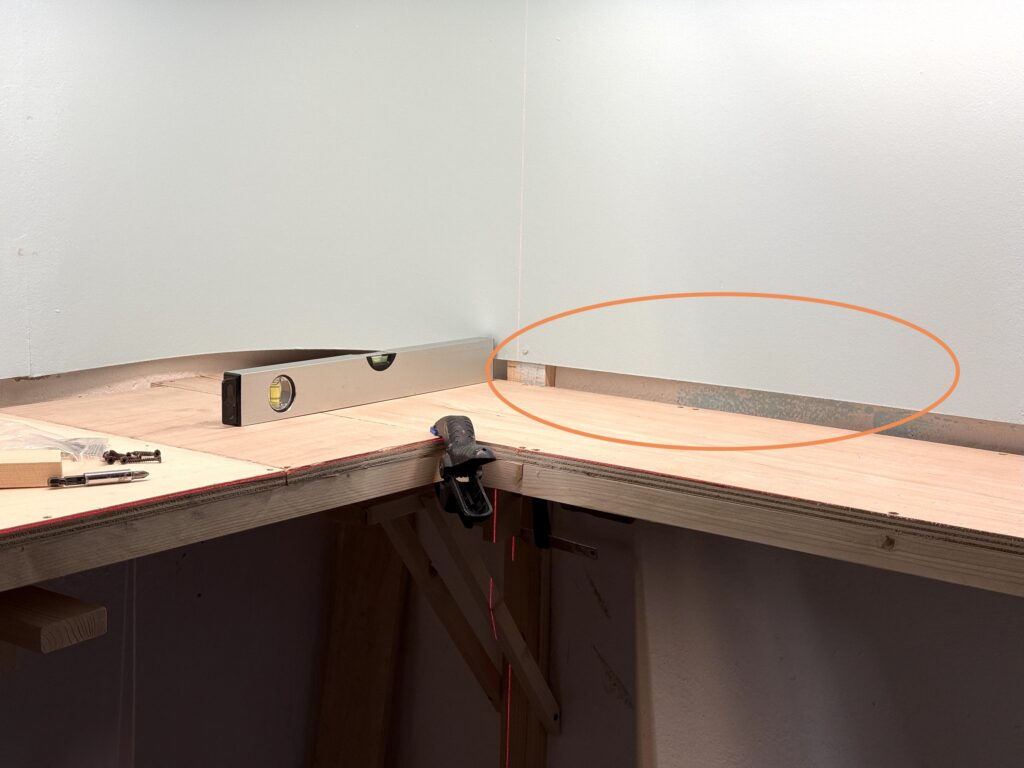
It’s time for a backdrop reboot! I installed the valance and backdrop based on wall measurements, then installed the plywood subroadbed using a laser level. That’s when I realized the valance wasn’t level – and the culprit was the walls, not being square.
Free tip: Always use a laser level. They’re inexpensive and extremely useful – I wish I had bought one before installing the benchwork supports.
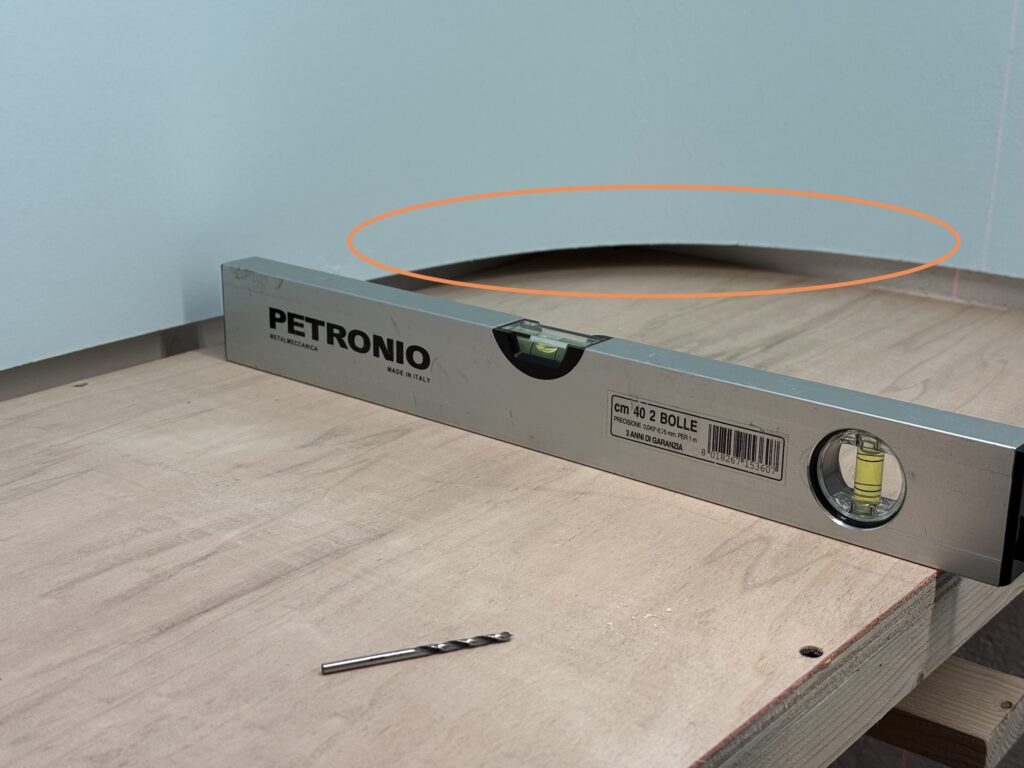
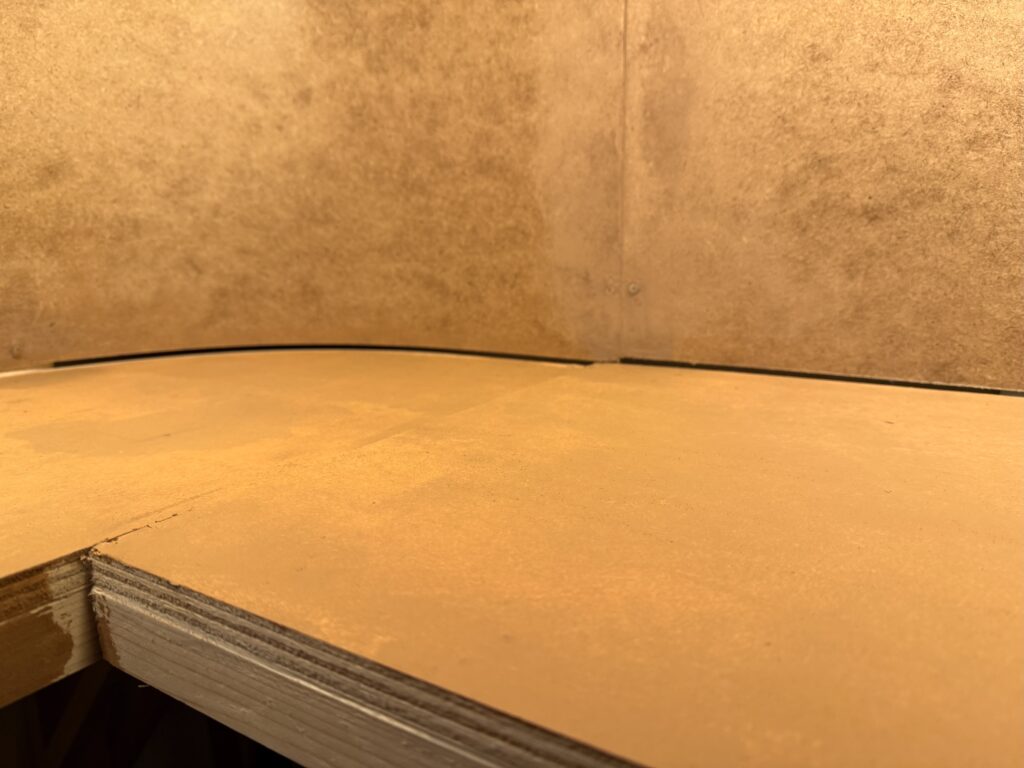
The backdrop is mostly fine, with only a small gap on the west end of the layout. However, the gap increases toward the east, as shown in the photo above. While the plywood base is level, the backdrop has a slight but steady incline.
At first, I thought I could fix it since the scenery isn’t done yet. But I quickly realized that the area I’m modeling is flat, with little vegetation – no hills or dense forests to hide the gap.
I tried thinking of a solution, but the more I considered it, the more I realized the backdrop needs to be scrapped and redone from scratch. So I did.
Starting over
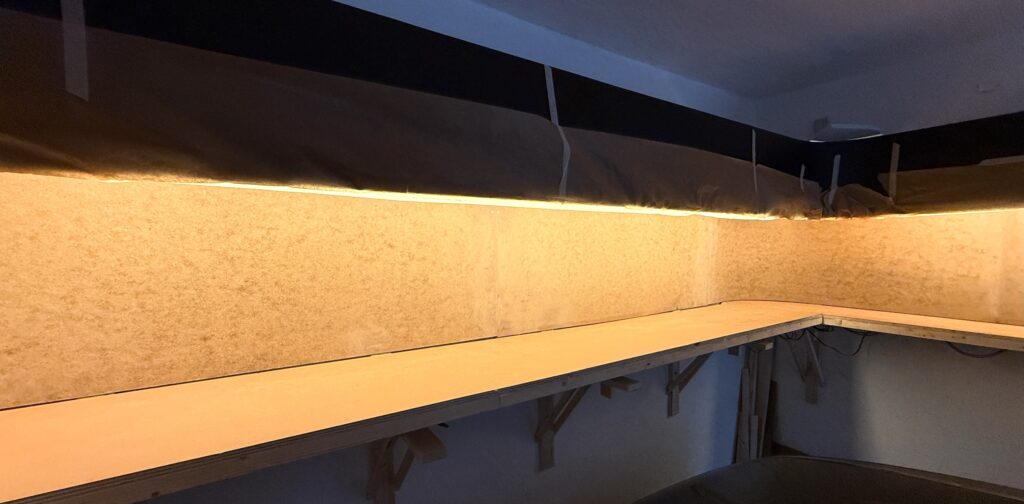
Backdrop reboot! I carefully unscrewed and removed the old backdrop, taking care not to damage the LED strip lights or valance. Then, I installed new Faesite (Masonite) panels, aligning the backdrop with the subroadbed plywood base.
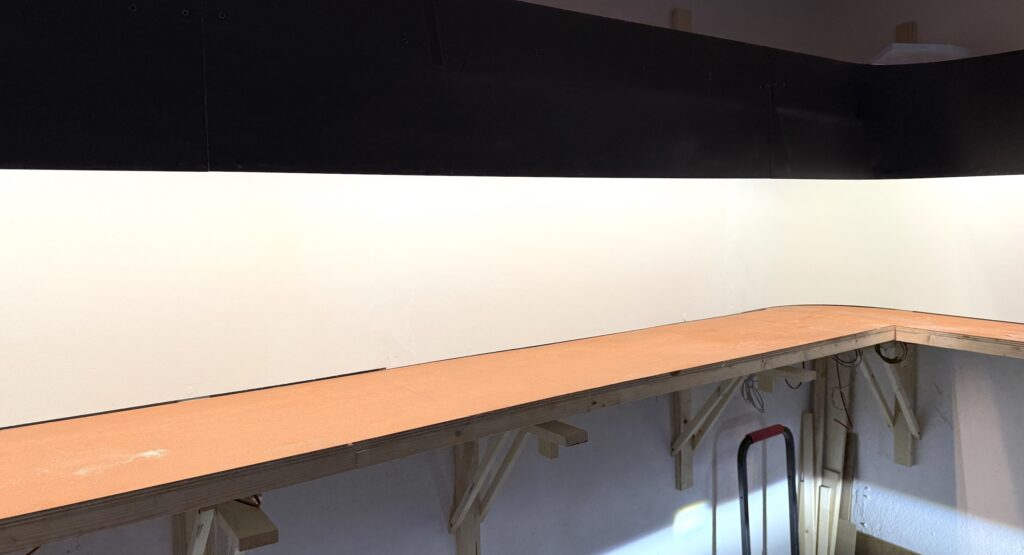
After installing the backdrop, I filled the gap with putty and smoothed it out. Now it’s ready for a coat of blue paint.
Using acrylic colors, I painted the plywood base tan. That serves as a basic color for the scenery.
Starting over can be frustrating, but fixing mistakes early prevents bigger issues later.
Fixing backdrop issues early builds confidence and prevents bigger layout problems down the line. A properly aligned backdrop sets the stage for convincing scenery.
We use cookies to ensure that we give you the best experience on our website. If you continue to use this site we will assume that you are happy with it.
You can revoke your consent any time using the Revoke consent button.